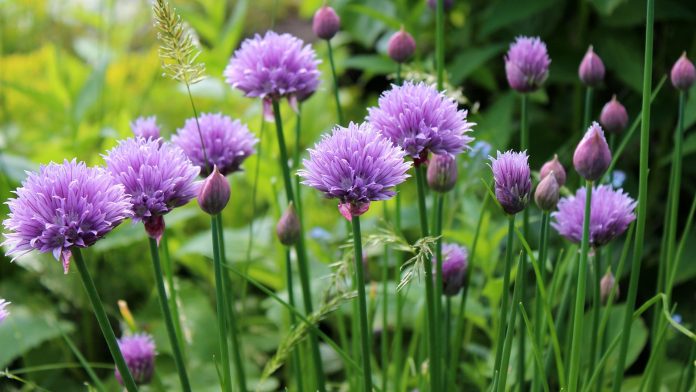
You don’t need a green thumb to grow chives (allium schoenoprasum), it’s almost a foolproof crop and will give you confidence to grow a variety of herbs. Chives, a relative of the onion, are a drought-tolerant perennial. They reach 8-20 inches tall in mounds via underground bulbs.
Not only is the chive pretty with its delicate purple flowers and thin green hollow stems, it is also incredibly delicious. In addition, the entire plant, including the leaves, flowers and even bulbs, is edible.
Chives have a delicate, not overwhelming onion flavor, and hollow green leaves so versatile in cooking that they go well with soups, salads, omelettes, or anything that requires just a touch of garlic flavor and a nice accent.
Where to plant:
I have always planted chives in my gardens, with my wild flowers, as bed borders, in my vegetable garden and also in my terraces and patios and even inside by a sunny window. They are so flexible and so joyful that you place them as long as there is at least half a day of sun.
From chives from seeds inside:
Chives are super easy from the seed. Start them indoors 10 to 12 weeks before the last suspected frost. Indeed, although they germinate quickly, the chives develop slowly, so you have to give them time to start before you can put them outside.
Fill the dishes with an earthless peat mixture. Sow 10-15 organic seeds per cell ½ inch deep and keep the dish constantly moist and at around 60-70 degrees F. The chives will germinate in about seven days.
Outdoor chive transplant:
In the early spring, harden your chives and plant them outside in a sunny location. Chives prefer moist, organic, rich, well-drained soil. Before planting, work 6 inches of composted organic matter in the soil. Add 3 tablespoons of organic fertilizer per square foot of planting area. Space the plants 4 to 15 inches apart and do not allow the soil to dry out until the plants mature.
Chives from seeds outside:
You can also start chives directly from seeds outdoors. Make sure to prepare the bed area as shown above.
Use a pointed branch to make a ¼ inch hole. Space the holes 8 to 12 inches
Place a seed in each hole and press firmly with your fingers so that the soil is packed around the seed
Lightly water the planted area
Check the soil every day until the seedlings emerge to make sure it is moist
As soon as the dirt covering your seed dries up, water again to at least an inch
Water the seedlings every five to seven days and allow them to soak several inches to get the roots wet
Water regularly until chives are well developed – once installed, it will no longer need as frequent watering
When mature, add compost tea or other heavy organic nitrogen fertilizer
The mature chives benefit from this fertilization in the spring and at the end of the summer
Chive harvest
You can harvest chives for about three months, provided the plant is at least six inches tall. I just like to leave the chives in the ground and cut the tops if necessary. The chives are robust and vigorous and will come back even if you cut them to the ground.
Leaf harvest:
Use gardening shears or clean scissors to cut the leaves, about two inches above the ground. First make sure to cut the leaves from the outside of the plant and not to cut all the plants at the same time.
Flower harvest:
Use gardening shears or clean scissors to cut the flower at the base of the stem. The chives will bloom between May and June.
Benefits of growing chives
1. Chives are perennials
As mentioned, chives will appear from year to year. Perennials are a wonderful addition to any garden and require no work after the first year.
CLICK NEXT PAGE BELOW TO CONTINUE READING …


