Prep Time: 13 hours, 20 minutes (includes rises)
Cook Time: 55 minutes
Total Time: 14 hours, 30 minutes
Yield: 1 loaf
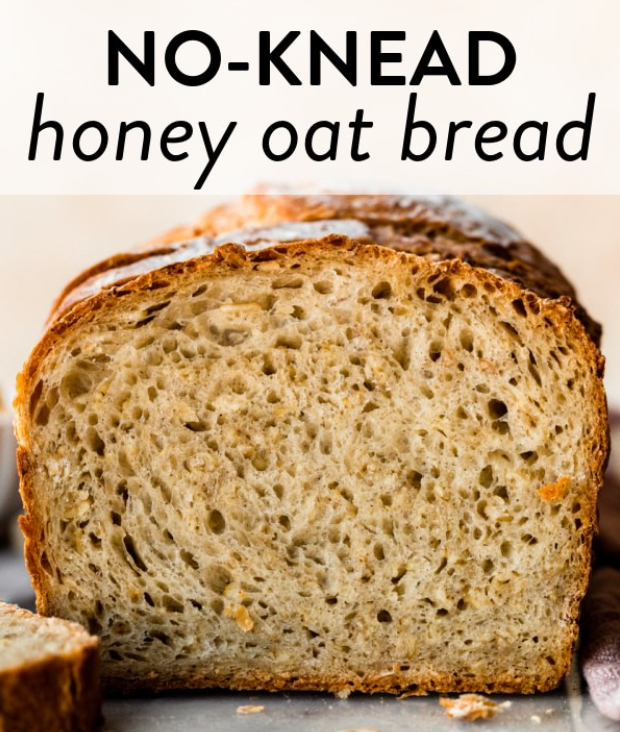
The process of making homemade yeast bread has a reputation for being difficult and complicated, but this honey oat bread recipe is simple and straightforward AND yields delicious, flavorful results. Most of the “work” is done hands-off while the dough is fermenting. If you’re not used to working with yeast, check out my Guide to Yeast Baking for answers to common yeast questions.
Ingredients
- 3 cups + 2 Tablespoons (410g) bread flour (spoon & leveled), divided
- 1 cup (85g) old-fashioned whole oats or quick oats (not instant)
- 1 and 1/2 teaspoons (4g) Platinum Yeast from Red Star or any instant or active dry yeast
- 1 and 1/2 teaspoons salt
- 1/2 teaspoon ground cinnamon
- 1 and 1/2 cups (360ml) water, close to room temperature at about 70°F (21°C)
- 6 Tablespoons (128g) honey
- 2 Tablespoons (30ml) vegetable oil (or other neutral tasting oil)
Cook Mode Prevent your screen from going dark
Instructions
- In a large ungreased bowl, whisk 3 cups (390g) bread flour, the oats, yeast, salt, and cinnamon together. Set aside. In a medium bowl or large liquid measuring cup, whisk the water, honey, and oil together. Pour water mixture into flour mixture and gently stir together with a rubber spatula or wooden spoon to combine. Dough will be heavy and very wet/sticky. Do not overwork dough. (Tip: Stir dough by hand. Dough is too sticky for a mixer.)
- 1st rise: Cover the dough tightly with plastic wrap or aluminum foil and set on the counter at room temperature– honestly any normal room temperature is fine. Allow to rise for 12-18 hours. (See note if you need to extend this time.) Depending on the size of your mixing bowl, the dough will mostly rise out to the sides of the bowl instead of rising up. Some upward rise is normal if your bowl is on the smaller side. The dough will stick to the sides of the bowl and have a lot of air bubbles. You want it to almost double in size during this time.
- Grease a 9×5 inch loaf pan.
- Gently shape: After rising, uncover dough and gently fold in remaining 2 Tablespoons (about 20g) of bread flour. Dough is very sticky, but the extra flour makes it more manageable. Pour dough (and any excess flour that is not mixing in) onto work surface. Using lightly floured hands, gently form into a loaf shape, about 8×4 inches. Does not have to be perfect, so don’t over-think the shape or overwork the dough. Place in greased pan and using a very sharp knife or bread lame (some even use kitchen shears), score the bread loaf with 1 slash down the center or off-center, about 1/2 inch deep. (“Score” = shallow cut.)
- 2nd rise: Loosely cover loaf with plastic wrap or aluminum foil and set on the counter at room temperature for 1 hour or until dough rises slightly above the rim of the pan.
- Meanwhile, towards the end of the 2nd rise, preheat oven to 375°F (191°C).
- After rising, remove plastic wrap/covering from bread and bake for 50-60 minutes. The loaf will begin to heavily brown on top, so tent it with aluminum foil after 30 minutes. How to test for doneness– give the loaf a light tap. If it sounds hollow, it’s done. For a more accurate test, the bread is done when an instant read thermometer reads the center of the loaf as 195°F (90°C). (Tip: Keep in mind that the bread will continue to cook for a few minutes as it cools.)
- Remove from the oven and allow bread to cool for at least 15 minutes in the pan set on a wire rack before slicing and serving. Feel free to let it cool completely before slicing, too.
- Cover leftover bread and store at room temperature for up to 3 days or in the refrigerator for up to 10 days.


