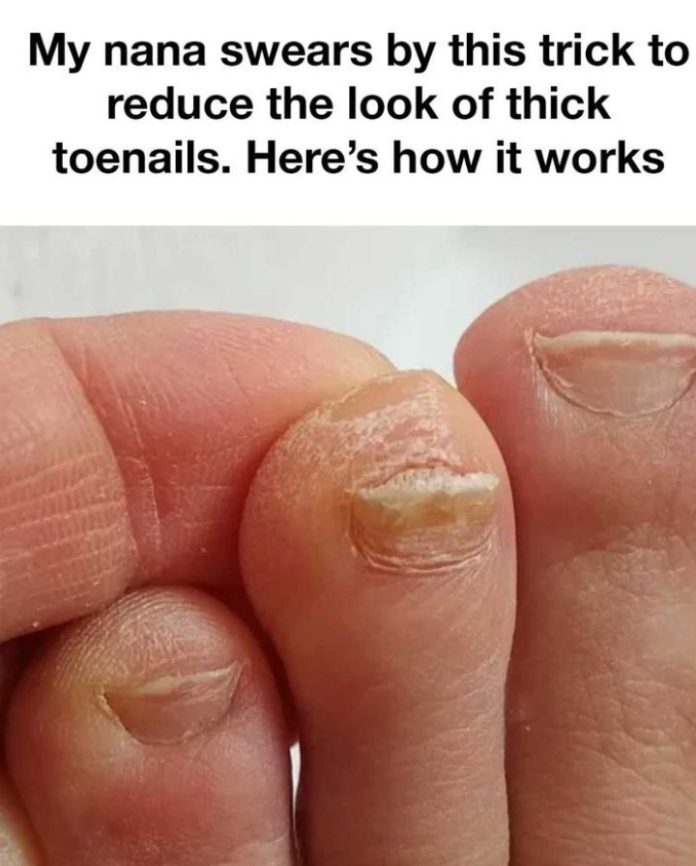
Toenail problems like thickening and discoloration are issues many people face, often due to aging, infections, injuries, or circulation problems. While medical treatments are available, they can sometimes be costly or invasive. Instead, this tried-and-true family remedy, passed down by my grandmother, uses natural ingredients found in most households to treat toenails effectively and gently.
Easy to follow, Nana’s remedy will help keep your nails looking and feeling healthy while reducing thickness naturally.
Why Do Toenails Become Thick?
Toenail thickness can result from several factors. Common culprits include fungal infections, aging, and trauma to the nail bed, but psoriasis and circulation issues also play a role. Thickened nails can be difficult to trim, prone to discomfort, and even lead to further infections if left untreated. Nana’s simple remedy addresses these issues with safe, natural ingredients and practices, helping thin out the nails gradually while maintaining their health.
What You’ll Need
This remedy requires basic items you likely already have at home:
- Warm water
- White vinegar – naturally antibacterial
- Baking soda – a mild exfoliant and softener
- A large bowl or basin for a foot soak
- A soft-bristled nail brush
- A pumice stone or nail file
- Moisturizing lotion or natural oil – such as coconut or olive oil
Step-by-Step Guide: Nana’s Toenail Remedy
Step 1: Prepare the Foot Soak
Start with a warm water soak. Fill a large bowl or basin with enough warm water to cover your feet comfortably. Add half a cup of white vinegar to the water. This vinegar has natural antifungal properties, making it helpful for cases where a mild fungal infection may be causing the nail thickness. Soak your feet for 15-20 minutes to soften the nails and surrounding skin.
Step 2: Gentle Cleaning
After the soak, use a soft-bristled nail brush to gently clean your toenails and the area around them. This will help remove any debris, soften the nails further, and improve the effectiveness of the next step.
Step 3: Baking Soda Paste
Create a paste by mixing two tablespoons of baking soda with a small amount of water until you achieve a thick consistency. Baking soda’s mild alkaline properties can soften the toenails while also acting as a gentle exfoliator. Apply the paste to your toenails, covering each nail thoroughly, and let it sit for 10 minutes. This step enhances the softening process, making it easier to thin the nails without harsh tools.
Step 4: Rinse Off
Once the baking soda paste has been allowed to sit, rinse your feet with warm water to wash off the paste. Make sure your toenails and skin are free from any residue. Gently pat your feet dry with a clean towel, ensuring no moisture remains, as dampness can contribute to fungal growth.
Step 5: File Down the Nails
Use a pumice stone or a nail file specifically designed for thick nails. Be gentle and avoid filing too much at once, as over-filing can weaken the nails and lead to more issues. Smooth out the surface to make the nail less thickened and more manageable, repeating this step weekly for continued thinning over time.
Step 6: Moisturize
Finish by applying a moisturizer or natural oil to seal in the hydration. Oils like coconut or olive oil contain natural antioxidants and moisturizing properties that can improve the appearance of the nails and surrounding skin, keeping them soft and reducing the likelihood of nail splitting.
How This Remedy Works: The Science Behind It
This remedy works because each ingredient offers specific benefits that target thick nails. White vinegar’s acetic acid helps to soften the nail’s keratin, making it less prone to thickness buildup. Its natural antibacterial and antifungal qualities help prevent minor infections. Baking soda’s alkalinity softens the nail and gently exfoliates, making it easier to thin the nails without causing damage. When combined with regular use of a nail file or pumice stone, these ingredients help thin down the nail while keeping it healthy and resilient.
Extra Tips for Healthy Toenails
Healthy toenails require more than just occasional treatment. For long-lasting results, here are additional daily practices:
- Keep Feet Dry and Clean: Bacteria and fungi thrive in damp environments, so keep your feet dry.
- Trim Nails Properly: Avoid cutting nails too short or at an angle to prevent ingrown nails.
- Wear Breathable Shoes: Choose footwear that allows air circulation to prevent moisture buildup.
- Promote Blood Circulation: Simple activities like walking can improve blood flow to your feet, aiding nail health.
When to Seek Professional Help
While this remedy works well for many, some cases may require medical attention. If your thickened toenails are accompanied by severe discoloration, persistent discomfort, or have worsened over time, it may be time to see a podiatrist. Conditions like severe fungal infections or psoriasis might need specialized treatment.
Success Stories: Real-Life Testimonials
Over the years, Nana’s toenail remedy has been a game-changer for many family members and friends. For instance, our neighbor Sarah struggled with toenail thickness as she got older. After following this regimen for a month, she noticed softer, healthier nails that were easier to trim and less prone to breaking. Similarly, my cousin John, who dealt with moderate toenail fungus, found that combining this remedy with regular foot care kept his nails looking and feeling better.
Conclusion :
Nana’s home remedy for thick toenails provides a safe, natural approach to nail care using ingredients you likely have at home. With regular use, this remedy can help keep your toenails thinner, healthier, and less prone to discomfort or infection. It’s not only a practical solution but also a way to honor the timeless wisdom of home remedies passed down through generations.
If you’re ready for softer, healthier nails, give Nana’s remedy a try and enjoy the benefits of natural nail care.


