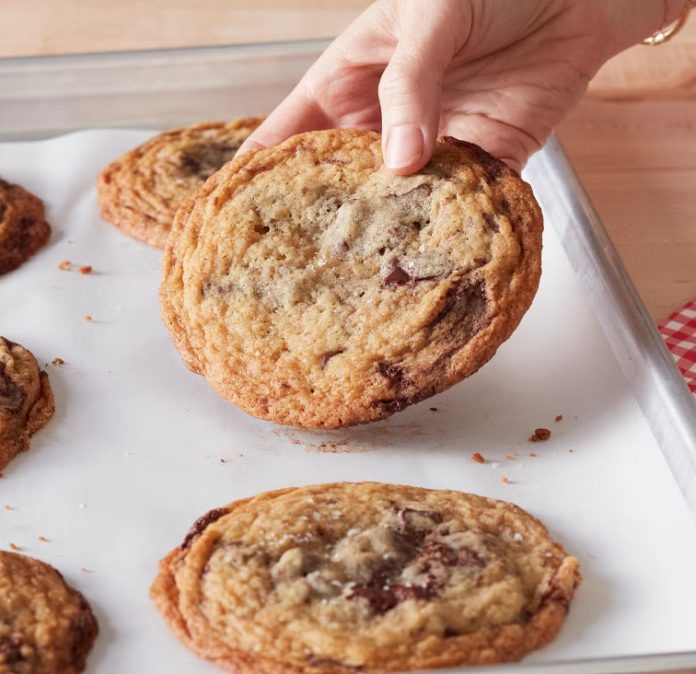
There’s something undeniably magical about the smell of freshly baked chocolate chip cookies wafting through the house. They evoke warm memories of family gatherings, cozy afternoons, and the simple joy of indulging in a sweet treat. These Ultimate Chocolate Chunk Cookies take that nostalgia to a whole new level.
With their rich flavors and perfect textures, they’re not just ordinary cookies; they’re a delightful experience. Made with two types of high-quality chocolate and a few special techniques, these cookies promise a cookie-eating adventure that will make every bite count. Get ready to impress your friends and family with a cookie recipe that might just become your new favorite.
The Key to the Perfect Cookie
Every cookie lover has their own idea of what makes the ideal chocolate chip cookie. Some prefer a chewy center, while others are fans of a crunchy edge. My version strikes the perfect balance between the two. These cookies feature crispy golden edges and a soft, gooey center that melts in your mouth. The secret lies in the combination of semisweet and dark chocolate, providing a luxurious depth of flavor that chocolate chips simply can’t match.
Why Use Chopped Chocolate?
Instead of relying on standard chocolate chips, this recipe calls for chopping up high-quality chocolate bars. This small change transforms the cookie experience. The varied sizes of the chocolate chunks create pockets of melted chocolate throughout the cookie, offering an indulgent chocolate experience in every bite. The best part? You can choose your favorite chocolates! Whether you prefer rich dark chocolate or creamy milk chocolate, the choice is yours.
The Importance of Chilling the Dough
One of the crucial steps in making these cookies is chilling the dough. While it may be tempting to bake them immediately, letting the dough rest in the refrigerator for at least 20 minutes makes a significant difference in the final product. Chilling the dough helps prevent the cookies from spreading too much in the oven, resulting in a thicker, more flavorful cookie with a chewy center. Plus, this step allows you to prepare the dough in advance. You can store it in the fridge for up to three days or freeze it for future cookie cravings.
Ingredients You’ll Need
- 2 sticks (1 cup) salted butter, softened to room temperature
- 2/3 cup granulated sugar
- 2/3 cup packed light brown sugar
- 1 tablespoon vanilla extract
- 2 large eggs
- 2 1/4 cups all-purpose flour
- 1 teaspoon baking soda
- 1/2 teaspoon kosher salt
- 8 oz. semisweet chocolate, chopped into chunks
- 4 oz. dark chocolate, chopped into chunks
- Sea salt, for sprinkling
Directions :
- Prepare the Baking Sheets
Begin by lining three baking sheets with parchment paper. This will prevent the cookies from sticking and ensure easy cleanup. - Cream the Butter and Sugars
In a stand mixer fitted with a paddle attachment, combine the softened butter, granulated sugar, and light brown sugar. Mix on medium-high speed for about 2 to 3 minutes, until the mixture is light and fluffy. Scrape down the sides of the bowl to ensure even mixing. - Incorporate Vanilla and Eggs
Add the vanilla extract and eggs to the butter mixture. Beat on medium speed until just combined. Avoid overmixing, as this can lead to a tougher cookie. - Add the Dry Ingredients
Gradually mix in the flour, baking soda, and kosher salt. Do this on low speed until just combined; you don’t want to overwork the dough at this stage. - Stir in the Chocolate
Remove the bowl from the mixer and use a wooden spoon or rubber spatula to fold in the chopped semisweet and dark chocolate. This ensures that the chocolate is evenly distributed throughout the dough. - Scoop the Dough
Using a 1/4-cup scoop, portion the dough onto the prepared baking sheets, spacing them about 2 inches apart to allow for spreading. Sprinkle a pinch of sea salt on top of each mound of dough for an added flavor kick. - Chill the Dough
Place the baking sheets with the dough in the refrigerator, uncovered, for at least 20 minutes. This step is crucial for achieving the perfect cookie texture. - Preheat the Oven
Preheat your oven to 350°F (175°C) while the dough chills. - Bake the Cookies
Once the oven is preheated, bake the cookies for 17 to 18 minutes, or until they are golden brown around the edges. The centers may appear slightly underbaked, but they will continue to firm up as they cool on the baking sheet. - Cool and Enjoy
Allow the cookies to cool on the baking sheets for a few minutes before transferring them to a wire rack to cool completely. This will help them maintain their shape and texture.
Storing Your Cookies
These cookies are best enjoyed fresh, but they can be stored in an airtight container at room temperature for up to three days. If you want to extend their life, you can freeze the baked cookies for up to three months. When you’re ready to indulge, simply let them thaw at room temperature for about an hour.
Conclusion :
These Ultimate Chocolate Chunk Cookies are not just a treat; they are a celebration of flavors and textures that everyone will adore. With each bite, you’re greeted by a delightful contrast between the crispy golden edges and the soft, gooey centers filled with luscious pools of chocolate. The use of high-quality ingredients elevates this cookie experience, making it perfect for both everyday enjoyment and special occasions.
Baking these cookies brings a sense of joy and nostalgia, reminding us of childhood afternoons spent in the kitchen, surrounded by family and laughter. Whether you’re indulging solo with a glass of milk or sharing them at gatherings with friends, these cookies are guaranteed to impress. Their irresistible aroma alone is enough to draw people in, creating a warm and inviting atmosphere.
So roll up your sleeves, gather your ingredients, and embark on this delicious baking adventure. As you measure, mix, and scoop, let the anticipation build. The reward is a batch of cookies that not only taste incredible but also create lasting memories. With every cookie you bake, you’ll find that this recipe is destined to become a cherished staple in your kitchen, one that you’ll return to time and time again, sharing the joy of homemade goodness with everyone you love.


