
Some of the most charming home decorations don’t come from an expensive craft store. Sometimes, a few ordinary items already sitting in your kitchen can be transformed into something that looks surprisingly polished.
That’s exactly what makes this unusual DIY project so much fun. With a handful of plastic drinking straws, a mini muffin tin, and two simple pantry ingredients—cinnamon and vanilla—you can create beautiful amber-toned ornaments with a warm, seasonal appearance.
The finished pieces have a smooth, slightly translucent look that catches the light beautifully. They can be hung in a window, displayed on decorative branches, added to a seasonal arrangement, or even attached to a homemade baked gift.
If you’re looking for an inexpensive fall craft that doesn’t require advanced skills, this project is definitely worth trying. The process is simple, but the finished result can look much more sophisticated than the inexpensive materials would suggest.
What You’ll Need
Gather the following supplies before getting started:
- 24 clear or lightly amber-colored plastic drinking straws
- 1 mini muffin tin with 24 cups
- 2 teaspoons ground cinnamon
- 1 teaspoon vanilla extract
- About 36 inches of jute twine
- 1 wooden skewer or toothpick
- 1 sheet of parchment paper
- Kitchen scissors
- A sturdy baking sheet, if desired
The cinnamon and vanilla are the two pantry ingredients that give this project its cozy seasonal character. The remaining materials are primarily used to create, shape, and display the ornaments.
Preparing the Straw Pieces
Begin by preheating your oven to 375°F.
While the oven heats, use kitchen scissors to cut the plastic straws into small, relatively even pieces. Pieces around 1/4 inch in length work well for this project.
Try to keep the pieces as uniform as possible. Evenly sized pieces are more likely to soften and fuse at approximately the same rate, which helps create a smoother finished ornament.
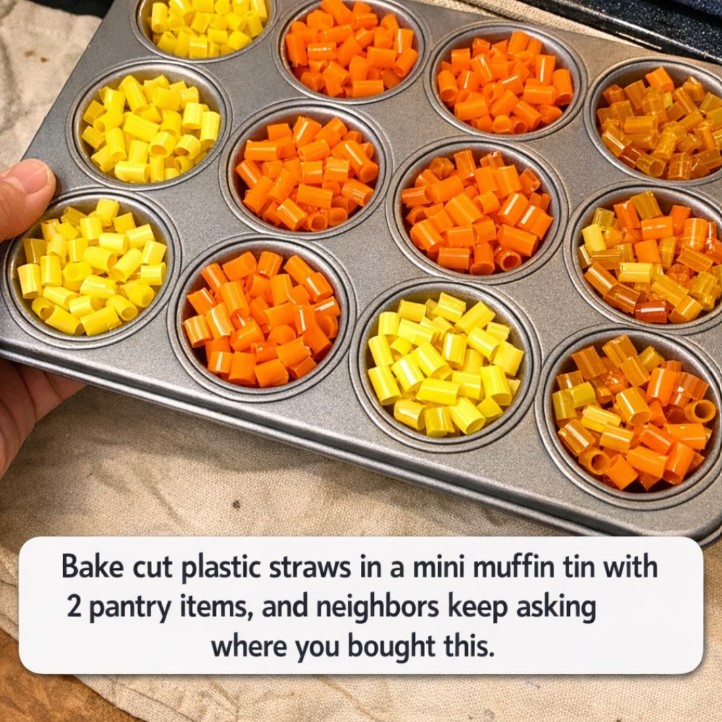
Fill the desired mini muffin cups loosely with the straw pieces. You don’t need to pack them tightly because the plastic will soften during baking and naturally settle together.
For a smaller project, you can start with around 12 filled cups rather than making the entire tray.
Adding the Cinnamon and Vanilla
Once the straw pieces are in place, add a very small pinch of ground cinnamon to each filled cup.
Next, add just a tiny amount of vanilla extract.
You don’t need much of either ingredient. The goal isn’t to soak the plastic but to add a subtle seasonal touch while the project is baking.
The combination of cinnamon and vanilla immediately gives this craft a cozy fall-inspired character, making the finished ornaments especially appropriate for autumn decorating.
Baking the Ornaments
Place the muffin tin into the preheated oven.
Bake the straw pieces for approximately 8 to 12 minutes, but don’t rely solely on the clock. Plastic materials can behave differently depending on their composition, thickness, and manufacturer.
For that reason, watch the tray closely through the oven window.
As the straw pieces soften, they should begin joining together into smooth, round shapes. Once the pieces have fused into discs, carefully remove the tray from the oven.
Do not leave the plastic baking longer than necessary.
Important safety note: Heating plastic can release fumes, and not all drinking straws are designed to be heated. This project should only be attempted if the specific plastic is known to be suitable for the intended use and the manufacturer’s safety guidance permits heating. Work in a well-ventilated area and stop immediately if you notice unusual fumes or smoke. Never use this method with unknown plastics.
Creating the Hanging Hole
Allow the newly formed discs to cool briefly.
When they are firm enough to handle but haven’t completely hardened, carefully use a wooden skewer or toothpick to make a small hole near the top of each piece.
This hole will later be used to attach the hanging string.
Be careful during this step because the pieces may still be warm. If they are too soft, wait a little longer. If they have completely hardened, don’t force the skewer through them.
Let Everything Cool Completely
Once the holes have been made, allow the ornaments to cool completely.
After they have hardened, gently remove them from the muffin tin.
Place them on parchment paper while you inspect each piece. If there are any rough edges, they can be carefully trimmed once the ornament has completely cooled.
The finished discs should have a smooth, decorative appearance with a warm amber or golden tone.
Adding the Twine
Cut several pieces of jute twine into short lengths.
Thread one piece through the hole in each ornament and tie the ends together securely.
Now your simple straw pieces have become hanging decorations.
The natural appearance of the jute works especially well with the warm colors of the finished ornaments. Together, they create a rustic, handmade look that fits beautifully into fall and harvest-themed decorating.
Easy Ways to Customize the Project
One of the best things about this craft is how easy it is to personalize.
Create Different Colors
If you want more variation, combine clear straws with darker orange, golden, or amber-colored straws.
Mixing shades can create a layered appearance once the plastic pieces fuse together. When light passes through the finished ornaments, the different tones can become particularly attractive.
Make Different Thicknesses
You don’t have to make every ornament identical.
Try filling some muffin cups with fewer straw pieces and others with more. This can create a collection of pieces with slightly different thicknesses and appearances.
A mixture of shapes can make a hanging display feel more natural and handmade.
Try a Minimalist Version
If you’re not interested in a strong harvest-inspired look, you can simplify the project.
Use clear straws and a very subtle amount of the pantry ingredients. The result can have a cleaner, more understated appearance while still maintaining the decorative effect.
Turn Them Into Gift Decorations
These little ornaments can also become an extra special finishing touch for homemade gifts.
Tie one onto a loaf of banana bread, a basket of muffins, a jar of homemade treats, or another seasonal gift.
Instead of using a traditional ribbon alone, the handmade ornament becomes part of the gift itself.
Ideas for Displaying Your Finished Ornaments
Once you’ve made several ornaments, there are plenty of ways to use them around your home.
Hang Them in a Window
Because the finished pieces are translucent, they can look especially attractive when natural light passes through them.
Hang several at different heights for a simple seasonal window display.
Decorate a Branch Arrangement
Collect a few attractive branches and place them in a vase. Hang the ornaments from the branches to create an inexpensive fall centerpiece.
This works particularly well when you mix different shades and sizes.
Add Them to a Wreath
The ornaments can also be incorporated into a seasonal wreath. Their warm color can complement dried leaves, twine, pinecones, and other natural decorative elements.
Use Them With Wrapped Gifts
Attach one ornament to a wrapped present instead of using a traditional decorative tag.
The recipient can remove it and use it as a decoration afterward, making the wrapping itself part of the gift.
Why This DIY Is So Appealing
There is something satisfying about taking an everyday object and giving it a completely different purpose.
Plastic straws are normally used for only a few minutes before being thrown away. In this project, small pieces are transformed into something decorative that can be displayed and reused.
The mini muffin tin also provides an interesting advantage: each cup naturally helps shape the melted material into a neat circular form.
And because cinnamon and vanilla are common pantry staples, you don’t need to purchase a collection of specialized crafting supplies.
A Few Important Tips
For the best results, keep these suggestions in mind:
- Cut the straw pieces as evenly as possible.
- Don’t overcrowd the muffin cups.
- Watch the oven carefully during the heating stage.
- Different plastic straws may soften differently.
- Allow the finished pieces to cool thoroughly before removing them.
- Don’t handle hot plastic with bare hands.
- Use good ventilation whenever working with heated materials.
- Never leave the oven unattended.
- Keep children away from the oven and hot materials.
- Only heat plastics when you have confirmed that the material is appropriate for the process.
The biggest lesson is not to assume that all plastic straws behave the same way. If you’re uncertain about the material, choose a safer craft method rather than experimenting with unknown plastic in an oven.
Final Thoughts
This creative DIY demonstrates how ordinary household materials can sometimes become the starting point for something unexpectedly beautiful. Small pieces of straw, a mini muffin tin, cinnamon, vanilla, and a little jute twine can be turned into warm-toned seasonal ornaments with a handmade appearance.
The finished decorations are simple enough for beginners but versatile enough to inspire plenty of creativity. You can experiment with colors, thicknesses, arrangements, and different ways of displaying them around your home.
Whether you hang them in a sunny window, add them to a branch arrangement, use them on a wreath, or attach one to a homemade gift, these little ornaments can add a cozy seasonal touch without requiring a large crafting budget.
Just remember that working with heated plastic requires extra care. Always confirm that the material is appropriate for the process, provide adequate ventilation, and never leave the oven unattended.
When done safely, the result can be a fun conversation piece—and you may even have people asking where you found such unusual decorations.