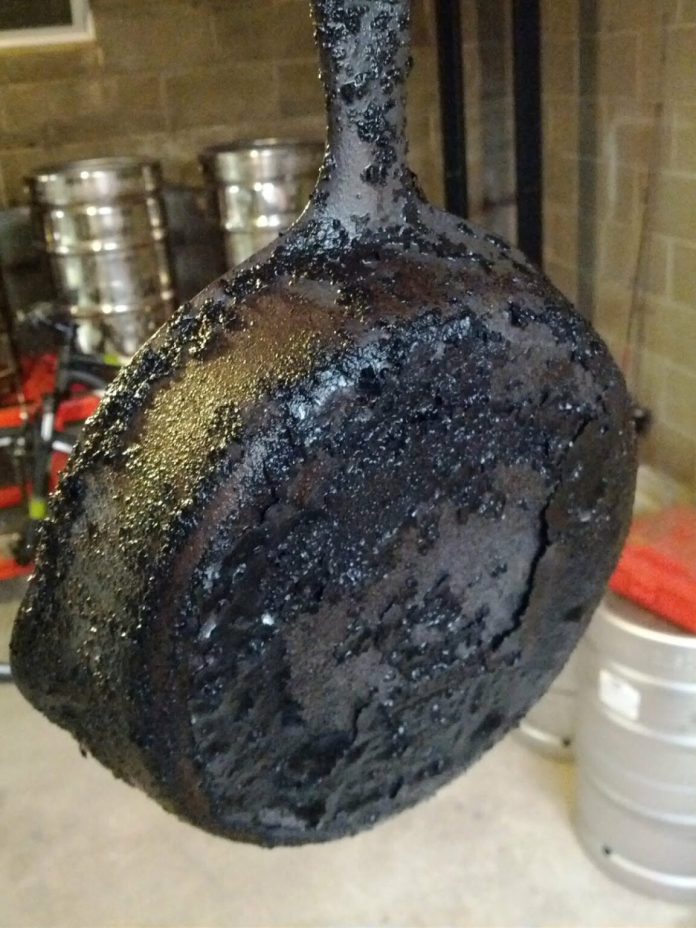
Cast iron cookware, with its timeless appeal and durability, often finds a second life in antique shops and markets. Recently, Krissy stumbled upon a treasure, a Wagner #3 cast iron skillet, during an antique shopping excursion in Delaware, OH. This skillet, dating back to the years 1935-1959, though showing signs of extensive use, held the promise of being beautifully restored. In this article, we delve into the art of cleaning cast iron cookware using an unconventional yet highly effective method: electrolysis.
Electrolysis, as a cleaning process, brings life back to cast iron by removing layers of burnt-on food, rust, and failed seasoning. If you’re curious about how to rejuvenate a cast iron skillet, keep reading to discover the tools and steps involved in the electrolysis cleaning method.
Step 1: Gather Your Materials To commence the cast iron resurrection project, you’ll need a few essential items:
- Plastic Tub Filled with Water: A plastic tub serves as the electrolysis bath for your skillet.
- Steel Plates (Anodes): You’ll require at least two steel plates to serve as the anode. Avoid metal with holes or mesh, as it can create unwanted imprints on your cast iron.
- Electrolyte (Sodium Carbonate): Prepare an electrolyte solution using sodium carbonate, not to be confused with baking soda. Mix approximately a tablespoon of sodium carbonate per gallon of water.
- Manual Battery Charger: Ensure you have a manual battery charger, as automatic or trickle chargers won’t work. A charger with a 12vdc 15 amp setting is suitable.
Step 2: Setting Up the Electrolysis Bath With your items collected, it’s crucial to set up your electrolysis bath safely. Never let the cathode and anode metals touch while the battery charger is in operation. Use a 1/2″ piece of EMT and a piece of coat hanger to suspend the skillet, ensuring it doesn’t make contact with the anodes. The negative side of the battery charger should connect to the skillet.
Step 3: Begin the Electrolysis Process As you power up the electrolysis setup, you’ll start noticing changes in the cast iron skillet. Over time, the layers of grime and rust will begin to fall away. Utilize a stainless steel scrubber to remove as much residue as possible, periodically returning the skillet to the electrolysis bath.
Step 4: Scrub and Clean After approximately 12 to 20 hours of electrolysis, your cast iron skillet will be noticeably cleaner. Continue scrubbing with a stainless steel scrubber and employ a stainless steel or brass brush to reach into the handle and branding details. A knife or small screwdriver can be handy for intricate cleaning.
Step 5: Post-Electrolysis Cleaning Once you believe your skillet is free of rust and grime, take it to the kitchen. Use a product called Bar Keepers Friend and your scrubbers to clean the cast iron further. Rinse it thoroughly, then wash it with dish soap like you would any other skillet.
Step 6: Preparing for Seasoning To prepare your cast iron skillet for seasoning, preheat your oven to 375°F. Use paper towels to dry the skillet thoroughly. Any residual water can lead to rust spots during the seasoning process. The paper towels may turn gray due to carbon from the naked metal, which is normal.
Step 7: Seasoning the Skillet Seasoning a cast iron skillet is about heating solid fat past its smoke point so that it chemically bonds to the metal. Avoid using liquid oils; instead, use a solid fat like Crisco. Apply a thin layer of Crisco to the hot skillet and wipe it evenly. The hot metal will melt the Crisco, creating a protective layer on the cast iron.
Conclusion:
Cleaning cast iron cookware with electrolysis is a remarkable method to restore antique pieces to their former glory. This process not only revives the skillet’s appearance but also ensures it’s ready for culinary adventures. As you embark on your journey to rejuvenate cast iron treasures, remember that patience and attention to detail are key to achieving a beautifully seasoned skillet that will serve you for generations to come. Happy cooking!
source of the picture : cakesandcolors


