
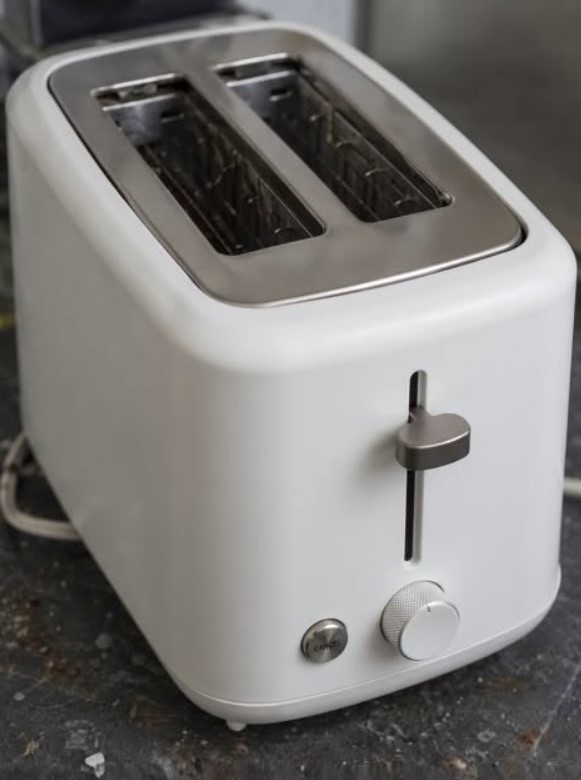
A toaster is one of those kitchen appliances that can quietly become much dirtier than it looks. We wipe down our counters, wash dishes, clean the stovetop, and sweep the kitchen floor, but the toaster often gets overlooked.
Then one day, you pick it up and discover crumbs underneath it, old food stuck around the openings, dust gathered in the corners, and a crumb tray that looks like it hasn’t been emptied in months.
That can be especially frustrating when you return to a property and discover that a renter has left a kitchen appliance in terrible condition.
The good news is that a dirty toaster can often be cleaned without expensive products. The important thing is to clean it safely because a toaster contains electrical components and heating elements that become extremely hot.
Here’s how to deal with a dirty toaster and when you should stop cleaning it and consider replacing it instead.
Why Does a Toaster Get So Dirty?
The basic design of a toaster makes it very easy for crumbs to disappear inside.
Every time bread goes into the slots, tiny pieces can break away. Some fall into the removable crumb tray, while others settle underneath the heating elements or collect in areas that aren’t easy to see.
Bread isn’t the only thing that can leave debris behind.
Depending on how the toaster has been used, you may find:
- Bread crumbs
- Bagel pieces
- Pastry flakes
- Seeds and grains
- Sugar
- Butter residue
- Melted cheese
- Small pieces of food
- Dust
- Burnt crumbs
A small amount of debris may not seem important at first. However, repeated use without cleaning can turn those little crumbs into a surprisingly large buildup.
That’s why a toaster can look reasonably clean from the outside while being packed with debris inside.
Why Old Crumbs Shouldn’t Be Ignored
A toaster becomes extremely hot during normal operation, but that doesn’t mean the inside automatically stays clean.
Food particles can remain around the bottom of the appliance and in the crumb tray. When the toaster heats up, old crumbs may become hot enough to scorch.
This can create an unpleasant burnt smell and, in some situations, smoke.
A toaster doesn’t necessarily become dangerous simply because it has crumbs inside. However, accumulated food debris near very hot heating elements is not something you want to ignore.
Regular crumb removal is therefore both a cleaning habit and a sensible kitchen-safety habit.
That Burnt Smell Could Be Coming From Old Food
Have you ever put fresh bread into a toaster and immediately noticed a strong burnt smell?
Sometimes the bread itself is simply overcooked.
But if the smell continues even when your toast isn’t burning, take a closer look at the appliance.
Old crumbs can repeatedly heat up every time the toaster is used. Eventually, they can scorch and produce a persistent burnt odor.
If you notice smoke, sparks, damaged wiring, or an unusual burning smell, don’t continue using the toaster just to see whether the problem goes away.
Unplug it and allow it to cool completely.
If there are signs of electrical damage or a malfunction, replacing the toaster may be safer than attempting a repair.
How to Tell When Your Toaster Needs Cleaning
Not sure whether your toaster has gone too long without being cleaned?
There are several obvious warning signs.
You may notice:
- Crumbs scattered underneath the toaster
- A completely full crumb tray
- Food particles visible inside the slots
- Dust around the openings
- A persistent burnt smell
- Smoke when the bread isn’t burning
- An unusual amount of debris falling out
- Toast that doesn’t seem to cook evenly
- Greasy or sticky residue around the exterior
One of the simplest questions is also one of the most useful:
When was the last time you emptied the crumb tray?
If you honestly can’t remember, it is probably time to clean it.
How to Clean a Toaster Safely
Before you start, remember one important rule:
Never clean a toaster while it is plugged in.
Water and electrical appliances are a dangerous combination, so you don’t want to pour water into the toaster, submerge it, or spray cleaning solution into the slots.
Instead, concentrate on dry cleaning for the inside and a lightly damp cloth for the exterior.
Step 1: Unplug the Toaster
Start by removing the plug completely from the electrical outlet.
Don’t simply switch the toaster off.
If you have just used it, wait until the appliance has cooled completely before touching the inside or removing the crumb tray.
This is the most important first step because it protects you from both electrical and heat-related hazards.
Step 2: Remove the Crumb Tray
Most toasters have a removable tray near the bottom.
Carefully pull it out and take it over a trash can.
Empty all of the old crumbs and debris.
If the tray is washable according to the manufacturer’s instructions, wash it separately with warm water and mild dish soap.
Then dry it completely before putting it back.
Never reinstall a wet tray.
Step 3: Turn the Toaster Upside Down
Once the toaster is unplugged and completely cool, take it somewhere easy to clean, such as over a sink or trash can.
Turn it upside down and gently shake it.
You may be surprised by how much falls out.
Don’t slam the appliance against a counter or shake it violently. A gentle movement is enough to loosen loose crumbs without unnecessarily stressing the toaster.
You can repeat this several times.
Step 4: Use a Soft Brush for Stubborn Crumbs
If crumbs remain inside the slots, a small, soft, dry brush can help loosen them.
A clean pastry brush or another suitable soft brush can work well for this purpose.
Work gently.
The goal is to remove loose food particles, not to bend or damage the heating elements.
Avoid poking sharp objects into the slots.
Don’t use knives, forks, metal skewers, or anything else that could contact electrical components or damage the appliance.
Step 5: Clean the Exterior
The outside of the toaster can usually be cleaned with a soft cloth that is only slightly damp.
If there is grease or sticky residue, use a small amount of mild dish soap on the cloth.
Do not spray cleaner directly onto the toaster.
Instead, put the cleaning solution on the cloth and wipe the exterior carefully.
Pay attention to the handles, sides, control area, and other surfaces that are touched frequently.
Step 6: Clean Around the Bottom
Don’t forget the surface underneath the toaster.
This is often where an enormous amount of debris collects.
Move the appliance aside and wipe the countertop.
Then inspect the toaster’s bottom and crumb-tray area for remaining debris.
If crumbs continue falling out, gently turn the unplugged and cooled appliance over the trash can again.
Step 7: Let Everything Dry Completely
If you washed the crumb tray or used a damp cloth on the outside, give everything plenty of time to dry.
The toaster should be completely dry before you reconnect it to electricity.
Never rush this step.
Step 8: Check the Toaster Before Using It Again
Before plugging the toaster back in, inspect it carefully.
Look for:
- Damaged power cords
- Cracked plastic
- Burn marks
- Melted areas
- Loose components
- Signs of overheating
- Unusual odors
- Damaged heating elements
If anything looks seriously damaged, don’t simply plug it back in.
A toaster is inexpensive compared with the potential consequences of using a damaged electrical appliance.
What You Should Never Do When Cleaning a Toaster
Some cleaning methods that work on other kitchen appliances are inappropriate for a toaster.
Never pour water into the toaster.
Never submerge the toaster in water.
Never spray cleaning products directly into the slots.
Never insert a metal utensil into the toaster.
Never try to scrape the heating elements aggressively.
Never clean it while it is connected to power.
And never continue using a toaster that is sparking, producing excessive smoke, or showing obvious electrical damage.
If you are unsure how to safely clean a particular model, check the manufacturer’s instructions.
Different toaster designs have different features and cleaning limitations.
How Often Should You Clean a Toaster?
The right cleaning schedule depends on how often the toaster is used.
For a household that uses it every day, checking the crumb tray every few days is a simple habit.
A more thorough dry cleaning can be done every few weeks or whenever you notice significant buildup.
A practical routine could look like this:
Every Few Uses
Check the crumb tray and empty it if necessary.
Every Few Weeks
Give the appliance a more thorough dry cleaning and wipe the exterior.
After a Particularly Messy Meal
If a lot of crumbs or food particles have fallen into the toaster, clean it once it has completely cooled.
This simple routine can prevent the kind of buildup that makes a toaster look neglected.
What About Melted Cheese or Sticky Food?
This can be more complicated than ordinary bread crumbs.
If melted cheese or another food has entered the toaster, don’t immediately try to scrape it out with a knife.
Unplug the appliance and allow it to cool completely.
Follow the manufacturer’s cleaning instructions for the specific model.
If food has reached the heating elements or caused visible damage, it may be better to have the appliance inspected or replace it rather than risk damaging the internal components.
When Should You Replace the Toaster Instead?
Not every dirty toaster needs to be thrown away.
If the problem is simply a full crumb tray and accumulated dry crumbs, careful cleaning may be all that’s needed.
However, replacement should be considered if you find serious damage.
Examples include:
- Frayed or damaged power cords
- Repeated sparking
- Burning smells that remain after cleaning
- Visible melting
- Damaged heating elements
- Smoke unrelated to the food being toasted
- A toaster that repeatedly overheats
- Electrical malfunction
- Cracked housing that exposes internal components
A clean toaster is useful.
A damaged toaster is a safety concern.
Don’t let the desire to save a few dollars convince you to keep using an appliance that may no longer be safe.
A Simple Cleaning Routine Can Make a Big Difference
The best way to deal with a filthy toaster is not to wait until it becomes a major cleaning project.
Empty the crumb tray regularly.
Shake out loose crumbs when the toaster is unplugged and completely cool.
Keep the outside free of grease and dust.
Clean the area underneath it.
And pay attention to unusual smells or smoke.
These small habits take only a few minutes but can make the appliance cleaner and easier to maintain.
Final Thoughts
Finding a toaster in terrible condition can certainly be frustrating, especially when you’re cleaning up after someone else.
But before getting angry at the appliance, remember that most toaster messes come from something very ordinary: years—or even months—of crumbs, food particles, dust, and residue gradually collecting inside.
The good news is that cleaning one doesn’t require a cabinet full of expensive products.
Start by unplugging the toaster and allowing it to cool completely. Empty the crumb tray, gently remove loose crumbs, clean the exterior with a suitable cloth, and make sure everything is completely dry before using it again.
Most importantly, don’t take shortcuts with an electrical appliance. Never pour water into the toaster, never poke around inside with metal objects, and don’t continue using it if you discover electrical damage, persistent burning smells, or sparking.
A few minutes of regular maintenance can keep a toaster cleaner, reduce unpleasant odors, improve its performance, and help make the kitchen a safer place.
And if your renter—or anyone else—left the toaster looking like it hadn’t been cleaned in ages, at least now you know exactly where to start.