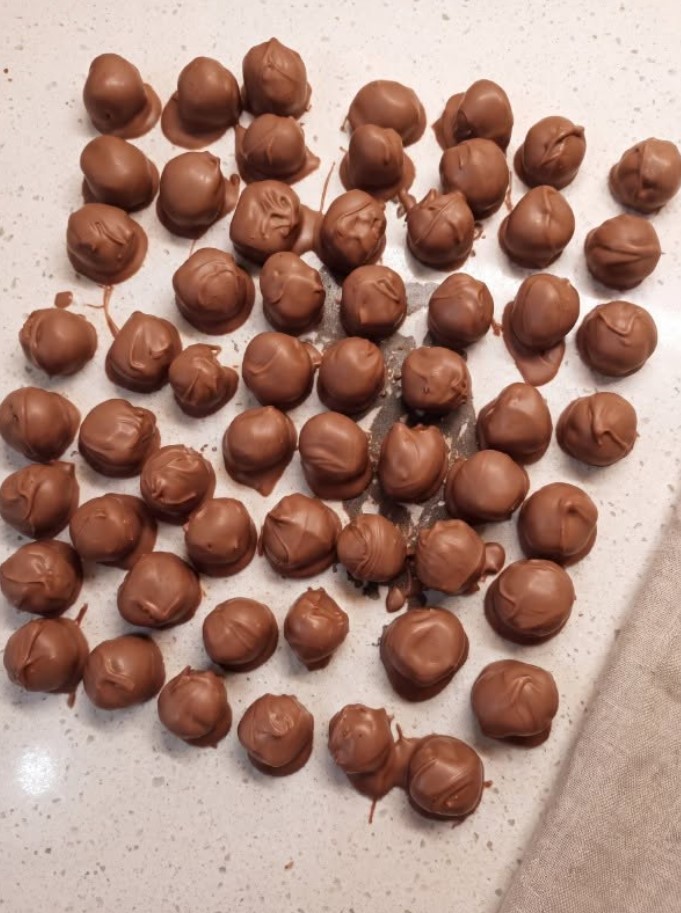
If you love the combination of chocolate and peanut butter, these Chocolate Peanut Butter Balls are sure to become one of your favorite homemade treats. They are rich, creamy, sweet, and wonderfully satisfying, with a smooth peanut butter center covered in a delicious layer of chocolate.
The best part? You don’t need an oven, complicated equipment, or hours in the kitchen to make them. With just a handful of simple ingredients and a little chilling time, you can prepare a batch of these delicious chocolate-covered treats right at home.
The peanut butter filling has a soft, creamy texture that almost melts in your mouth. Powdered sugar gives it just the right amount of sweetness, while a little butter helps create a smooth and rich consistency. Once coated in melted chocolate, each ball becomes a delightful little dessert that tastes like a homemade peanut butter cup.
These treats are perfect for Christmas celebrations, holiday cookie trays, birthday parties, potlucks, and homemade edible gifts. They are also wonderful when you want something sweet without turning on the oven.
Whether you serve them to guests or keep a batch in the refrigerator for yourself, these Chocolate Peanut Butter Balls are an easy dessert that everyone will look forward to enjoying.
Ingredients for Chocolate Peanut Butter Balls
This recipe makes approximately 20 bite-sized peanut butter balls.
For the Peanut Butter Filling
- 1/2 cup creamy peanut butter
- 3 tablespoons unsalted butter, softened
- 1 cup powdered sugar
- 1/2 teaspoon vanilla extract (optional)
- A small pinch of salt (optional)
For the Chocolate Coating
- 8 ounces semisweet or dark baking chocolate
- 1 teaspoon coconut oil or vegetable shortening (optional, for a smoother coating)
Optional Decorations
- A little melted white chocolate for drizzling
- Finely chopped peanuts
- Chocolate sprinkles
- A small pinch of flaky sea salt
How to Make Chocolate Peanut Butter Balls
Step 1: Prepare Your Baking Sheet
Start by lining a large baking sheet or flat tray with parchment paper or wax paper.
This will prevent the peanut butter balls from sticking and make it easier to remove them once the chocolate has hardened.
Make sure you have enough space in your refrigerator or freezer for the tray.
Step 2: Prepare the Peanut Butter Mixture
In a large mixing bowl, combine the creamy peanut butter and softened butter.
Using an electric hand mixer or a sturdy spoon, mix until the ingredients are smooth and completely blended.
Add the powdered sugar gradually, mixing after each addition. Continue until a thick, soft mixture forms.
Stir in the vanilla extract and a small pinch of salt if desired.
The filling should be firm enough to roll between your hands without sticking excessively. If it feels too soft, add a little more powdered sugar, one tablespoon at a time.
Step 3: Shape the Peanut Butter Balls
Scoop out small portions of the mixture using a teaspoon or a small cookie scoop.
Roll each portion gently between your palms until you have a smooth, round ball.
Try to make the balls approximately the same size so they chill evenly and have a consistent chocolate coating.
Place each ball on the prepared baking sheet, leaving a little space between them.
Continue until all the peanut butter mixture has been used.
Step 4: Chill Until Firm
Place the tray in the refrigerator for approximately 30 to 45 minutes, or until the peanut butter balls become firm.
You can also place them in the freezer for approximately 15 to 20 minutes if you want to speed up the process.
This step is important because firm peanut butter balls are much easier to dip into melted chocolate. If they are too soft, they may lose their shape while being coated.
Step 5: Melt the Chocolate
Break the chocolate into small pieces and place them in a microwave-safe bowl.
Heat in the microwave in 20-second intervals, stirring between each interval until the chocolate is completely melted and smooth.
If you prefer, you can melt the chocolate using a double boiler. Simply place the chocolate in a heatproof bowl over a saucepan of gently simmering water, making sure the bottom of the bowl does not touch the water.
Stir until smooth.
For a thinner, easier-to-dip coating, add a teaspoon of coconut oil or vegetable shortening and mix until fully incorporated.
Avoid allowing water or steam to enter the chocolate, as this can cause it to become thick and grainy.
Step 6: Dip the Peanut Butter Balls in Chocolate
Remove the chilled peanut butter balls from the refrigerator.
Using a fork, gently lower one ball into the melted chocolate. Turn it carefully until it is completely covered.
Lift it out with the fork and gently tap the fork against the side of the bowl to allow excess chocolate to drip away.
Place the coated ball back onto the parchment-lined baking sheet.
Repeat with the remaining peanut butter balls.
Work in small batches if necessary, keeping the remaining balls refrigerated so they stay firm while you dip them.
Step 7: Add Optional Decorations
If you want to make your treats look extra special, decorate them before the chocolate coating hardens.
You can sprinkle chopped peanuts or chocolate sprinkles over the tops.
For a more elegant finish, drizzle a little melted white chocolate over each ball using a spoon or a small piping bag.
A tiny pinch of flaky sea salt also works beautifully, especially if you enjoy a sweet-and-salty combination.
Step 8: Allow the Chocolate to Set
Once all the peanut butter balls have been coated and decorated, place the tray in the refrigerator for approximately 15 to 20 minutes, or until the chocolate has completely hardened.
When the coating is firm, carefully remove the treats from the parchment paper.
Arrange them on a serving plate or transfer them to an airtight container.
Your homemade Chocolate Peanut Butter Balls are ready to enjoy!
Helpful Tips for Perfect Chocolate Peanut Butter Balls
Choose creamy peanut butter: Regular creamy peanut butter gives the filling a smooth consistency and makes the balls easier to shape. Natural peanut butter can sometimes be too oily or loose.
Add powdered sugar gradually: Adding all the sugar at once can make mixing difficult. Gradual additions help you control the consistency of the filling.
Chill before dipping: Don’t skip the chilling step. Firm peanut butter centers hold their shape much better when dipped into warm chocolate.
Use good-quality chocolate: Semisweet and dark chocolate both work beautifully. Choose a chocolate you enjoy eating because it makes up the entire outer coating.
Melt chocolate slowly: Chocolate can burn easily. Use short microwave intervals and stir frequently to keep it smooth.
Keep the coating thin: Allow excess chocolate to drip off before placing each ball on the tray. This creates a neat finish without an overly thick chocolate shell.
Use a fork for dipping: A fork allows excess chocolate to drain away more easily than a spoon and helps create a smoother coating.
Delicious Variations to Try
Dark Chocolate Peanut Butter Balls
For a less sweet dessert with a deeper chocolate flavor, use dark chocolate instead of semisweet chocolate. The slight bitterness balances the sweet peanut butter filling beautifully.
Crunchy Peanut Butter Balls
If you enjoy a little texture, replace creamy peanut butter with crunchy peanut butter. The small peanut pieces add a pleasant crunch to every bite.
Rice Crispy Peanut Butter Balls
For extra texture, gently fold 1/2 cup of crispy rice cereal into the peanut butter mixture before shaping. This creates a light, crunchy center.
Coconut Peanut Butter Balls
Add 1/4 cup of finely shredded coconut to the filling for a subtle coconut flavor. You can also sprinkle a little coconut over the chocolate coating before it sets.
White Chocolate Peanut Butter Balls
Replace the semisweet chocolate with melted white chocolate for a sweeter and creamier version. These also look beautiful on holiday dessert platters.
Salted Chocolate Peanut Butter Balls
Sprinkle a few flakes of sea salt over the chocolate coating before it hardens. The combination of sweet peanut butter, rich chocolate, and a touch of salt creates a delicious balance.
How to Serve Chocolate Peanut Butter Balls
These little treats are delicious straight from the refrigerator, when the chocolate coating is firm and the peanut butter center is cool and creamy.
Arrange them on a dessert platter alongside cookies, brownies, fudge, and other homemade sweets.
They are especially popular during the holiday season and make a lovely addition to Christmas dessert tables, Thanksgiving gatherings, and family celebrations.
For an afternoon snack, serve a couple of peanut butter balls with coffee, tea, or a cold glass of milk.
They also make wonderful homemade gifts. Place them in small decorative boxes or candy bags, separate the layers with parchment paper, and keep them chilled until you’re ready to give them away.
How to Store Chocolate Peanut Butter Balls
Proper storage helps maintain their creamy texture and keeps the chocolate coating in good condition.
In the refrigerator: Store the finished peanut butter balls in an airtight container for up to 2 weeks. Separate layers with parchment paper to prevent them from sticking together.
In the freezer: Place the balls in a freezer-safe container, separating the layers with parchment paper. Freeze for up to 3 months for the best quality.
Before serving: If frozen, transfer the desired amount to the refrigerator and allow them to thaw overnight. You can also let them sit at room temperature briefly before serving.
Because the filling contains butter and peanut butter, refrigeration is the best storage option for maintaining freshness.
Frequently Asked Questions
Do Chocolate Peanut Butter Balls Need to Be Baked?
No! This is a completely no-bake dessert. The peanut butter filling is mixed, shaped, chilled, and covered in melted chocolate. No oven is needed.
Why Is My Peanut Butter Mixture Too Sticky?
The mixture may be too soft because of the peanut butter’s consistency or the temperature of the butter. Add powdered sugar gradually until it becomes firm enough to roll. Chilling the mixture briefly can also help.
Can I Use Natural Peanut Butter?
You can, but regular creamy peanut butter usually gives more consistent results. Natural peanut butter often separates and contains more oil, which can make the filling too soft.
Can I Make These Treats Ahead of Time?
Absolutely! These peanut butter balls are excellent for preparing ahead. You can make them several days before a celebration and keep them refrigerated until serving.
What Is the Best Chocolate to Use?
Semisweet chocolate is a popular choice because it balances the sweetness of the peanut butter filling. Dark chocolate works well for a richer flavor, while milk chocolate creates a sweeter coating.
Can I Make Them Without a Microwave?
Yes. Use a double boiler to melt the chocolate gently. Stir continuously until it becomes smooth and completely melted.
How Do I Prevent the Chocolate From Cracking?
Allow the chocolate to set gradually in the refrigerator rather than exposing the treats to sudden temperature changes. Avoid freezing freshly dipped balls immediately, as rapid temperature changes can sometimes affect the coating.
Conclusion :
These Chocolate Peanut Butter Balls are proof that a delicious homemade dessert doesn’t need to be complicated. With a few everyday ingredients, a little preparation, and no baking required, you can create a rich and creamy treat that looks beautiful and tastes absolutely wonderful.
The combination of smooth peanut butter and sweet powdered sugar creates a soft, satisfying center, while the chocolate coating adds a delicious finish. Every bite brings together two classic flavors that have been loved by dessert enthusiasts for generations.
One of the best things about this recipe is how easy it is to customize. You can use dark chocolate for a richer taste, crunchy peanut butter for extra texture, or a drizzle of white chocolate for a more decorative appearance. A little sea salt or chopped peanuts can also give these simple treats a special finishing touch.
They are perfect for busy holiday preparations because they can be made ahead of time and stored in the refrigerator until needed. Whether you’re preparing a dessert platter for Christmas, making homemade gifts for friends, or simply looking for something sweet to enjoy after dinner, these peanut butter balls are always a wonderful choice.
They are also a lovely recipe to make with family. Children can help roll the peanut butter mixture into balls, choose their favorite decorations, and watch the chocolate coating turn into a firm, delicious shell.
Once you make a batch, don’t be surprised if they disappear quickly. Their creamy centers, rich chocolate coating, and convenient bite-sized shape make them difficult to resist.
Keep this recipe close whenever you need an easy homemade dessert that delivers plenty of flavor without requiring hours in the kitchen. These Chocolate Peanut Butter Balls are simple, delicious, and guaranteed to bring a little extra sweetness to any occasion.