Some recipes are more than desserts. They are little pieces of family history, the kind of sweets that remind you of holidays, crowded kitchens, handwritten recipe cards, and the people who made special occasions feel even more special.
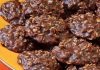
Aunt Bill’s Brown Candy is one of those old-fashioned treats. This rich confection has a texture somewhere between creamy fudge and a nutty praline, with a deep caramel flavor and plenty of toasted pecans. It has been associated with Oklahoma cooking and has been passed around in different forms for generations.
The recipe is made from surprisingly simple ingredients, but the technique is what makes it special. Sugar is caramelized separately before being incorporated into a creamy mixture, then the candy is cooked to the soft-ball stage, enriched with butter and vanilla, and beaten until it thickens. Toasted pecans are folded in at the end for crunch and flavor.
If you’ve never made homemade candy before, this recipe may look a little intimidating. Don’t let that stop you. Once you understand the stages of cooking and pay attention to the temperature, you’ll find that the process is much more manageable than it first appears.
What Makes Aunt Bill’s Brown Candy So Special?
There are plenty of modern desserts that are flashy and complicated, but there’s something wonderful about a recipe that relies on basic pantry ingredients.
Aunt Bill’s Brown Candy has several qualities that make it memorable:
- A rich caramel-like flavor
- A creamy, fudge-like texture
- Plenty of toasted pecans
- Simple ingredients
- A beautiful golden-brown color
- A nostalgic old-fashioned character
- A dessert that’s excellent for holiday trays and homemade gifts
The finished candy is firm enough to cut into squares but remains tender and slightly crumbly rather than becoming hard like traditional caramel candy. Recipes describe it as a cross between fudge and pecan praline.
Ingredients You’ll Need
Granulated Sugar
Sugar is the foundation of this candy. A portion is caramelized to create the deep brown flavor, while the remaining sugar is combined with the dairy mixture.
Half-and-Half or Heavy Cream
The dairy gives the candy its creamy consistency and helps balance the intense sweetness of the sugar.
For a particularly rich version, heavy cream can be used. Traditional versions also commonly use whole milk or cream.
Unsalted Butter
Butter contributes richness and helps create the smooth, tender texture that makes this candy different from a hard caramel.
Baking Soda
A very small amount of baking soda helps alter the texture of the candy. Be prepared for the mixture to foam slightly when the baking soda is added.
Vanilla Extract
Vanilla adds a warm background flavor and helps round out the caramel and buttery notes.
Pecans
Toasted, chopped pecans are one of the defining ingredients. They provide crunch and a delicious roasted flavor that works beautifully with the caramelized sugar.
Water
A small amount of water is used with the sugar to help create the caramel syrup.
How to Make Aunt Bill’s Brown Candy
Step 1: Prepare Your Pan
Before beginning the candy, prepare your pan.
Generously butter an 8-by-8-inch metal baking pan for a smaller batch. You can also use a larger pan if you’re working with one of the traditional larger recipes.
If desired, line the bottom with parchment paper and butter the parchment as well. This makes removing the finished candy considerably easier.
Set the pan aside.
Step 2: Prepare the Cream Mixture
Place about two-thirds of the sugar in a heavy-bottomed saucepan along with the half-and-half.
Warm the mixture gently over low heat, stirring occasionally until the sugar has dissolved.
Once the sugar is dissolved, remove the pan from the heat and set it aside temporarily.
The mixture should remain warm while you prepare the caramel.
Step 3: Make the Caramel
Place the remaining sugar and water into another heavy saucepan.
Heat gently until the sugar dissolves.
Once the sugar has dissolved, stop stirring and allow the mixture to boil.
Watch it carefully as it changes color.
You’re looking for a deep amber caramel, but you don’t want it to become black or smoky. Caramel can go from perfectly golden to burned surprisingly quickly.
Swirling the pan gently can help distribute the heat.
The caramelization stage is important because this is where much of the candy’s characteristic brown, toasted flavor comes from.
Step 4: Combine the Caramel and Cream Mixture
When the caramel has reached the right color, carefully add it to the warm cream mixture.
Be extremely careful during this step.
The mixture will bubble vigorously because very hot caramel is meeting a cooler dairy mixture.
Add the caramel gradually if necessary and stir continuously until the caramel has dissolved into the creamy mixture.
Don’t lean directly over the pan, and use a long-handled spoon or heat-resistant utensil.
Step 5: Cook to the Correct Temperature
Attach a candy thermometer to the saucepan.
Continue cooking the mixture over medium heat, stirring as directed, until it reaches approximately 244°F, which is the soft-ball stage used in the classic version of this recipe.
A candy thermometer is extremely helpful here.
Unlike ordinary baking, candy making depends heavily on temperature. A difference of only a few degrees can affect whether the finished candy is creamy, crumbly, soft, or too firm.
If you don’t have a candy thermometer, traditional recipes sometimes use the cold-water test, but a reliable thermometer makes the process much easier to control.
Step 6: Add the Baking Soda
Once the mixture reaches the proper temperature, remove it from the heat.
Immediately stir in the baking soda.
Don’t be surprised if the mixture foams or becomes slightly more active. This is normal.
Stir until the baking soda is incorporated.
Step 7: Add the Butter
Add the butter pieces while the mixture is still hot.
Stir until the butter has completely melted into the candy.
The mixture should look smooth and glossy.
At this point, resist the temptation to start beating it immediately.
Let it cool undisturbed until it reaches approximately 160°F. The classic method allows around 20 minutes for this cooling stage.
Step 8: Add the Vanilla
Once the mixture has cooled sufficiently, stir in the vanilla extract.
This small addition makes a noticeable difference, adding warmth and helping balance the richness of the caramelized sugar and butter.
Step 9: Beat the Candy
Now comes one of the most important steps.
Using a sturdy wooden spoon, begin stirring or beating the mixture continuously.
At first, the candy will be glossy and relatively loose.
As you continue stirring, it will gradually become thicker and lose some of its shine.
This transformation is exactly what you’re looking for.
The candy can become quite stiff, so be prepared for some arm work. Older versions of the recipe even suggest having another person nearby to take turns stirring when making a large batch.
Step 10: Add the Pecans
Once the candy has thickened and begun to lose its glossy appearance, add the toasted, chopped pecans.
Fold them through the mixture as evenly as possible.
The candy may feel very stiff at this point, so work quickly but carefully.
The pecans should be distributed throughout the candy rather than concentrated in one section.
Step 11: Transfer to the Pan
Immediately scrape the candy into your prepared pan.
Because the mixture becomes firm quickly, don’t wait too long after adding the pecans.
Use lightly dampened fingertips or a buttered spatula to press the candy evenly into the pan.
Try to create a relatively level surface so that the finished pieces are uniform.
Step 12: Let It Cool Completely
Allow the candy to cool completely at room temperature.
Depending on the size and depth of your pan, this can take anywhere from an hour or two to several hours.
Don’t cut it while it’s still warm.
The candy needs time to finish setting and develop its final texture.
Once completely cool, remove it from the pan and cut it into small squares.
The classic smaller-batch recipe produces approximately 30 pieces.
Tips for Making Perfect Brown Candy
Use a Heavy-Bottomed Pan
A heavy saucepan distributes heat more evenly and reduces the risk of hot spots that can burn the sugar.
Don’t Walk Away From the Caramel
Caramel requires attention.
Once the sugar begins changing color, the process can accelerate quickly. Stay nearby and watch it carefully.
Use a Candy Thermometer
For the most consistent results, use a reliable candy thermometer.
The target temperature is approximately 244°F in the classic version.
Toast the Pecans
Toasting the pecans before adding them is worth the extra few minutes.
It brings out their natural oils and gives them a deeper, more pronounced flavor.
Allow them to cool before chopping.
Don’t Overbeat the Mixture
The candy needs enough stirring to lose its glossy appearance and thicken, but you don’t want to continue indefinitely after it has reached the proper consistency.
Work Quickly at the End
Once the candy begins thickening, the final stages move quickly.
Have your pan prepared before you begin cooking so you aren’t scrambling to butter it after the candy is ready.
How to Toast Pecans
Toasting pecans is simple.
Spread the pecans in a single layer on a baking sheet and place them in a moderate oven for several minutes.
Keep a close eye on them because nuts can go from toasted to burned quickly.
Allow them to cool completely before chopping.
You want them fragrant and lightly browned, not dark or bitter.
What Does Aunt Bill’s Brown Candy Taste Like?
The flavor is intensely sweet, buttery, nutty, and caramel-like.
The caramelized sugar provides a deeper flavor than ordinary fudge, while the cream and butter give the candy a smooth richness.
The pecans add a roasted, slightly savory contrast that keeps the candy from tasting like pure sugar.
Its texture is equally distinctive.
Rather than being sticky like caramel or completely smooth like ordinary fudge, it has a tender, slightly crumbly consistency with a creamy finish.
Why This Is a Great Holiday Candy
Aunt Bill’s Brown Candy is particularly well suited to the holiday season.
It can be cut into small squares and arranged on a dessert tray alongside cookies, truffles, peanut brittle, and other homemade sweets.
It also makes a thoughtful homemade gift.
Place the pieces in a decorative tin, candy box, or parchment-lined container and give them to friends, neighbors, coworkers, or family members.
Because the recipe makes a substantial amount, it’s also a convenient choice when you’re preparing treats for several people.
Variations You Can Try
Use Walnuts
Pecans are traditional, but walnuts can be substituted if that’s what you have available.
They’ll provide a slightly different flavor while still working beautifully with the caramel base.
Make Smaller Pieces
Because this candy is rich, you don’t need huge portions.
Cutting it into small bite-sized squares makes it perfect for dessert trays.
Add a Touch of Sea Salt
A tiny sprinkle of flaky sea salt on top can provide a pleasant contrast to the sweetness.
Don’t overdo it—the candy is already rich and flavorful.
Experiment With Nut Combinations
You can experiment with a mixture of pecans and walnuts if you enjoy both.
For the most traditional result, however, pecans remain the classic choice.
Common Problems and How to Avoid Them
The Caramel Burned
If the caramel becomes very dark, smells bitter, or begins smoking, it has likely gone too far.
Caramel needs to be deeply colored, but burned sugar will make the finished candy unpleasantly bitter.
The Candy Is Too Soft
This can happen if the mixture didn’t reach the proper temperature before being removed from the heat.
A candy thermometer can help prevent this problem.
The Candy Became Too Hard
Overcooking can cause the candy to become firmer than intended.
Temperature control is therefore one of the most important parts of the recipe.
The Candy Stayed Glossy
The final beating stage is what helps create the desired texture.
If the mixture hasn’t thickened or lost its glossy appearance, it may need additional stirring.
The Candy Hardened Before You Could Spread It
The mixture can firm up quickly once the final stage begins.
Prepare your pan in advance and work efficiently when transferring the candy.
How to Store Aunt Bill’s Brown Candy
Once the candy has cooled completely, store the pieces in an airtight container.
Place parchment or wax paper between layers if you stack them.
Keep the container in a cool, dry place away from direct sunlight and heat.
Because this is a rich candy containing dairy and butter, follow appropriate food-storage practices and avoid leaving it exposed to excessive heat.
Frequently Asked Questions
Can I use heavy cream instead of half-and-half?
Yes. Traditional versions of Aunt Bill’s Brown Candy have been made with different dairy choices, including cream, whole milk, and half-and-half.
Do I really need a candy thermometer?
It’s strongly recommended. The texture depends heavily on reaching the correct cooking temperature.
Can I use walnuts instead of pecans?
Yes. Pecans are traditional, but walnuts are a reasonable substitution.
Why does the candy need to be beaten?
Beating helps the cooked sugar mixture change from a shiny, fluid mixture into the thicker, more fudge-like texture characteristic of this candy.
How long does it take to make?
The exact time varies depending on the recipe size and cooling time, but expect roughly an hour of active candy-making plus additional time for cooling and setting. The classic smaller recipe lists about 30 pieces as its yield.
Is Aunt Bill’s Brown Candy the same as fudge?
Not exactly. It has similarities to fudge, but its caramelized sugar component and abundant pecans give it a distinctive flavor and texture. It is often described as a cross between fudge and pecan praline.
Final Thoughts
Aunt Bill’s Brown Candy is the kind of recipe that deserves to be remembered.
It doesn’t rely on trendy ingredients, complicated decorations, or expensive equipment. Instead, it takes a few familiar ingredients—sugar, dairy, butter, vanilla, baking soda, and pecans—and turns them into a deeply flavorful homemade candy through careful technique.
The most important part is patience. Take your time with the caramel, monitor the temperature carefully, and don’t rush the cooling and beating stages. Once you understand how the sugar changes throughout the process, the recipe becomes much less intimidating.
The combination of caramelized sugar, creamy dairy, butter, vanilla, and toasted pecans creates a candy that feels wonderfully old-fashioned. It’s rich enough that a small piece goes a long way, making it perfect for holiday gatherings, homemade gifts, cookie exchanges, or simply enjoying with a cup of coffee.
Perhaps that’s why this recipe has remained popular for so many years. It’s not just candy—it’s the kind of homemade treat that can become part of a family’s traditions.
Make a batch once, and you may find yourself understanding exactly why generations of cooks have continued passing Aunt Bill’s Brown Candy from one kitchen to another.