
In childhood, many of us cherished the joy of pressing delicate flowers between the pages of a scrapbook, preserving the essence of nature’s beauty. If you’re looking for a delightful project that rekindles that nostalgic magic and lets your creative spirit soar, you’re in for a treat. Woodlark Blog has shared a whimsical DIY idea that involves crafting exquisite pressed flower butterfly wings. These ethereal creations can be designed for children’s or adult costumes, or as enchanting decorations. The best part? You have the freedom to select the flowers and arrangements that resonate with your unique vision.
The Artistry of Pressed Flower Butterfly Wings:
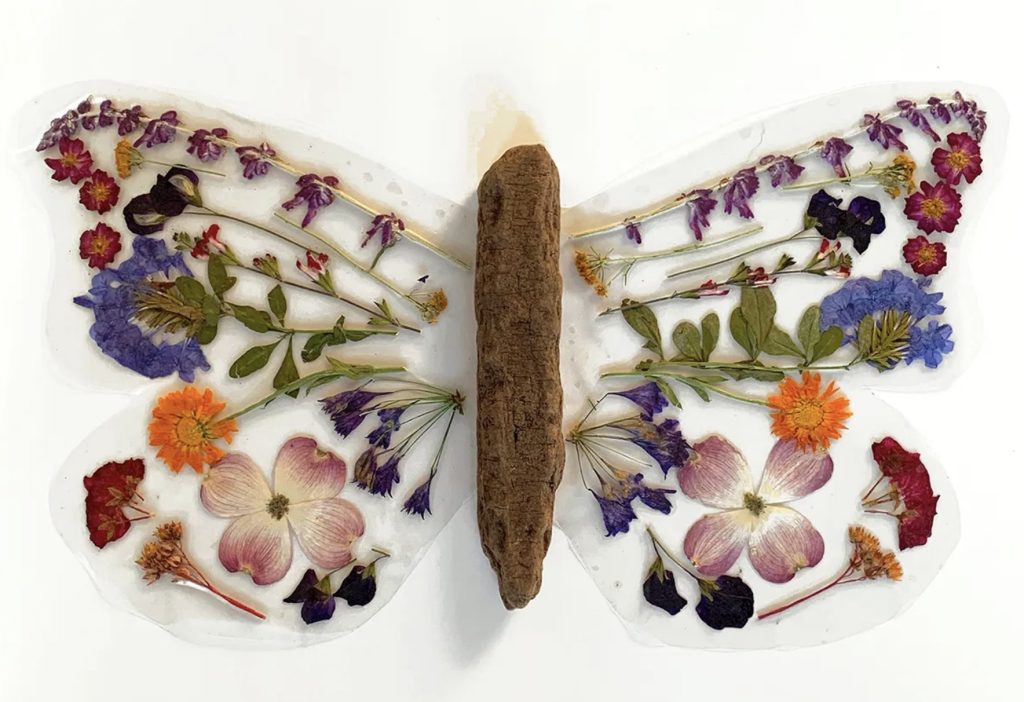
As a homage to the art of flower pressing, this DIY project promises to be an unforgettable experience. It allows you to transform pressed flowers into stunning, butterfly-like wings. The end result is both intricate and mesmerizing, perfect for costume parties or as decorative elements in your living space.
Materials You’ll Need:
To embark on this artistic journey, you’ll need a few essential materials:
- Pressed Flowers: Gather an assortment of pressed flowers. The choice is yours, and this is where your creativity can truly shine.
- Thin Cardboard or Cardstock: This serves as the base for your wings.
- Scissors: Essential for cutting out your butterfly wing shape.
- Craft Glue or Mod Podge: You’ll need a reliable adhesive to secure the pressed flowers to the cardboard.
- Paintbrush: This will aid in applying glue evenly.
- Driftwood or Craft Sticks: These natural elements serve as the body of your butterfly and add an organic touch to the project.
Crafting the Butterfly Wings:
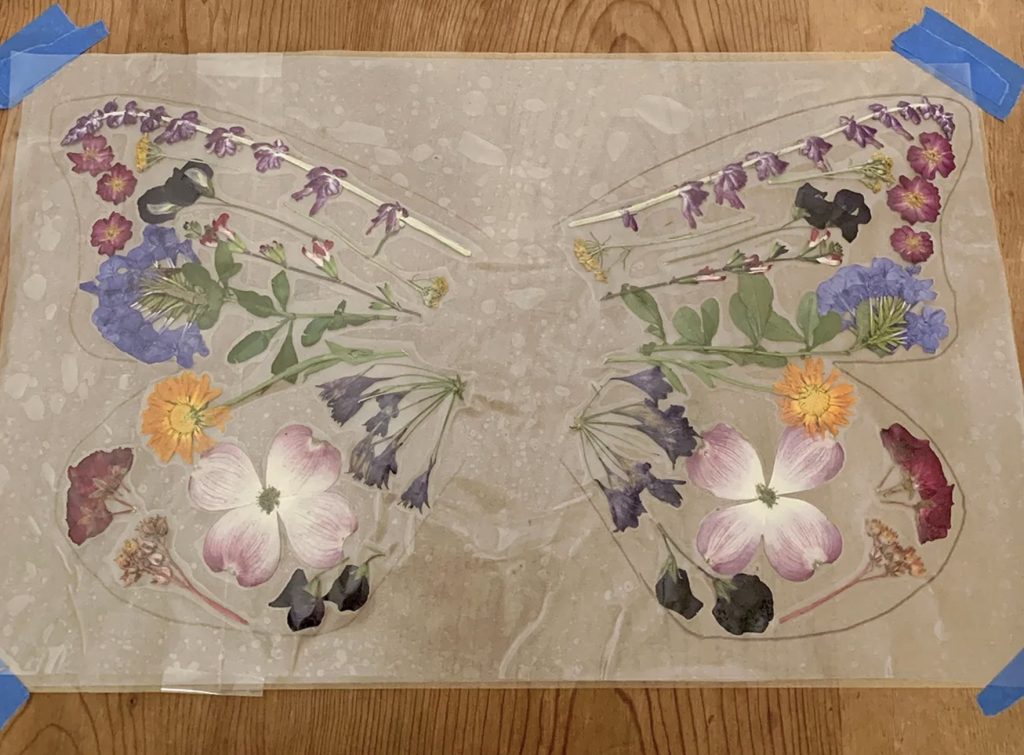
- Design Your Butterfly Shape: Start by sketching the butterfly wing shape on the cardboard or cardstock. This is where your artistic flair comes into play; you can go for classic, intricate patterns or invent your own.
- Arrange Your Pressed Flowers: Lay out the pressed flowers on the cardboard in the pattern you desire. Experiment with different combinations and placements until you’re satisfied.
- Glue the Flowers: Using craft glue or Mod Podge and a paintbrush, carefully adhere the pressed flowers to the cardboard wings. Ensure they are securely fastened.
- Attach the Driftwood Body: To create the butterfly’s body, affix driftwood or craft sticks to the center of the wings. This not only adds a touch of nature but also serves as a practical means of holding your wings.
Conclusion:
This DIY project is a testament to the beauty of nature and your creativity. As you watch your butterfly wings come to life, you’ll be reminded of the simple joys of childhood and the enchanting world of imagination. Whether for a costume party or to adorn your home, these pressed flower butterfly wings are a masterpiece that celebrates the timeless connection between art and nature. So, embark on this delightful crafting adventure, and let your inner child’s excitement take flight.
Find the full tutorial on Woodlark Blog and embark on one of the most captivating DIY projects you’ll ever experience. Your unique vision and choice of flowers will make these butterfly wings an artistic masterpiece you’ll be proud to display or wear.
image source: Woodlark Blog


