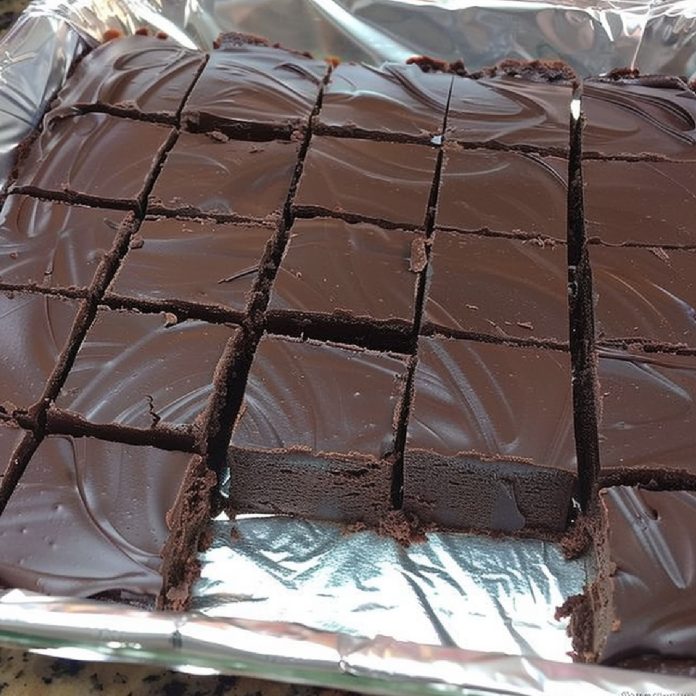
Indulge in the timeless delight of homemade fudge with our Decadent Old Fashioned Fudge Recipe. Crafted with love and precision, this sweet treat promises to transport you back to the nostalgic comforts of days gone by.
With a rich blend of cocoa, buttery goodness, and a hint of vanilla, each square embodies the essence of homemade goodness. So, gather your ingredients and let’s embark on a journey to fudge-filled bliss.
Ingredients:
- 2 cups granulated sugar
- 4 tablespoons Hershey’s cocoa
- 1 stick salted butter
- 5-ounce can Carnation Evaporated Milk
- 1 teaspoon vanilla extract
- Nuts (optional, but recommended for a delightful crunch)
Instructions:
Step 1: Preparing the Pan Before diving into the culinary adventure, prepare an 8×8 inch pan by lining it with parchment paper or lightly greasing it. This step ensures effortless removal of your fudge squares once they’re perfectly set.
Step 2: Sweet Beginnings In a heavy saucepan, combine the granulated sugar and Hershey’s cocoa. With a gentle whisk, blend these ingredients together until they form a harmonious mixture, setting the stage for the fudge-making magic to unfold.
Step 3: Infusing Buttery Bliss Introduce the stick of salted butter and the Carnation Evaporated Milk to the sugar-cocoa concoction. Watch as the butter melts and blends with the milk, creating a symphony of flavors that will elevate your fudge to new heights of decadence.
Step 4: Stirring to Perfection Over medium heat, stir the mixture continuously, allowing it to come to a rolling boil. Let it dance in the heat for approximately 3-4 minutes, reaching the soft ball stage of candy making. To ensure the desired consistency, perform a simple water test: drop a small amount of the mixture into cold water, and if it forms a soft ball, you’re on the right track.
Step 5: Essence of Vanilla Once removed from the heat, introduce the teaspoon of vanilla extract, infusing your fudge with a burst of aromatic sweetness that will tantalize your taste buds and leave you craving for more.
Step 6: Nuts for Crunch For those seeking an extra dimension of flavor and texture, gently fold in your favorite nuts at this stage. Whether it’s walnuts, pecans, or almonds, these additions will provide a delightful crunch that perfectly complements the velvety smoothness of the fudge.
Step 7: Setting the Stage Carefully pour the luscious mixture into the prepared pan, using a spatula to ensure a smooth and even surface. Exercise patience as you allow the fudge to cool for several hours, resisting the urge to sneak a taste. For optimal results, let it set overnight, allowing the flavors to meld and mature.
Step 8: The Grand Finale As the dawn breaks on a new day, unveil the masterpiece that is your homemade fudge. Lift it out of the pan using the parchment paper and transfer it to a cutting board. With a sharp knife, slice the fudge into delectable squares, each one a testament to your culinary prowess and dedication to the art of confectionery.
Conclusion:
In a world filled with fleeting pleasures, homemade fudge stands as a timeless symbol of comfort, indulgence, and love. With our Decadent Old Fashioned Fudge Recipe, you have embarked on a journey of culinary mastery, creating not just a sweet treat, but a cherished memory to be shared with loved ones for generations to come. So savor each bite, relish in the joy of creation, and let the rich flavors of nostalgia envelop your senses.
SOURCE OF THE PICTURE : Recipesneed


