
Since we were restoring our back terrace, it was the perfect time to install a magnificent water fountain.
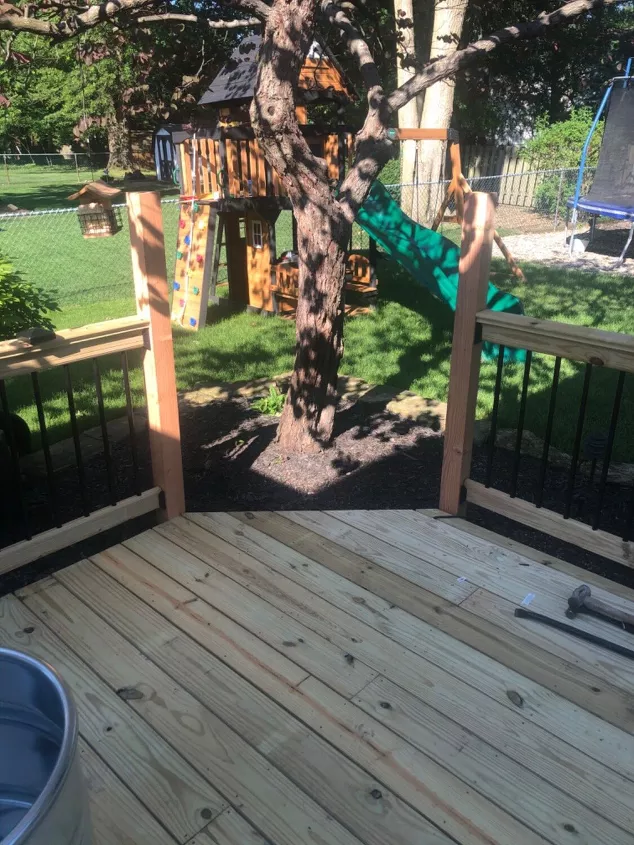
Determining the layoutOn this terrace we kept all of the existing structure, simply redoing the boards, posts and railings on the upper terrace. This little nook turned out to be the perfect place for what I had in mind.
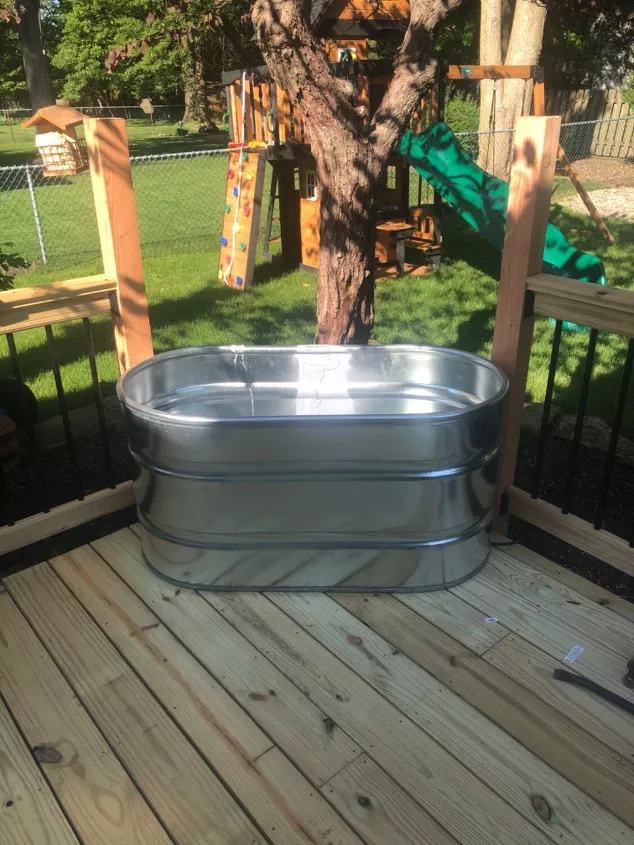
Test fitUsing a 4ft water trough I positioned between the two post to make sure it would fit as intended without taking up too much deck space. This sizing was perfect.
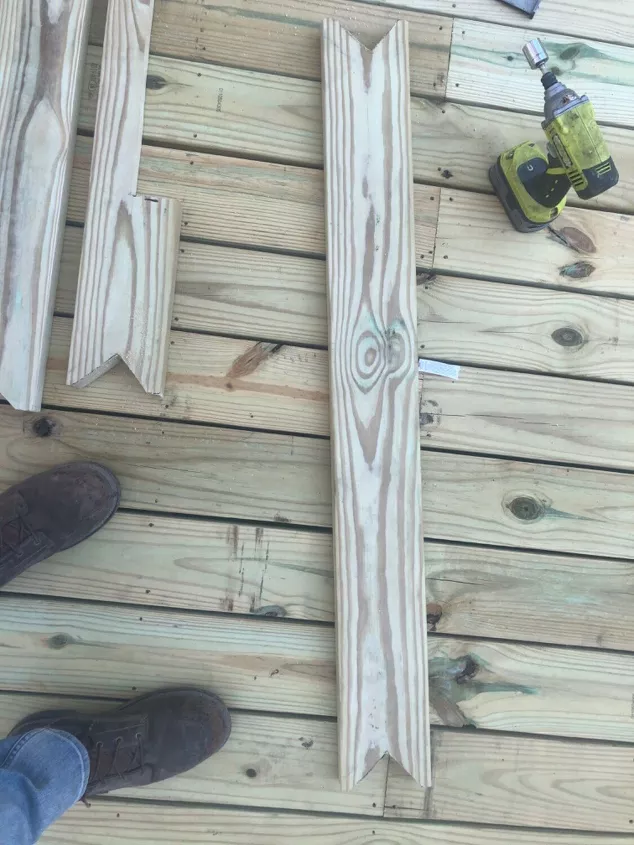
Making the bracesUsing a 2×6 that I cut to the width between the two posts, I placed the 2×6 over the post, carefully aligning it and marking the corners. I placed the 2×6 over the post, carefully aligning it and marking the corners. With a jigsaw, I trimmed each corner, allowing the spacer to slide tightly between each post. I then made two more exactly the same.

Drilling for plumbingWith the first spacer in place, I clamped the chute in place to make sure the inlet was in the center. Knowing the size of the pipe, I drilled a 1 1/2-inch hole.
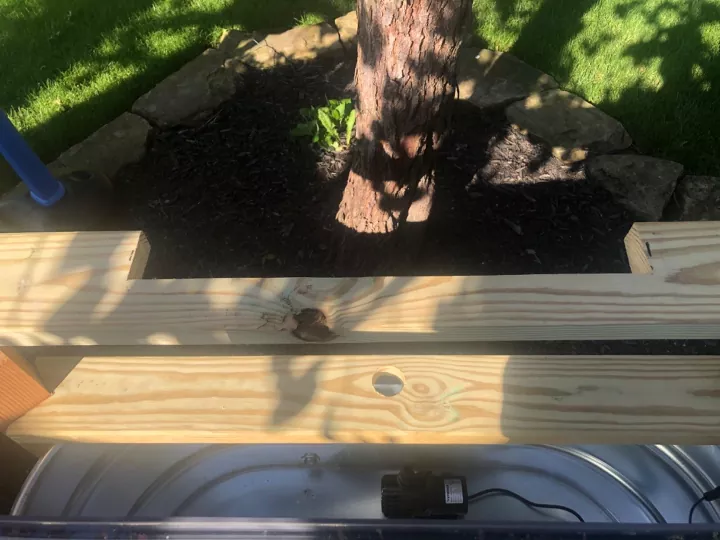
Second spacerWith the first spacer already attached and the hole drilled, I visualized how high I wanted the overflow to be. Too high and there was a risk of splashing, leading to water leaks and leaving the deck constantly wet. Too low and the sound and effect was diminished. I think I chose a height of 16 inches from the top of the channel. I set the second spacer at this height. I then cut the notch for the weir.
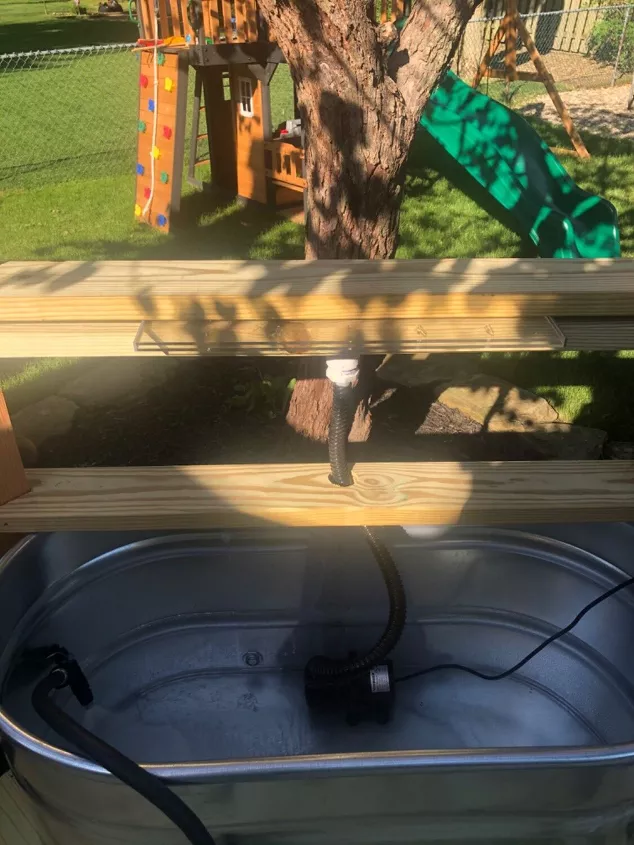
Place the weirPlace the weir in the notch cut out in the previous step, tilting it slightly forward to facilitate water flow. Place the third spacer on top to hold the weir in place by applying a little pressure. Next, I ran the hose through the hole and connected the weir to the pump located at the bottom of the trough.
Once everything was in place and connected, I added some water to the trough and did a test run. This way I made sure I had the right pump to feed the weir. In my case, for the 24-inch weir, a 700-gallon-per-hour pump was sufficient.
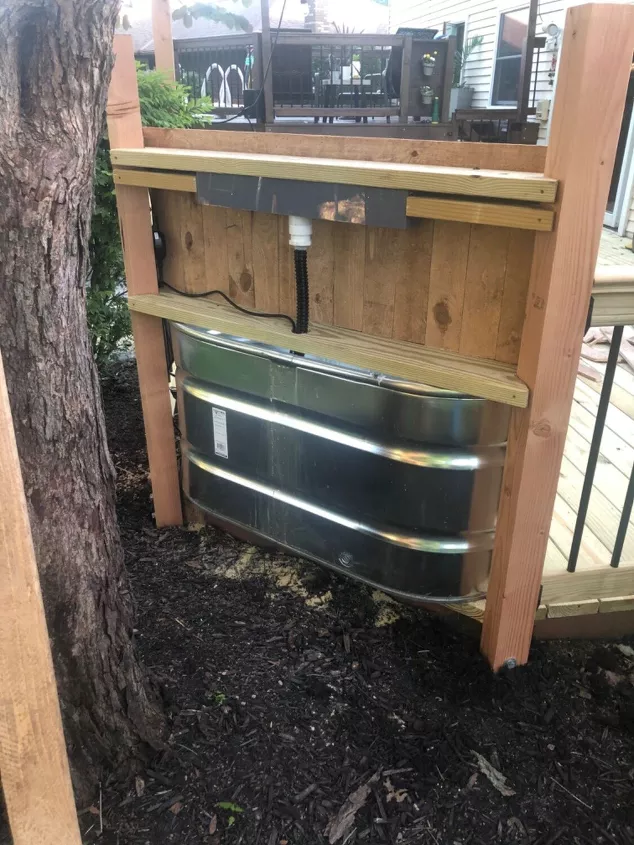
Back viewView from the back to show how simple the plumbing connections are. This will be covered using a galvanized metal for easy removal to drain water of make repairs if needed
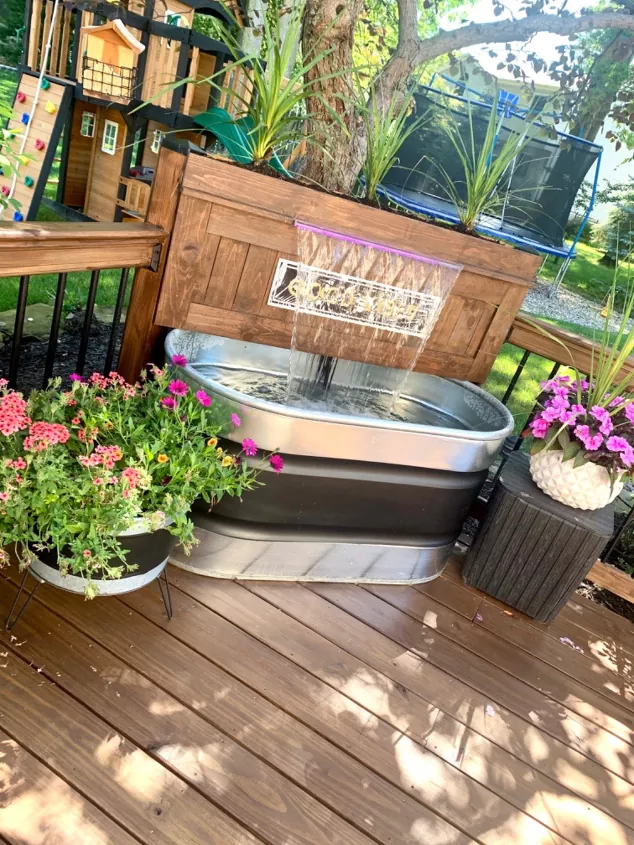
Once everything worked as planned, I used some fence post boards to hide all the plumbing. In doing so, I created a small planter at the top that, while shallow, adds a nice visual touch. The deck and new railings were stained. Electricity was connected to an existing outlet via an external extension cord placed on a timer. ENJOY


