
Enhance Your Bathroom Experience with a Bidet Attachment: Installation Guide
Toilet paper, a bathroom staple, can be both costly and detrimental to septic and plumbing systems, especially if you opt for thicker varieties. If you’re looking to reduce your reliance on toilet paper and improve your bathroom experience, a bidet attachment could be the solution you need. In this comprehensive guide with step-by-step instructions and accompanying photos, we’ll walk you through the process of equipping your toilet with a bidet attachment for a more hygienic and environmentally-friendly approach to personal hygiene.
Introduction: The Bidet Advantage
Toilet paper, while conventional, may not be the most efficient or sustainable option for personal hygiene. Bidets, on the other hand, offer a more hygienic and eco-friendly alternative. However, installing a full-size bidet can be a complex and costly endeavor, often requiring additional plumbing connections and space. This is where bidet attachments come into play.
Bidet attachments are a convenient way to enjoy the benefits of a bidet without the need for extensive renovations. They can be easily installed on any existing toilet, making it a practical and affordable solution for upgrading your bathroom experience. In this guide, we will take you through the entire process of installing a bidet attachment, ensuring that you have all the information you need to get started.

Project Overview
- Working Time: 20 to 45 minutes
- Total Time: 30 minutes to 1 hour
- Skill Level: Suitable for beginners
- Estimated Cost: $30 to $500
Before You Begin
Before delving into the installation process, it’s essential to have a basic understanding of how bidets work. Full-size bidet toilets are equipped with a built-in spray nozzle that extends from the back of the toilet bowl. Users can use this spray function for cleaning, followed by drying with either toilet paper or designated bidet towels. Alternatively, bidet sprayers can be connected to a regular toilet’s water line and function similarly to handheld showerheads.
Bidet toilet seats and bidet attachments strike a balance between these options. They provide the adjustable spray nozzle of a bidet toilet and offer an installation method akin to a bidet sprayer. This means you can use them while seated without having to manipulate a handheld nozzle. Clean water flows from a dedicated water line to the bidet attachment’s spray nozzle, offering a similar experience to a full bidet toilet.
Step 1: Remove the Toilet Seat (Optional)
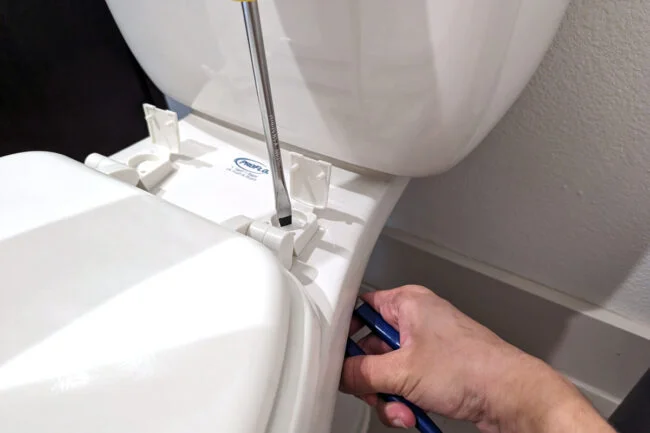
The first step in installing a bidet toilet seat is to assess whether you need to remove the existing toilet seat. Some bidet attachments are designed to work alongside the existing seat, making this step unnecessary. If removal is required, follow the manufacturer’s instructions, and consider using a lubricant like WD-40 to ease the process. You’ll typically need to unscrew the bolts holding the seat in place using a screwdriver and channel lock pliers.
Step 2: Turn off the Toilet Water Supply
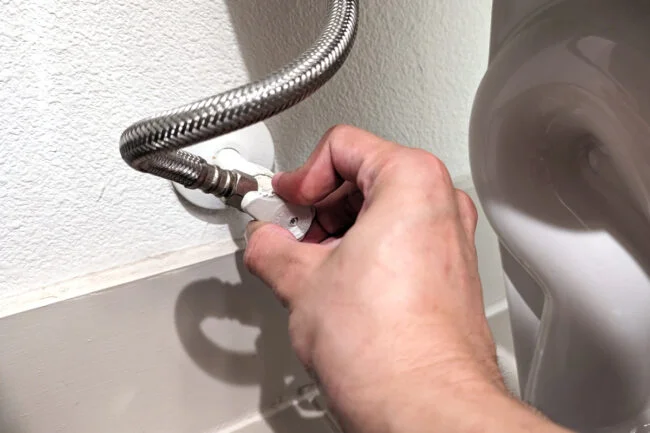
After removing the toilet seat, locate the water supply valve, typically located behind or to the side of the toilet near the base of the tank. Turn off the valve to stop the water supply, and then flush the toilet to drain the tank. You can use a towel to remove any remaining water from inside the tank.
Step 3: Install the T-Valve on the Water Supply Line
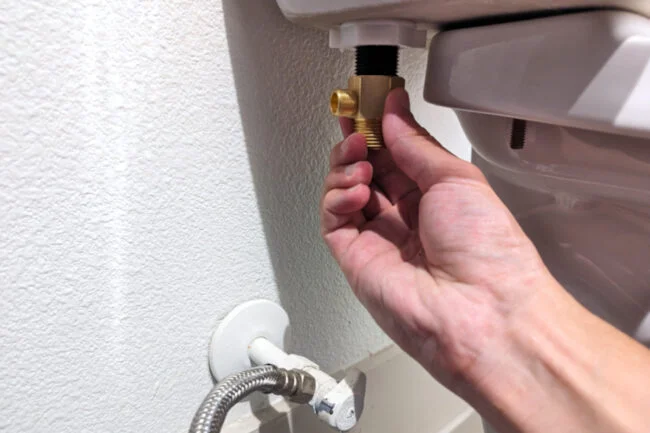
To connect your bidet to the incoming water supply line, you’ll need to install a T-valve. Place a bucket or towel beneath the connection point, disconnect the water supply line from the base of the toilet tank using channel lock pliers, and let any remaining water drain. Attach the T-valve to the base of the toilet tank by hand, then reconnect the water supply line to the T-valve, also hand-tightening it securely. Most bidets connect to the cold water line, while models with both hot and cold options may require additional T-valve connections at a nearby sink.
Step 4: Attach the Bidet
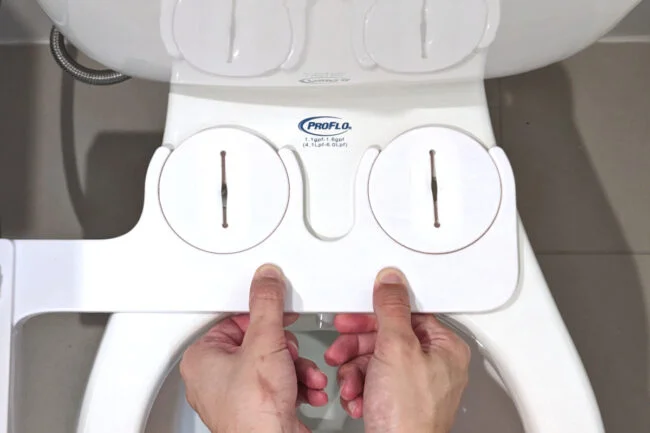
Once the T-valve is connected to the water supply line, you can proceed to attach the bidet. Ensure that you’ve selected a bidet that fits your toilet’s size and shape. Line up the holes in the bidet mounting plate with those in the toilet and secure the mounting plate using bolts. Hand-tighten the nuts on each bolt and then use channel lock pliers to ensure a snug fit. Finally, slide the bidet toilet seat onto the mounting plate until you hear it click into place.
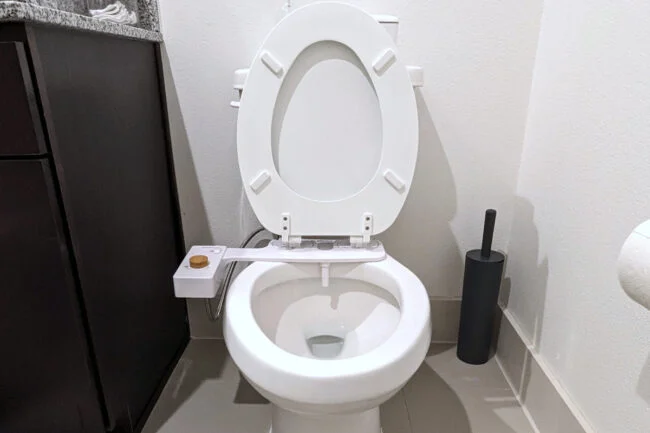
Step 5: Test the Bidet and Check for Leaks
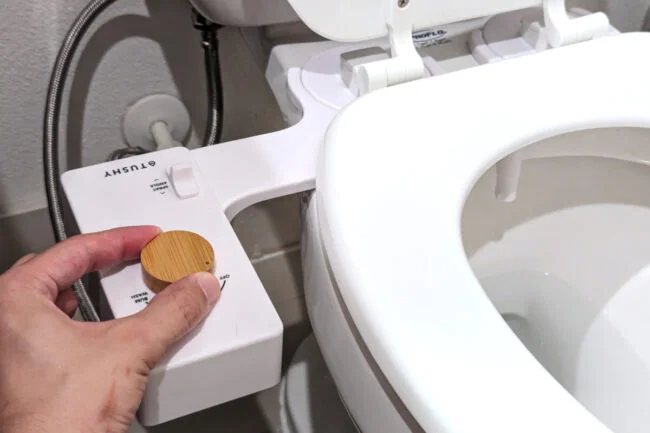
Turn the water supply back on and carefully inspect the connections for any leaks. Once you’re confident in the installation, test the bidet’s features, such as heated seating, warm air drying, and oscillating spray. Some bidets may include additional features like a built-in night light or a gentle-close lid to enhance your bathroom experience. Be sure to consult your bidet’s instructions to ensure you’re making the most of its capabilities.
Conclusion: Elevate Your Bathroom Experience
Bidets have gained popularity worldwide for their superior hygiene and comfort compared to traditional toilet paper. Installing bidet attachments, bidet toilet seats, or bidet sprayers is a straightforward project suitable for DIYers of all skill levels. In addition to the environmental benefits, you can expect long-term savings on toilet paper costs. If your bidet lacks a drying function, consider keeping a small stock of bidet towels on hand for a comprehensive and cost-effective bathroom upgrade.
By following this installation guide, you can equip your toilet with a bidet attachment to enjoy the advantages of a cleaner, more comfortable, and eco-friendly bathroom experience.
images source : Phillip Tinner for Bob Vila – istock photo


