
As a DIYer, every single item can be made into some kind of art or craft. Everyday objects become the source of inspiration to create something wonderful. Even the recognizable Pringles can, after its contents have been eaten, can help you make a special décor piece, which can become a main attraction in any room. You must have tried to undertake some kind of DIY project in your life, like a project in school for Summer break or recently, during the pandemic while everyone is stuck in the house. If making something out of nothing interests you in any way, then you should take a look at the ideas we have curated for you. All of these incredible DIY projects below have just one common item that can be repurposed in many ways: A Pringles can!
Scrunchy stand
Keeping all your hair ties and scrunchies in one place is a big task. If you don’t want to keep losing your scrunchies, or simply make them easier for you to find, then this hack is perfect for you. All you have to do is eat Pringles!
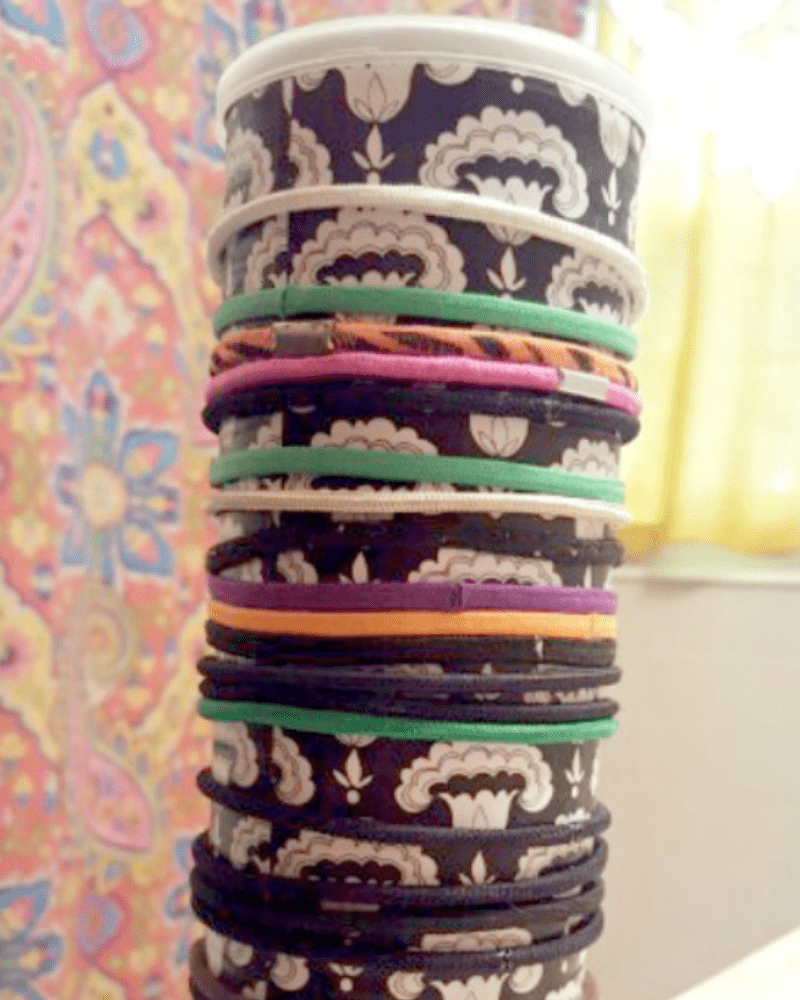
After finishing your snacks, you can clean the Pringles can and decorate it with beautiful design paper or fabric. You can also stick on some jewels too. Cover both the ends of the can with the same paper or use a different one. You can use any of these designs you like to make this your perfect scrunchy stand.
Bracelet organizer
If you love having lots of accessories, then you also need a way to organize them. If you are someone who loves to own a lot of bracelets, then you need to put this on your dresser. It’s a simple bracelet organizing stand made out of a Pringles can. It is super easy to make and is functional for a lot of items.
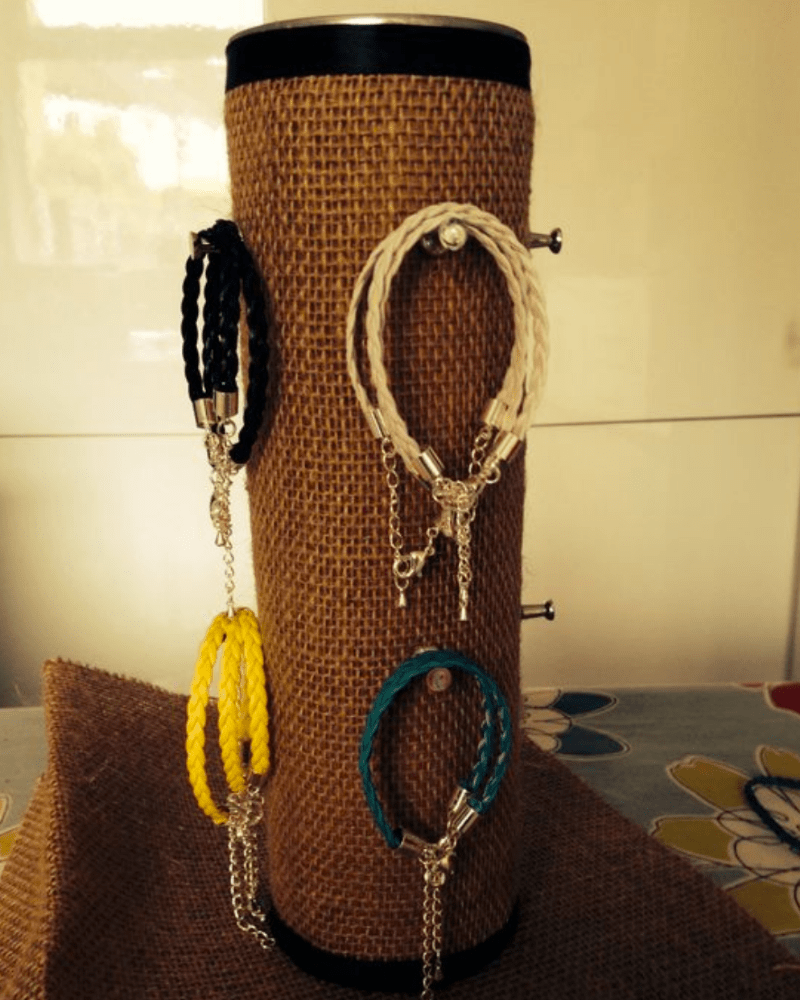
To make it a more ‘boho’ décor piece, you can use fabric like a jute handwoven sheet. You can wrap the sheet around the surface of a Pringles can and wrap the ends of the can with lace or any other fabric. Add screws or pushpins to the can so you can hang your bracelets, and your bracelet organizer is ready to use.
Handmade wind ‘chime’
You can teach kids how to make paper wind ‘chimes’ with just a can of Pringles. This fun activity would be a great bonding experience with kids where they use colorful paper and crafts to make the wind ‘chimes.’ You will also have handmade articles around the house!
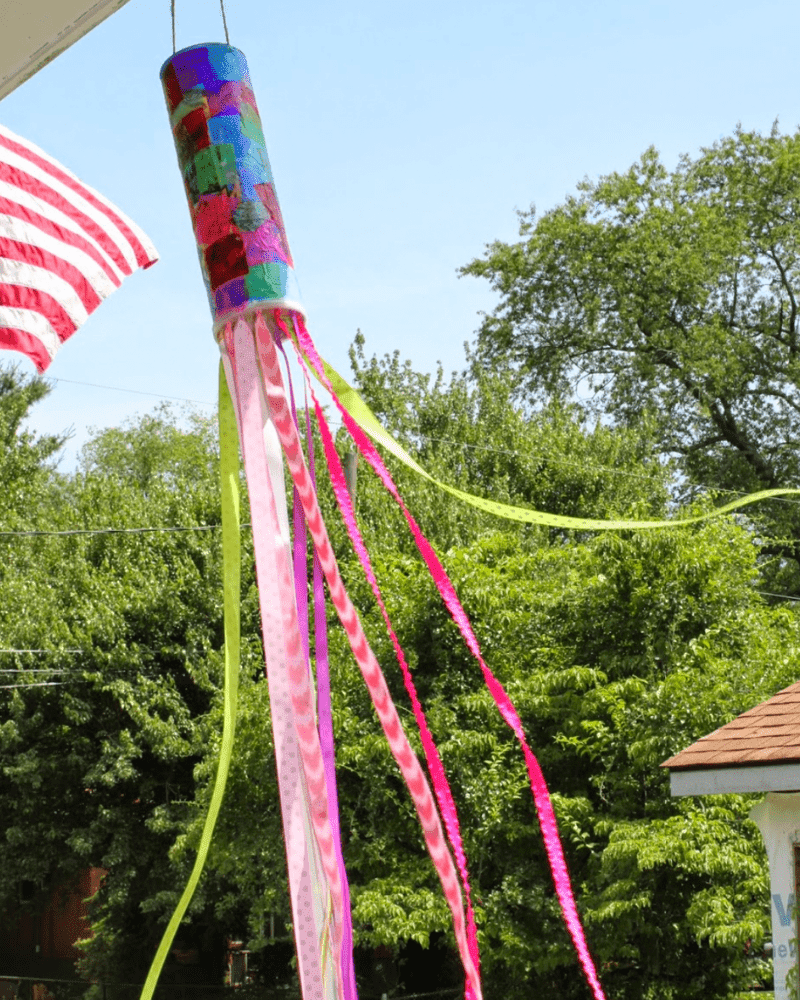
For this project, you would need various craft paper in different colors and paper ribbons. You can stick different kinds of paper in various cuts on the Pringles can. Make holes in one end of the can to put a string for hanging the wind ‘chime.’ Add long paper ribbons with different colors to the tail, and hang the handmade wind chime in your yard.
DIY cotton dispenser
You can make a DIY cotton dispenser to keep your bathroom cabinet clutter-free every time you need to do your skincare routine. You can either use a big Pringles can, or you can use small ones too, depending on your needs. One can is enough to make one dispenser at a time.
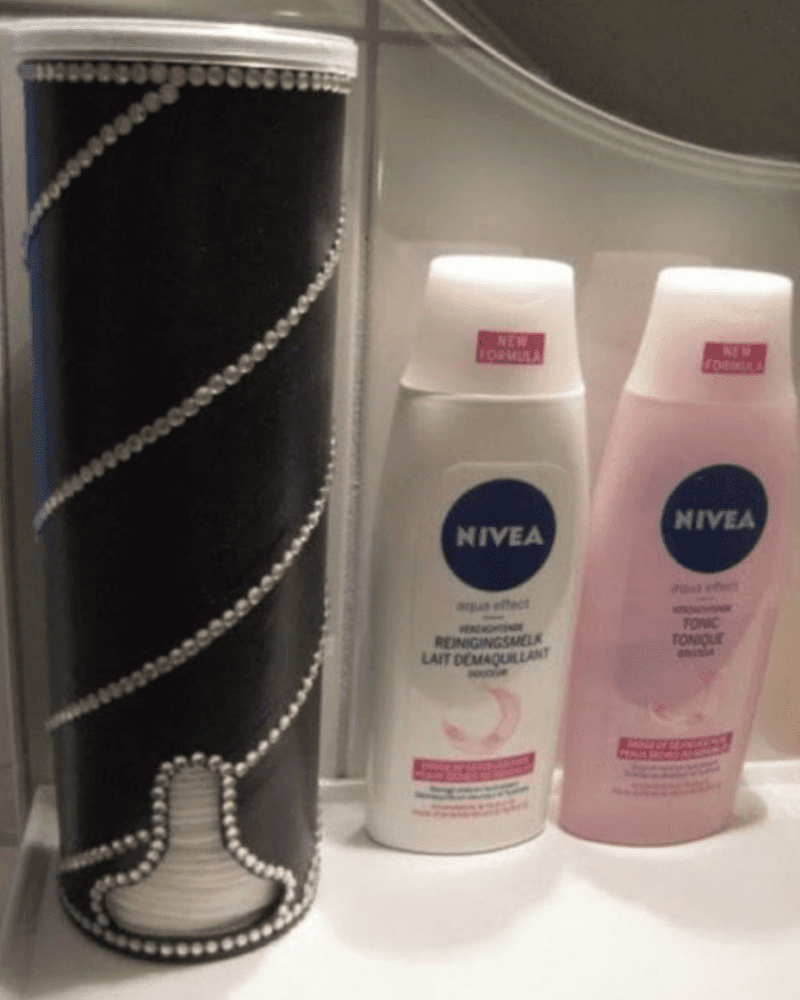
Take a clean Pringles can, and cut the surface on one end of the can. Make the cut as wide as you want, so that you can pull out the cotton pads easily. After the cut is made, cover the can with a decorative fabric or paper, and style it the way you want. Make sure to keep the cut open while decorating the can.
Curling iron stand
Instead of making a mess on your vanity with your beauty appliances and products, make a space for every device. Instead of a mess, you will be left with controlled chaos. Use a Pringles Can, customized with your own taste without splurging on expensive organizing units. Here is how you do it.
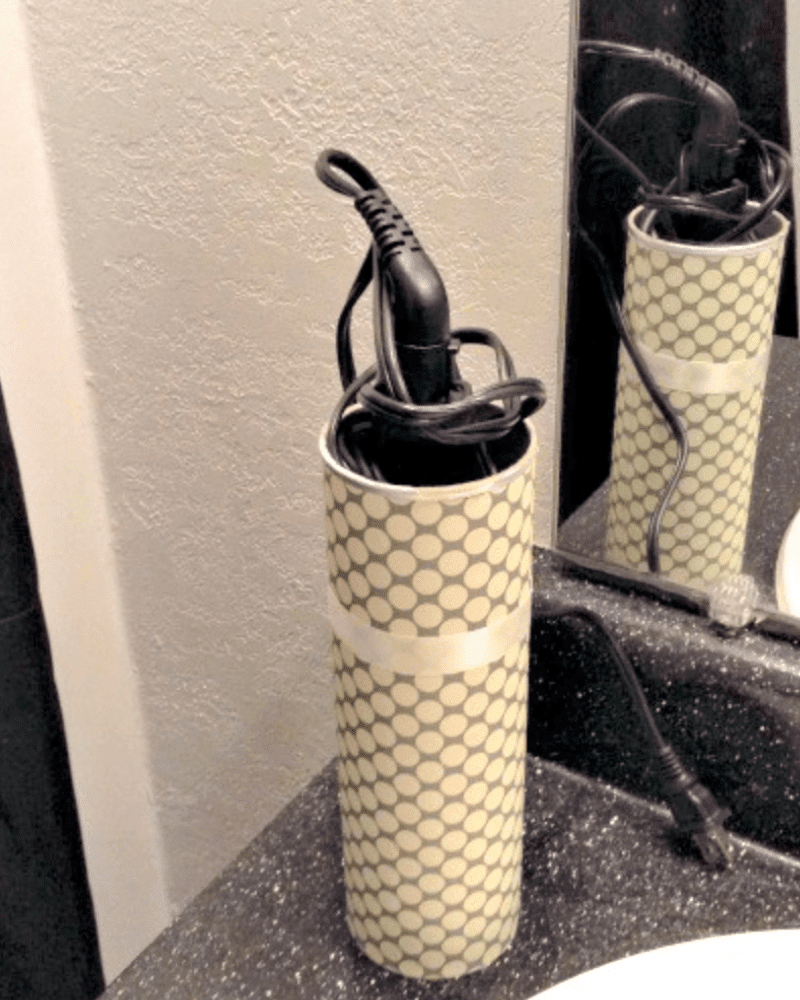
Take an empty Pringles can, and stick your favorite decorating paper, fabric, glitter paper, or craft paper on it. Make patterns, designs, and add stickers of your choice to make it beautiful. Cover one end of the can so that it can stand on its own, and keep one end open. After you’ve customized your can, place your cool curling iron in the can on your dresser.
Easy necklace hanging piece
You can never have a lot of jewelry. The importance of organizing your jewelry should never be underestimated. If all of your pieces were entangled in one another, what would be the use of having so many when your not able to wear them? Therefore, you need a device that can keep your jewelry organized.

You can use a Pringles can for this very purpose. Decorate the can as you see fit, and add hooks or pins near one of the ends of the can. Add them in the circular fashion over the surface so that you cover enough space. Hang your necklaces on the DIY stand to keep them separated and organized.
Homemade candles
If you’re ever wondering which heartfelt gifts you can give your loved ones without having to spend your bank account on them, then we have one for you. You can make candles at home with just 2 things: wax and a Pringles can!
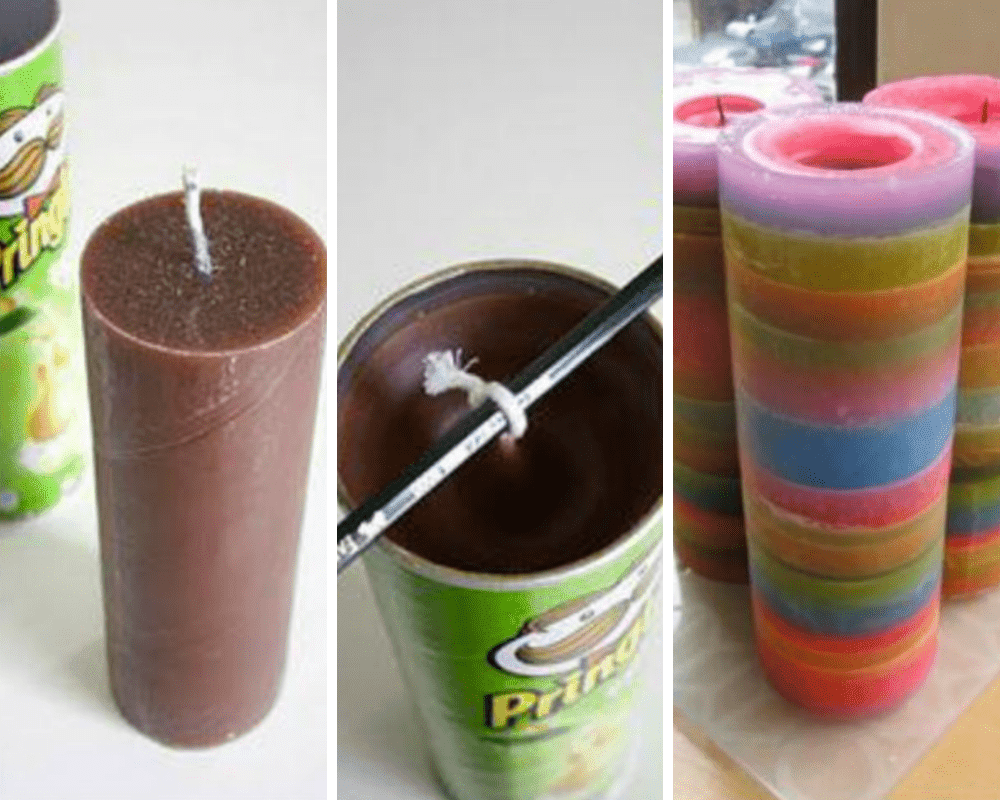
Get a clean Pringles can and add any wax of choice. You can add different colors and aromas of wax to make it a visual and aromatic experience. To add wick on the candles, tie one end of the wick to a pencil or pen, and put it on the can so that the other end of the wick is submerged in the wax. After the wax is set, you can take it out of the can, and your candle is ready to use.
DIY yummy science project
Use the Pringles can to make a DIY solar cooker that can cook hot dogs in the sun. You will need a Pringles can, glue gun, sharp knife, and adult supervision so that you don’t hurt yourself. Make the Pringles solar cooker this Summer, and enjoy hot dogs all summer long.
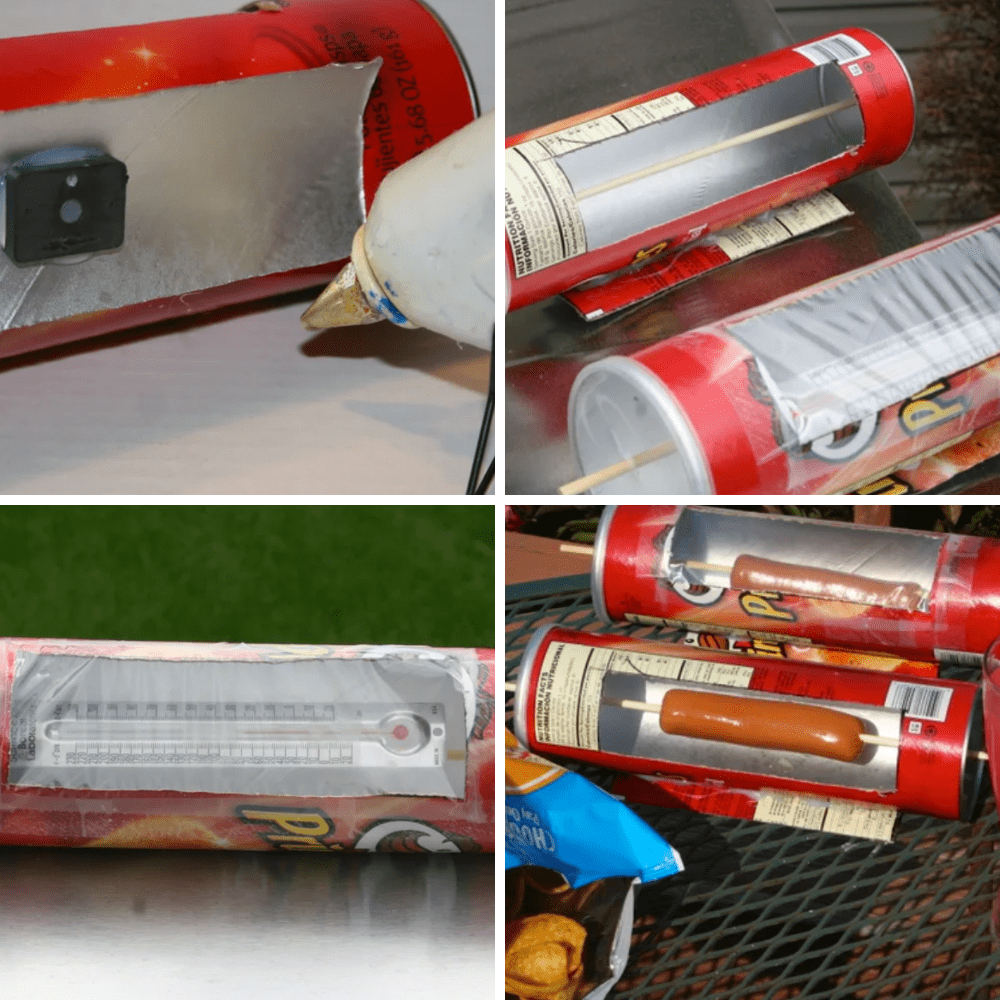
Cut the Pringles can with a sharp knife to make a rectangular window to reveal the inside of the can. Poke a hole on both ends of the can in a straight line. Use a skewer, and put it through both the ends. Wrap the can with plastic, and your oven is ready to be placed in the sun. Put a hot dog on the skewer, place it inside the can, and observe it cook!
Plastic storage can
It’s time we started reusing plastic considering how much we use of it one a daily basis. The challenge here is how to store the plastic that we end up using. We have a trick just for you! Use a Pringles can to store all your plastic bags in one place.
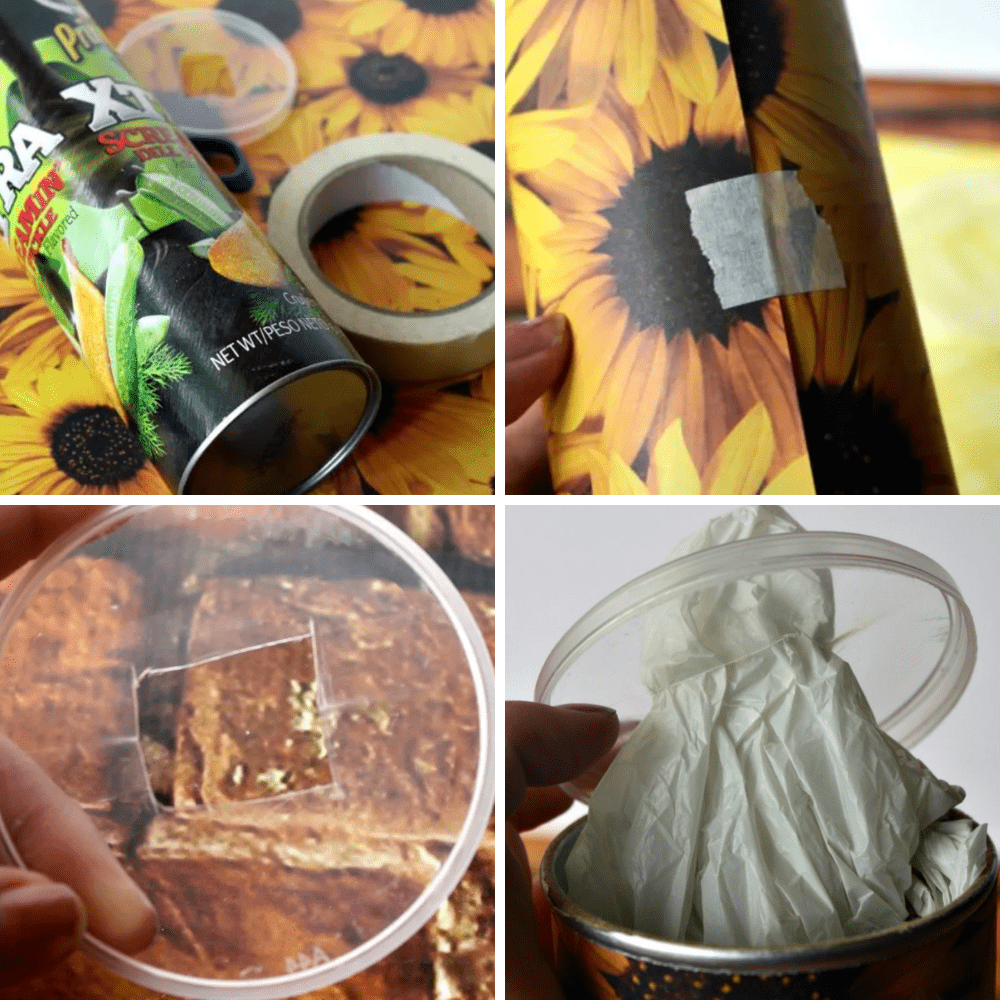
This is a one step project. You just have to make a big square-cut on one of the ends of the Pringles can, and you’re literally done. Decorate the can as you like with wrapping paper, and put all your reusable plastic bags in the can. Close the lid of the can and pull the plastic bag from the open square-cut on the lid!
DIY coffee table
If you love to eat Pringles, then you probably have a lot of empty Pringle cans that can be used in any DIY project. We bet you didn’t think about using these cans to build a table? We will tell you how, and you can use it in your home.
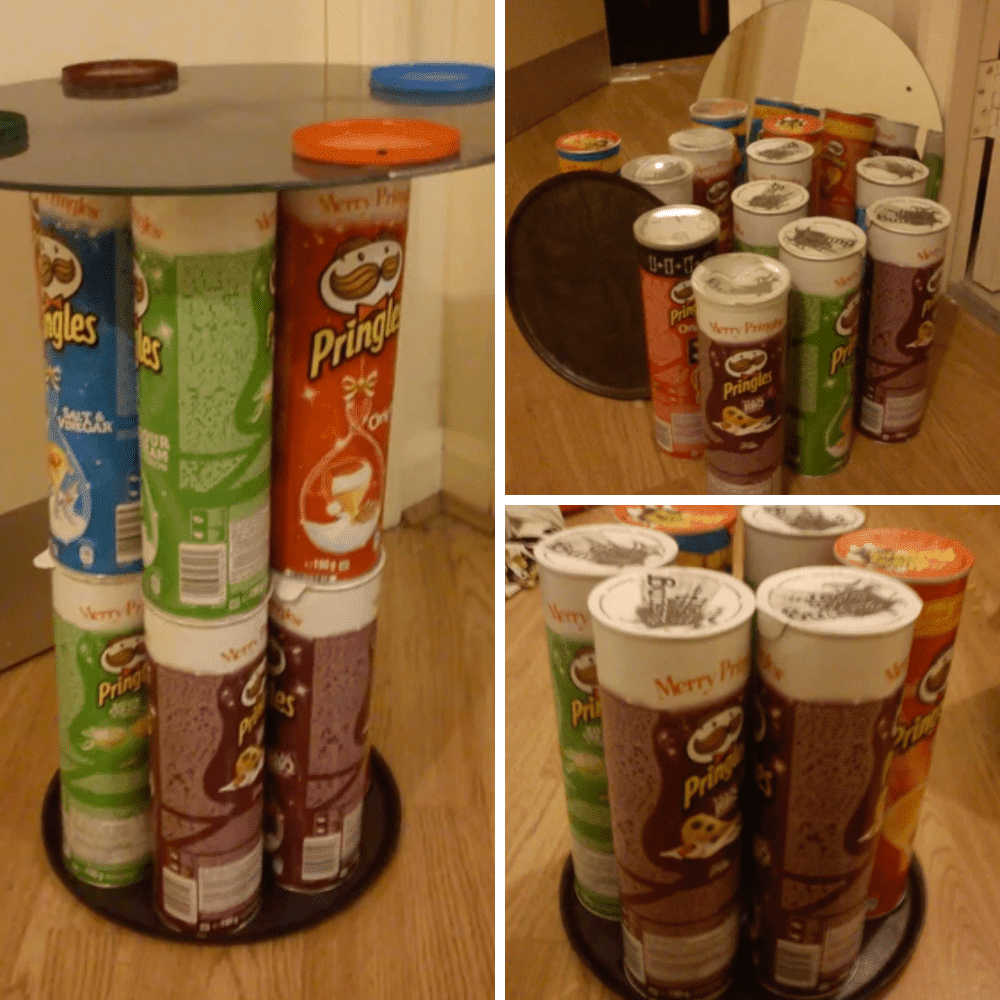
You will need 6-12 Pringle cans for this one. Take an old pizza base, and place 6 Pringles cans on it in circular fashion. Glue them to the base, and then glue another 6 cans on the top of the existing 6 cans. Place an old glass mirror on the top, and glue 4 lids on the surface of the mirror. You can paint the cans in any color you like.
Creative castle can
The castles that come from fairy tales are usually one of a kind and extremely detailed. However, buying those royal castle décor pieces could leave a big hole in your pocket. But you can easily make a castle of your own without spending extra dimes.
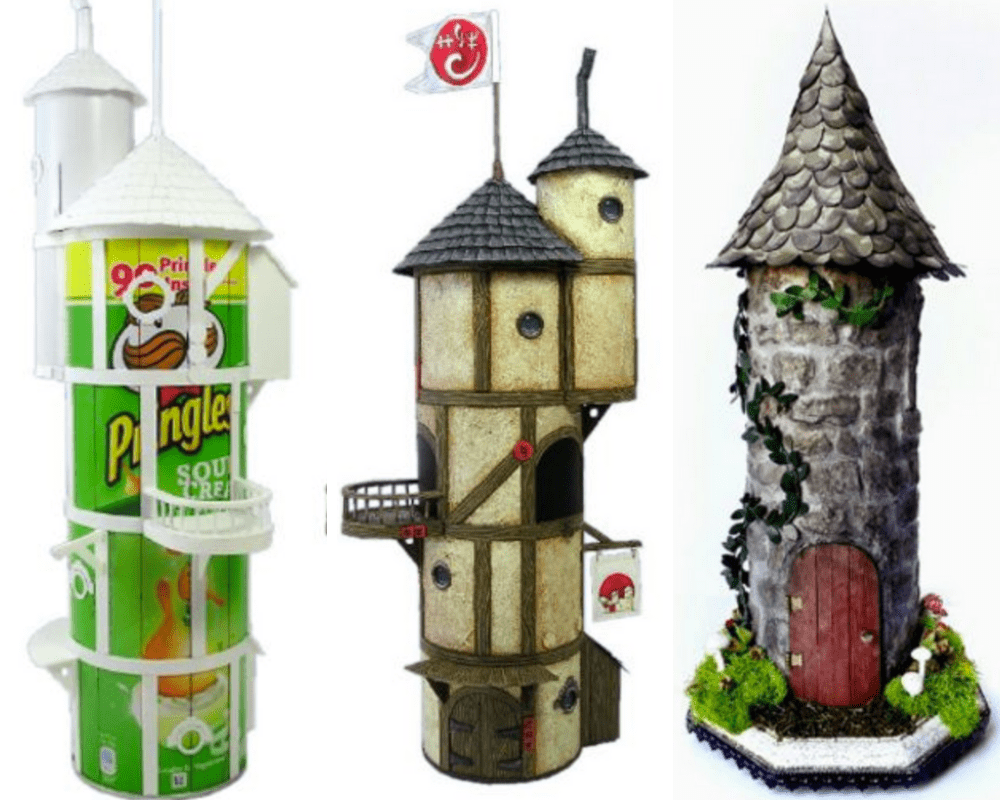
With a Pringles Can of course! You just need material that is easily available at your house. Like an empty can of Pringles and materials from an old doll house. Stick the old doll house accessories on your Pringles can, and paint it all with some oil paint. You’ll have your very castle that did not cost you a fortune.
Christmas cards holder
You can turn the Christmas cards you receive every year into a sweet display for your loved ones. The cards won’t remain lying around collecting dust, and will be displayed for all your guests to enjoy. How, you ask? With the humble Pringles can.
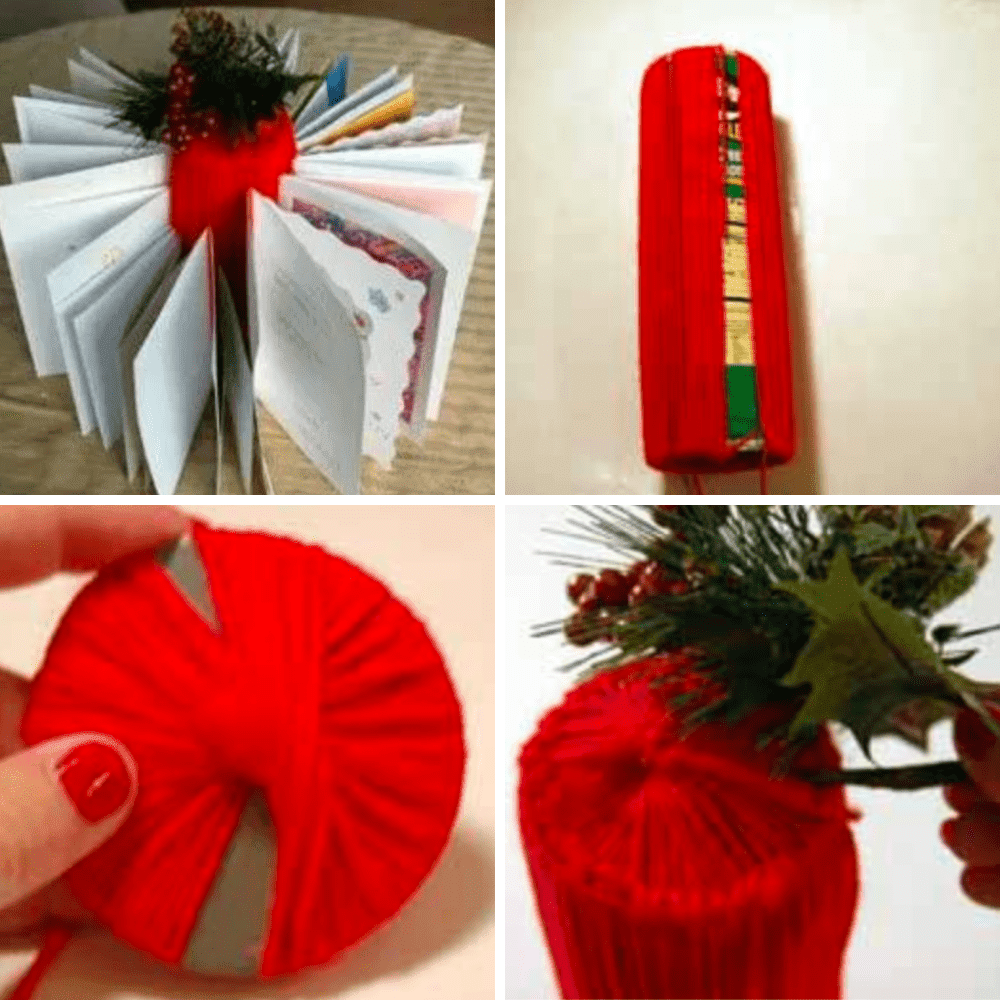
Take a clean and empty Pringles can and use some wool to wrap around the surface of the can. With each strand of wool parallel to the surface of the can, you can insert your cards between the strands, what you will end up with is a 360 degree display of cards.


