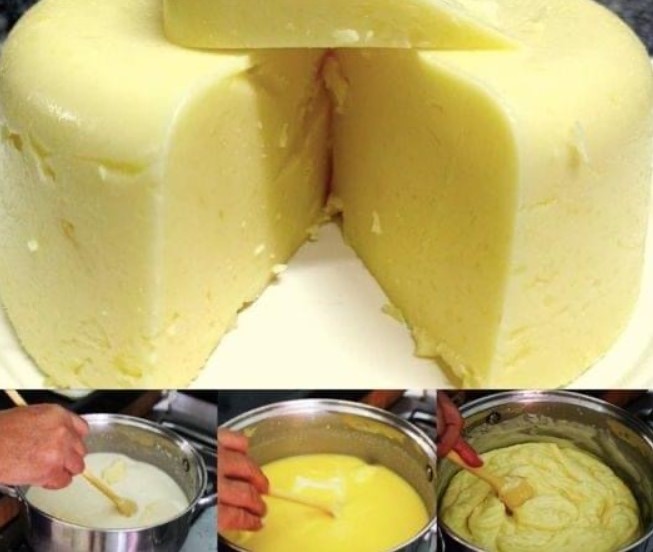
Hello, fellow food enthusiasts! Imagine the joy of spreading fresh, homemade cheese on a slice of warm bread or crumbling it over your favorite salad, knowing that it took just 15 minutes to create. This recipe is a culinary gem for anyone who loves fresh, natural ingredients but doesn’t want to spend hours in the kitchen.
With just a handful of everyday ingredients and a straightforward process, you’ll be amazed at how simple it is to craft your very own cheese at home. Say goodbye to store-bought and hello to a fresh, creamy delight that’s as satisfying to make as it is to eat.
Why Make Your Own Cheese? Why settle for pre-packaged cheese when you can create a fresher, more flavorful version right in your kitchen? Homemade cheese offers a world of benefits. You’re in control of the ingredients, ensuring no unnecessary additives or preservatives. The freshness and flavor are unparalleled, and the satisfaction of making something from scratch is unmatched. Plus, the process is quick and accessible, even for those who are new to cheese-making. In just 15 minutes, you can have a batch of creamy, delicious cheese that will elevate any dish it touches.
Ingredients:
- 1 liter of whole milk: The key to a rich, creamy cheese lies in the quality of the milk. Choose a high-quality whole milk for the best results.
- 3 tablespoons of lemon juice or white vinegar: These acids work their magic to curdle the milk, creating the foundation of your cheese.
- Salt to taste: A little salt enhances the natural flavors of the cheese, but feel free to experiment with different seasonings.
- A cheesecloth or fine strainer: Essential for separating the curds from the whey, this tool helps you achieve a smooth, creamy cheese.
- A large pot: You’ll need a good-sized pot to heat the milk evenly and prevent it from scorching.
Instructions:
- Heat the Milk: Begin by pouring the whole milk into a large pot and placing it on the stove over medium heat. Stir the milk occasionally as it heats to prevent it from sticking to the bottom of the pot. You want to bring the milk to just below boiling – when it’s hot and steaming but not bubbling over. This gradual heating helps maintain the milk’s integrity, ensuring a smooth curdling process.
- Add Lemon Juice or Vinegar: As the milk reaches its optimal temperature, it’s time to add the acidic agent. Slowly pour in the lemon juice or white vinegar while gently stirring the milk. Almost immediately, you’ll notice the milk begin to separate into curds (the solid part) and whey (the liquid part). This reaction is the magic of cheese-making in action! The curds are the beginnings of your fresh cheese.
- Let it Sit: After adding the lemon juice or vinegar, turn off the heat and let the pot sit undisturbed for about 10 minutes. This resting period allows the curds to fully develop and separate from the whey. During this time, the curds will become firmer, making them easier to handle during the straining process.
- Strain the Curds: Line a colander with cheesecloth or use a fine strainer and carefully pour the curdled milk mixture through it. The whey will drain away, leaving the curds in the cheesecloth. These curds are your fresh cheese! Gather the cheesecloth around the curds and gently squeeze to remove any excess liquid. Be sure not to press too hard, as you want to retain some moisture for a creamy consistency.
- Season Your Cheese: Transfer the strained curds to a bowl and sprinkle with a pinch of salt. This is your chance to get creative – you can also add herbs, spices, or even a bit of garlic or pepper to customize the flavor. Mix the seasonings into the cheese gently, ensuring an even distribution without breaking up the curds too much.
- Press and Cool: If you prefer a firmer cheese, you can press the curds by placing a weight on top of them while they’re still in the cheesecloth. This will squeeze out more whey and result in a denser cheese. Once pressed, allow the cheese to cool to room temperature. You can use it immediately or store it in an airtight container in the refrigerator for up to a week.
Conclusion:
And there you have it – in just 15 minutes, you’ve created a delicious, homemade fresh cheese that’s ready to enjoy. Whether you spread it on toast, use it in your favorite recipes, or simply savor it on its own, this cheese is a testament to the joy of making food from scratch.
The simplicity of the process, combined with the rich, creamy taste of the final product, makes this recipe a must-try for anyone who loves good food. So, the next time you’re looking for a quick and easy kitchen project, remember this homemade cheese recipe – it’s the perfect blend of simplicity, satisfaction, and flavor.
Happy cheese-making!
Source of the picture : Barbara O’Neill Lectures


