
Millions of bees have died all over the world in the last couple of years because of the colony collapse disorder, and until this day, many beehives are still suffering from the phenomenon that causes a massive threat on agriculture in particular and the environment in general.
This phenomenon mainly because of the use of harmful synthetic pesticides, habitat loss, diseases, and climate change. These factors can cause an over-stress on young bees who travel long distances to get some food because they are not as experienced in navigation and as strong as adult bees.
If you want to help the bees and save the planet at the same time, make sure to make this DIY beehive.
Materials needed
- A box of 1” wood screws
- A can of wood stain
- 12 big mouth quart canning jars (for honeycomb)
- Bottom beehive kit
- 16″ X 20″ rectangle of thick plywood
- Two 1″ X 1″ X 18” pieces of wood for the front and back of the top frame
- Two 2″ X 12″ X 18” pieces of wood for the front and the back of the hive
- Two 2” X 12” X 22” pieces of wood for the sides of the hive
- Two 1″ X 1″ X 22” pieces of wood for the sides of the top frame
Directions
Start by measuring and marking 12 3 1/2” in the 16” X 20” plywood
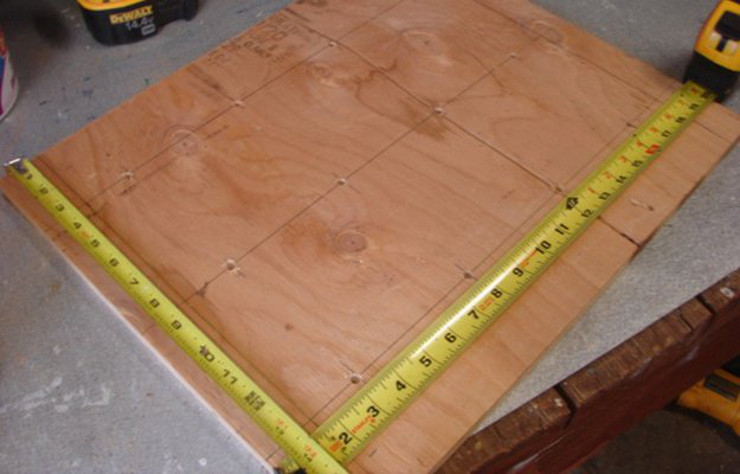
Drill the holes using a hole saw. First, drill a single hole and test the opening with a single to make sure that it fits just right because you want the bees to get in and out through the hive’s base to avoid an ant magnet mess. You can also insert shims to be sure that the jars are secured.
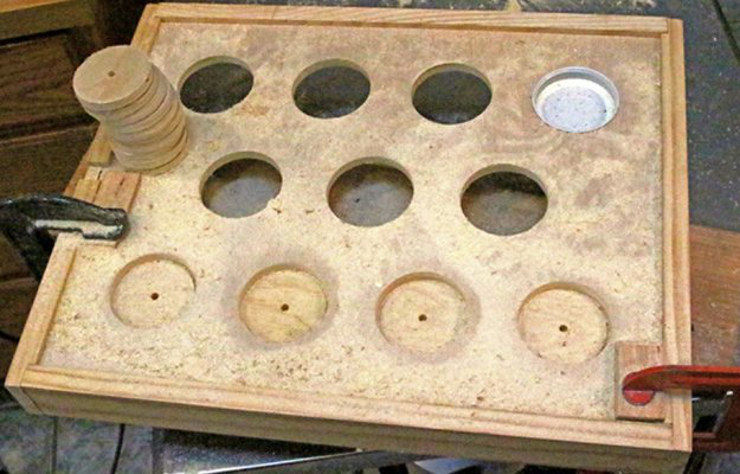
Put the piece of the plywood with the holes on top of the bottom beehive kit, then screw the front, back, and side panels around the pre-made kit.
CLICK NEXT PAGE BELOW TO CONTINUE READING …


