
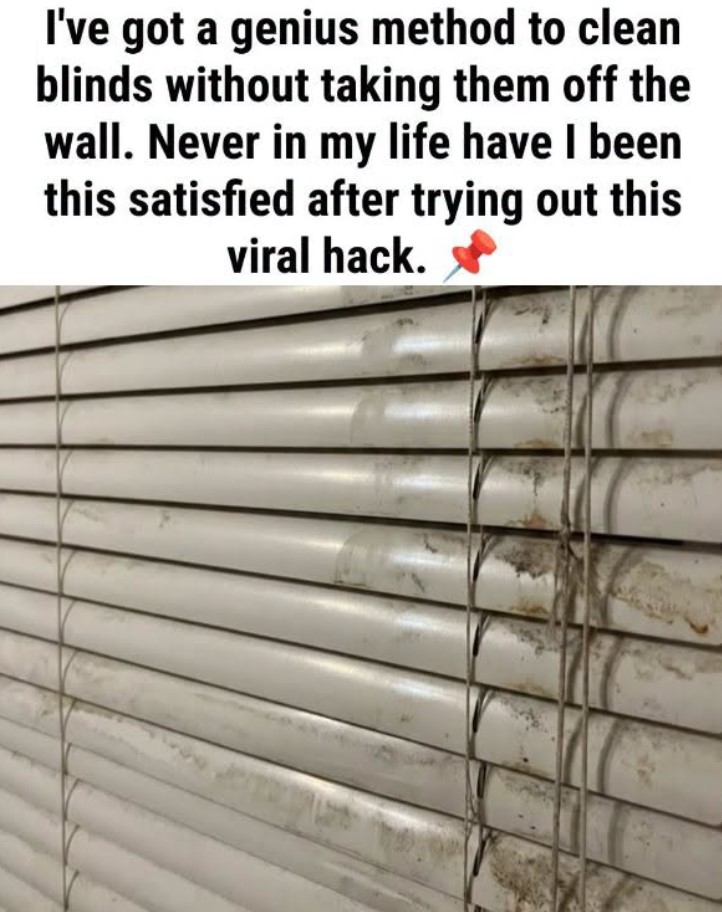
Cleaning window blinds is one of those household chores that many people put off for as long as possible. Although blinds help control sunlight, provide privacy, and make a room look more attractive, they also collect dust, pet hair, fingerprints, and everyday dirt. Over time, even blinds that looked clean when they were installed can become dull and dusty.
The biggest challenge is that blinds have so many individual slats or fabric surfaces that cleaning them can feel like a never-ending task. Taking them down, washing them separately, and putting them back up can make the job even more time-consuming.
Fortunately, you usually do not need to remove your blinds from the wall to get them looking fresh again. With a few simple household supplies and the right cleaning technique, you can remove accumulated dust and deal with light stains while leaving the blinds in place.
The key is to choose a method that suits the material of your blinds. Wooden blinds, faux-wood blinds, aluminum slats, vinyl blinds, and fabric shades all have different cleaning requirements. Using too much water or the wrong cleaning product can cause unnecessary damage.
In this guide, you will learn how to clean your blinds without taking them off the wall, which supplies to prepare, how to remove stubborn dirt, and how to keep your window coverings cleaner for longer.
What You’ll Need
Before starting, gather the supplies you may need. Most of these items are inexpensive and are probably already available in your home.
- A microfiber cloth for removing dust and wiping surfaces
- A vacuum cleaner with a soft brush attachment
- A clean, dry microfiber duster or soft paintbrush
- A small bowl of lukewarm water
- A few drops of mild dish soap for washable surfaces
- A second clean cloth for removing soap residue
- A dry towel for drying the blinds
- A sturdy step stool, if needed to reach higher areas safely
You do not necessarily need every item on this list. If your blinds have only a light layer of dust, a microfiber cloth or a vacuum attachment may be enough.
For blinds in the kitchen, you may also need a little extra time to remove greasy residue. However, avoid abrasive sponges, harsh chemicals, and excessive moisture unless the manufacturer’s care instructions specifically allow them.
Step 1: Close the Blinds Before Cleaning
Start by lowering your blinds and adjusting the slats so they are closed in one direction. This creates a more accessible surface and makes it easier to remove dust without having to handle every slat separately at first.
For horizontal blinds, tilt the slats until they form a relatively flat surface. You can then clean one side before turning the slats in the opposite direction to reach the other side.
If you have vertical blinds, rotate the vanes so they are aligned and easy to reach. Work from the top toward the bottom, supporting each vane gently as you clean it.
Before you begin, move nearby decorations, furniture, or other items that could collect falling dust. You can also place an old towel beneath the window to catch loose dirt.
Taking a few minutes to prepare the area will make the entire cleaning process easier and reduce the amount of cleanup afterward.
Step 2: Remove Loose Dust
Always begin with dry cleaning before introducing water or cleaning solutions. When dust becomes wet, it can turn into a gray residue that spreads across the surface instead of coming away easily.
For lightly dusty blinds, use a microfiber duster or a clean microfiber cloth. Move gently across the slats, starting at the top and working downward.
If your blinds have accumulated more dust, a vacuum cleaner with a soft brush attachment can be particularly useful. Use a low suction setting and guide the attachment carefully over the slats without bending them.
For narrow spaces and corners, a soft paintbrush can help loosen dust that a larger cloth cannot reach.
Pay attention to the edges, the bottom rail, and the areas near the window frame. These places are often overlooked, even though dust can accumulate there just as easily as on the main surfaces.
Once you have cleaned one side, adjust the slats in the opposite direction and repeat the process. This helps remove dust from both sides without taking the blinds down.
Step 3: Prepare a Gentle Cleaning Solution
If your blinds have fingerprints, light stains, or sticky residue, dry dusting may not be enough. In that case, prepare a simple cleaning solution using lukewarm water and a few drops of mild dish soap.
Mix the solution in a small bowl until the soap is evenly distributed. You do not need to create a thick layer of foam or use a large quantity of detergent.
Before cleaning the entire blind, test the solution on a small, inconspicuous area. This is especially important if the blinds are painted, colored, coated, or made from a delicate material.
Use a clean microfiber cloth and wring it out thoroughly. The cloth should be slightly damp rather than dripping wet.
Avoid spraying cleaning solution directly onto the blinds, particularly near cords, the headrail, electrical components, or motorized mechanisms. Applying the solution to the cloth gives you better control over the amount of moisture used.
Remember that real wood blinds and many fabric shades require extra care. Always follow the manufacturer’s instructions before using water or detergent on these materials.
Step 4: Wipe Each Slat Carefully
Once the loose dust has been removed and your cleaning cloth is ready, begin wiping the blinds.
For horizontal blinds, work from the top slat downward. Hold each slat gently with one hand, if necessary, while wiping it with the other. This helps prevent bending or putting too much pressure on the material.
Move the cloth along the length of each slat, paying attention to areas where fingerprints or dirt are visible. Rinse the cloth frequently so that you do not transfer dirt from one section to another.
If your blinds have a buildup of kitchen grease, you may need to repeat the process with a fresh, lightly dampened cloth. Avoid scrubbing aggressively, as this can damage the finish or leave scratches.
For vertical blinds, wipe each vane gently from top to bottom. Support the material as you work and avoid pulling on the attachments or cords.
If you have a pair of clean microfiber gloves, you can wear them to make handling the slats easier. A folded microfiber cloth or an old, clean microfiber sock worn over your hand can also help you reach narrow surfaces.
Take your time rather than trying to clean every slat in a single quick movement. Gentle, consistent wiping usually produces a better result than excessive pressure.
Step 5: Remove Any Soap Residue
After cleaning the slats, check whether any detergent or residue remains on the surface.
Take a second clean cloth, dampen it with plain water, and wring it out thoroughly. Wipe the cleaned surfaces lightly to remove any remaining soap.
This step is particularly useful when cleaning washable vinyl, faux-wood, or aluminum blinds. Soap residue can attract dirt or leave visible streaks if it is not removed properly.
For real wood blinds, avoid this step unless the manufacturer’s care instructions permit damp wiping. Use a suitable wood-safe cleaning method instead.
Do not allow water to collect around the edges, cords, or moving parts. Excess moisture can damage certain materials and interfere with the blind’s operation.
Step 6: Dry the Blinds Thoroughly
Drying is an important part of the cleaning process. Leaving moisture on certain blinds can cause water marks, damage the finish, or contribute to warping.
Use a clean, dry microfiber cloth to wipe away remaining moisture from washable slats. Work carefully and check the edges, corners, and bottom rail.
For real wood blinds, dry any permitted damp areas immediately. Never leave wooden slats wet or allow water to soak into the material.
Fabric blinds and shades should be treated according to their care instructions. If spot cleaning is allowed, use as little moisture as possible and allow the fabric to dry completely before raising or folding it.
Keep the blinds in a position that allows air to circulate while they dry, provided this is appropriate for their design. Avoid operating motorized blinds while moisture remains near electrical components.
Once everything is dry, open and close the blinds gently to make sure they move as expected.
Step 7: Clean the Headrail, Cords, and Surrounding Area
After cleaning the slats or vanes, take a moment to inspect the rest of the window covering.
The headrail at the top of the blinds can collect dust, especially along its upper edge and in the corners. Use a dry microfiber cloth or a soft brush to remove loose dirt without pushing it into the mechanism.
Wipe the bottom rail and other accessible surfaces gently. If your blinds have cords, clean them only in accordance with the manufacturer’s recommendations, avoiding excessive moisture or strong chemicals.
Next, clean the windowsill and the surrounding window frame. Dust often falls onto these surfaces during the cleaning process, so wiping them afterward prevents loose dirt from returning to the blinds.
If you notice broken slats, frayed cords, loose brackets, or a mechanism that no longer operates properly, address those problems separately rather than forcing the blinds to move.
How to Clean Different Types of Blinds
Not every blind should be cleaned in exactly the same way. Choosing the correct method helps prevent damage and keeps your window coverings looking their best.
Wooden Blinds
Real wood blinds require particular care because excessive moisture can cause swelling, warping, or damage to the finish.
For regular maintenance, use a dry microfiber cloth, a soft duster, or a vacuum cleaner with a soft brush attachment.
If a stain needs attention, check the manufacturer’s instructions and use a wood-safe product if recommended. Avoid soaking the slats or using a wet cloth unless the finish specifically permits it.
Dry dusting regularly is generally the safest approach for real wood blinds.
Faux-Wood Blinds
Faux-wood blinds are often made from materials designed to resemble natural wood. Depending on the manufacturer’s instructions, they may tolerate gentle wiping with a slightly damp microfiber cloth.
Start by removing loose dust, then use a small amount of mild soapy water if needed. Wipe away any residue and dry the surface.
Do not assume every faux-wood product can tolerate the same cleaning agents. Always test an inconspicuous area first.
Aluminum and Vinyl Blinds
Aluminum and washable vinyl blinds are generally suitable for careful wiping with a damp cloth.
After removing loose dust, clean the slats with a mild soap solution if necessary. Avoid abrasive pads that could scratch the surface or remove its finish.
Aluminum slats can bend easily, so support them while wiping. Use minimal water around the headrail and operating mechanisms.
Fabric Blinds and Shades
Fabric blinds need a gentler approach because excessive moisture can leave marks, damage the material, or cause shrinkage.
Begin with a vacuum cleaner using a suitable soft attachment. Use low suction and avoid pulling on the fabric.
For small marks, spot-clean only if the manufacturer’s care instructions permit it. Test the cleaning method in a hidden area and avoid rubbing aggressively.
Cellular shades, blackout shades, and other specialized window coverings may have specific restrictions. When in doubt, follow the manufacturer’s cleaning guide rather than applying a general cleaning solution.
Tips for Keeping Your Blinds Cleaner for Longer
Once your blinds are clean, a few simple habits can make the next cleaning session much easier.
Dust regularly. A quick dusting every week or two can prevent a thick layer of dirt from building up. Adjust the frequency according to the amount of dust in your home.
Clean from top to bottom. This allows falling dust to land on surfaces you have not cleaned yet, reducing the need to repeat your work.
Use the right tools. Microfiber cloths, soft dusters, and suitable vacuum attachments can remove dirt without scratching or bending delicate surfaces.
Pay attention to kitchen blinds. Cooking can leave grease and airborne residue on nearby window coverings. Light, regular cleaning can help prevent this buildup from becoming difficult to remove.
Keep windowsills clean. Dust on the sill can easily be transferred back onto the bottom slats, especially when windows are opened or closed.
Avoid excessive moisture. Using too much water can damage wood, affect fabric, and allow moisture to reach the blind’s operating mechanism.
Check the manufacturer’s instructions. A few minutes spent checking the recommended cleaning method can help you avoid damaging an expensive window covering.
Common Mistakes to Avoid When Cleaning Blinds
Even a simple cleaning task can cause problems if the wrong technique is used.
One common mistake is wiping dusty blinds with a wet cloth before removing loose dirt. This can spread dust and create streaks, making the job more difficult.
Another mistake is using too much pressure. Thin aluminum slats and delicate fabric vanes can bend, stretch, or become misshapen if handled roughly.
Using strong chemical cleaners without checking compatibility can also damage paint, protective coatings, and fabric finishes. Avoid mixing cleaning products, and never combine bleach with vinegar or other incompatible cleaners.
Finally, do not climb on unstable chairs or furniture to reach high windows. Use a sturdy step stool placed on a level surface, and ask for assistance if the blinds are too high to reach safely.
A careful approach protects both your blinds and your safety.
Conclusion :
Cleaning your blinds does not have to involve taking them off the wall, washing them separately, and spending extra time reinstalling them. With a microfiber cloth, a soft brush attachment, and a gentle cleaning solution when appropriate, you can remove everyday dust and light dirt while leaving most blinds in place.
The most important steps are to remove loose dust first, clean each surface carefully, use only the amount of moisture the material can tolerate, and dry washable surfaces thoroughly. Paying attention to the differences between wood, faux wood, aluminum, vinyl, and fabric also helps prevent avoidable damage.
Regular maintenance makes a noticeable difference. Instead of waiting until your blinds become heavily soiled, add a quick dusting to your normal cleaning routine. This can reduce buildup, make future cleaning easier, and help your window coverings maintain their appearance.
With the right tools and a little patience, you can keep your blinds looking fresh without turning a simple household chore into a much bigger project.