
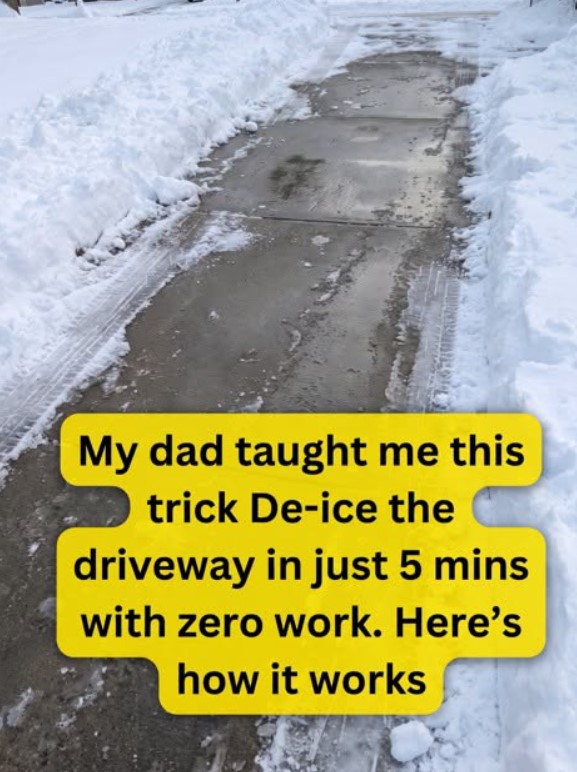
Winter weather can transform an ordinary walkway into a slippery, dangerous surface in just a few hours. A driveway that seemed perfectly safe the previous evening may be covered in ice by morning. Front steps, garden paths, sidewalks, and entrances can become hazardous, especially when freezing rain or overnight temperatures create a thin layer of nearly invisible ice.
Fortunately, you don’t have to wait for warmer weather to make your outdoor spaces safer. With the right preparation, suitable de-icing materials, and a few simple precautions, you can reduce ice buildup and make it easier for your family, visitors, and delivery workers to move around your property.
However, removing ice involves more than spreading salt across the ground. Using too much de-icer can damage concrete, affect nearby plants, contaminate runoff, and irritate pets’ paws. Some products also become less effective when temperatures drop significantly.
The safest approach is to remove snow promptly, choose a de-icing product suited to your walkway and local weather, apply it carefully, and check the surface regularly. Here is how to de-ice your walkways effectively while protecting your property, your pets, and the surrounding environment.
Why De-Icing Your Walkways Matters
Snow and ice are more than a winter inconvenience. They can create serious slipping hazards around entrances, steps, driveways, and garden paths.
One of the biggest problems is that ice is not always easy to see. A walkway may look wet when it is actually covered with a thin, transparent layer of ice. This is particularly common in shaded areas, near downspouts, beneath dripping gutters, and on surfaces where melting snow refreezes overnight.
Even a small icy patch can cause someone to lose their balance. Older adults, children, people with mobility difficulties, and anyone carrying groceries or other items may be especially vulnerable to falls.
Regular snow removal and appropriate de-icing can improve traction and reduce the risk of accidents. However, no product can guarantee that a surface will remain completely ice-free in every weather condition. Checking the walkway regularly and walking carefully are still essential.
The UK government’s guidance on clearing snow and ice recommends removing snow early, using salt where appropriate, and paying particular attention to steps and steep pathways. <Cite refs={[“turn951710search0″,”turn951710search10”]}/>
Step 1: Remove Snow Before It Turns Into Ice
One of the most effective ways to make winter walkways safer is to remove snow before it becomes compacted or freezes into a hard layer.
Fresh snow is generally easier to shovel than snow that has been walked on repeatedly or left to melt and refreeze.
If snow is forecast, keep a shovel, snow pusher, or suitable snow-clearing tool somewhere easy to reach. This allows you to clear important paths before the accumulation becomes difficult to manage.
Clear the Most Important Areas First
You don’t necessarily need to clear every outdoor surface at once. Start with the areas people use most frequently, including:
- The path between your front door and driveway.
- Steps and entrances.
- The route to your garage or parking area.
- Sidewalks and paths used by visitors.
- Sloped walkways that become particularly slippery.
- Areas near mailboxes, gates, and outdoor bins.
Create a clear walking route first, then gradually widen it. Move the snow to the sides without blocking drains, entrances, or other walkways.
Avoid piling snow where melting water will flow back across the path and freeze again.
Use the Right Shoveling Technique
Choose a shovel that feels manageable for your height and strength. Push snow whenever possible instead of lifting large, heavy loads.
If you must lift snow, bend your knees, keep the load close to your body, and avoid twisting your back while carrying it. Wet snow can be particularly heavy, so take breaks and work at a comfortable pace.
If you have a medical condition that makes strenuous activity risky, or if the snowfall is particularly heavy, consider asking for help rather than attempting the entire job yourself.
Once most of the snow has been removed, you can treat the remaining ice with an appropriate de-icing product.
Step 2: Choose the Right De-Icing Material
Not all de-icing products work in the same way. Some help melt existing ice, while others provide extra grip without melting it.
Choosing the right material depends on the outdoor temperature, the surface you need to treat, the presence of pets, and how much ice has accumulated.
Rock Salt
Rock salt, also known as sodium chloride, is one of the most widely used materials for winter de-icing.
It lowers the freezing point of water, helping existing ice melt and making it harder for new ice to form under suitable conditions.
Rock salt is relatively inexpensive and can work well on many ordinary outdoor walkways. However, it has limitations.
Its effectiveness decreases as temperatures fall, and it may become much less useful during severe cold. It can also corrode metal, harm plants, affect soil, and contribute to damage on concrete and other surfaces.
Salt should therefore be applied sparingly and only where needed.
Calcium Chloride
Calcium chloride is another common de-icing ingredient. It releases heat as it dissolves, helping it work in colder conditions than ordinary rock salt.
It can be useful when temperatures are too low for sodium chloride to perform effectively.
However, calcium chloride is not harmless. It can irritate skin and pets’ paws, damage sensitive surfaces, and create problems if swallowed by animals.
Always check the manufacturer’s temperature range and application instructions before using it.
Magnesium Chloride
Magnesium chloride is used in some commercial ice-melting products and may perform well at lower temperatures than ordinary rock salt, depending on the formulation.
It is sometimes marketed as a more pet-friendly option, but that label should not be interpreted as meaning it is completely safe.
Excessive exposure can still irritate paws, and swallowing de-icing chemicals can cause health problems in pets.
Use only the recommended amount and remove residue where practical.
Calcium Magnesium Acetate
Calcium magnesium acetate, often abbreviated as CMA, is another option for certain walkways and surfaces.
It is generally less corrosive than conventional chloride-based de-icers and may be suitable when reducing corrosion is a priority.
However, it can cost more than ordinary salt and may not perform equally well under all conditions. Product suitability, temperature, and the type of surface should guide your choice.
Sand and Fine Grit
Sand does not melt ice, but it can improve traction on slippery surfaces.
This makes it useful when temperatures are too low for a particular de-icer to work effectively or when you want to avoid applying more salt.
Spread a thin, even layer over icy sections, especially on steps, slopes, and frequently used paths.
Avoid creating thick piles of sand because loose material can also become a slipping hazard. Once winter ends, sweep up excess sand where practical so it does not accumulate in drains or wash into nearby waterways.
Consumer guidance and environmental recommendations emphasize that de-icers have different trade-offs and that non-salt materials can provide traction without actually melting ice. <Cite refs={[“turn951710search7″,”turn951710search9″,”turn951710search15”]}/>
Step 3: Apply De-Icer Correctly
Even a suitable de-icing product can cause unnecessary problems when applied incorrectly.
Using more product does not automatically make a walkway safer. Excessive amounts can increase costs, damage nearby vegetation, and leave chemical residue on the surface.
Follow the manufacturer’s instructions and apply only the amount needed for the conditions.
Clear the Snow First
Remove as much loose snow as possible before applying an ice melt.
Spreading de-icer over a thick layer of snow wastes product and makes it harder for the material to reach the ice beneath it.
After shoveling, inspect the walkway and identify the areas that remain slippery. Apply the product directly to those sections rather than treating every part of the property unnecessarily.
Spread It Evenly
Use a handheld spreader or another suitable application tool if recommended for your product.
Distribute the material in a thin, even layer. Pay particular attention to steps, slopes, entrances, and other places where slipping could have serious consequences.
Avoid creating concentrated piles of salt or ice melt. Excess product can damage the surface and may leave an unpleasant residue.
If the packaging provides a recommended application rate, follow it instead of estimating how much to use.
Give It Time to Work
De-icers do not usually melt thick ice instantly.
Depending on the product, temperature, ice thickness, and moisture conditions, the material may need time to dissolve and loosen the ice.
Check the walkway periodically. Once the ice begins to soften, remove the loosened material carefully if it is safe to do so.
If the temperature is below the product’s effective range, applying more of the same material may not solve the problem. Sand or another suitable traction material may be a better temporary choice.
Treat Steps and Slopes With Extra Care
Steps, steep paths, and sloping driveways deserve particular attention because a fall in these areas can be especially dangerous.
Clear these surfaces thoroughly and use a suitable de-icer or traction material where appropriate.
If an area remains slippery, keep people away until it can be treated safely. A warning sign or temporary barrier may be useful while work is underway.
Step 4: Protect Concrete, Stone, and Other Surfaces
A walkway can be safer in winter without being completely free of every trace of ice. It is also important to avoid damaging the surface while trying to remove it.
Some de-icing chemicals can contribute to corrosion, discoloration, or deterioration, especially when used excessively or on vulnerable materials.
Be Careful With New Concrete
New concrete may be particularly vulnerable to damage from de-icing salts. The risk depends on the concrete’s condition, the product used, and exposure to freezing and thawing.
If your walkway was installed recently, ask the contractor or manufacturer which winter treatments are appropriate.
Until you have confirmed the recommended approach, prioritize prompt snow removal and consider traction materials such as sand where suitable.
Check the Product Label for Stone and Brick
Natural stone, decorative paving, brick, and other masonry surfaces may react differently to de-icing products.
Some materials are more sensitive to salts or repeated freeze-thaw cycles than others.
Before applying a chemical product, check that it is suitable for your specific surface. If necessary, test it in a small, inconspicuous area according to the manufacturer’s instructions.
Avoid assuming that a product is safe for every outdoor material simply because it is commonly used on sidewalks.
Prevent Water From Refreezing
Sometimes the problem is not the de-icing product but the source of the water.
A leaking gutter, poorly directed downspout, or low area that collects melting snow can repeatedly create ice on the same walkway.
Inspect these areas and correct drainage problems where possible. Direct runoff away from paths and entrances so it does not refreeze in places where people need to walk.
The less water that collects on a walkway, the easier it is to manage ice throughout winter. <Cite refs={[“turn951710search7″,”turn951710search9”]}/>
Step 5: Keep Pets Safe Around De-Icing Products
If you have a dog or cat, choosing and applying ice melt carefully is especially important.
Pets can walk through treated areas and later lick their paws while grooming. Some products can irritate the skin, while swallowing certain de-icing chemicals can cause more serious health problems.
Rock salt can be harmful if eaten in sufficient quantities, and other chloride-based products can also cause irritation or gastrointestinal problems.
Choose Products Carefully
Look for clear ingredient information and follow the label’s safety instructions.
Some products are marketed as pet-friendly, but that does not guarantee that they are harmless if swallowed or that they cannot irritate sensitive paws.
If you are concerned about chemical exposure, consider using sand for traction in suitable areas or discussing appropriate alternatives with your veterinarian.
Wipe Your Pet’s Paws After Walks
After taking your dog outside, wipe its paws with a damp cloth or rinse them with lukewarm water.
Pay attention to the spaces between the toes, where residue may collect. Dry the paws gently afterward.
Protective dog boots may also help reduce contact with treated surfaces, provided your pet tolerates them comfortably.
Store Ice Melt Securely
Keep de-icing products in their original containers, securely closed and out of reach of pets and children.
Clean up spilled granules rather than leaving them scattered around the entrance.
If your pet has eaten a de-icing product or develops symptoms such as vomiting, excessive drooling, unusual thirst, or paw irritation after exposure, contact a veterinarian promptly.
The ASPCA advises careful use of de-icers, limited application, and cleaning pets’ paws after exposure. <Cite refs={[“turn951710search1″,”turn951710search2”]}/>
Step 6: Protect Plants and the Environment
Winter de-icing can affect more than the walkway itself.
When snow melts, dissolved salt and other chemicals can move into nearby lawns, flower beds, soil, and storm drains. Repeated exposure may harm plants and contribute to environmental problems.
Fortunately, a few simple practices can help reduce unnecessary damage.
Keep De-Icer Away From Plants
Avoid spreading salt directly onto grass, shrubs, flower beds, or tree roots.
When possible, direct application toward the actual icy surface instead of broadcasting material across the surrounding garden.
If treated snow is piled beside plants, the concentrated runoff may affect the soil as the snow melts. Choose a designated snow-storage area away from sensitive vegetation when practical.
Use Only What You Need
One of the simplest ways to reduce environmental impact is to avoid overapplication.
Clear snow first, identify the slippery sections, and apply de-icer only where it is necessary.
More product does not necessarily mean better results, particularly when temperatures are outside the product’s effective range.
Clean Up Excess Material
After the ice has melted and conditions permit, sweep up excess granules or loose traction material where practical.
Avoid washing unnecessary chemicals into storm drains with a hose.
If you use sand, remove accumulated material when the weather improves so it does not block drainage or wash into nearby waterways.
These steps can help protect your garden while still maintaining a safer walking surface.
Step 7: Prevent Ice Before It Forms
Treating ice after it appears is important, but prevention can make winter maintenance easier.
When freezing conditions are forecast, inspect your walkways and identify areas that regularly become slippery.
Shaded paths, north-facing entrances, steps, and locations beneath dripping gutters often remain icy longer than sunny, well-drained surfaces.
Check the Weather Forecast
Pay attention to forecasts for freezing rain, overnight frost, and sudden temperature drops.
Applying an appropriate de-icer before a forecast freeze may help prevent ice from bonding strongly to the surface, provided the product is suitable for the conditions.
Follow the label’s instructions about timing and application.
Clear Snow Throughout the Storm
If heavy snow is falling, clearing it in manageable stages may be easier than waiting until the storm ends.
Removing snow before it becomes compacted reduces the amount of material you must handle later.
After the snowfall, inspect the walkway again for remaining ice and apply an appropriate treatment if necessary.
Inspect the Walkway in the Morning
Temperatures often fall overnight, allowing melted snow to freeze again.
Before leaving home, check steps, entrances, and frequently used paths. A surface that looked clear the previous afternoon may have developed a new icy patch.
Pay special attention to areas where water collects or where sunlight rarely reaches the ground.
Consider Long-Term Improvements
If the same section freezes repeatedly, consider whether a permanent change could help.
Improving drainage, repairing gutters, redirecting downspouts, or adding a suitable non-slip surface may reduce recurring problems.
For frequently used steps or paths, professionally installed heating systems or heated mats designed for outdoor conditions may be an option, provided they are installed and operated according to the manufacturer’s safety instructions.
Preventing water accumulation and responding early to freezing conditions can reduce the amount of de-icer needed throughout the season.
Common Mistakes to Avoid When De-Icing Walkways
Even with the right supplies, a few common mistakes can make winter maintenance less effective.
Using hot water to melt ice. Hot water may temporarily melt a patch, but the resulting water can refreeze when temperatures remain below freezing, creating an even more slippery surface. The UK government’s guidance recommends avoiding water as a snow-and-ice removal method for this reason. <Cite refs={[“turn951710search0”]}/>
Applying salt before removing snow. Thick snow can prevent the product from reaching the ice beneath it. Shovel first, then treat the remaining slippery areas.
Using too much de-icer. Excessive application wastes money and can damage surfaces, vegetation, and nearby soil.
Ignoring the temperature. Different products have different operating ranges. Always check the label and use a traction material if the conditions are unsuitable for your chosen de-icer.
Forgetting about pets. Animals may walk through treated areas and lick residue from their paws. Wipe their feet after exposure and store chemicals securely.
Leaving loose snow where it can refreeze across a path. Snow piled in the wrong place may melt during the day and send water across the walkway overnight. Move it away from drainage channels and walking routes.
Assuming the walkway is safe because it looks clear. Thin ice can be difficult to see. Inspect shaded and frequently wet areas carefully, especially after a freeze.
Conclusion
Learning how to safely de-ice your walkways this winter is an important part of preparing your home for cold weather. Snow-covered paths, icy steps, and slippery driveways can create hazards for everyone who visits your property, but a few simple habits can make these areas considerably safer.
The most important step is to act early. Removing snow before it becomes compacted or freezes into a hard layer makes the job easier and can reduce the amount of chemical treatment required. Keep your shovel and winter supplies accessible, clear frequently used paths first, and pay special attention to entrances, stairs, slopes, and shaded areas where ice tends to remain.
Choosing the right de-icing material is equally important. Rock salt is a common and affordable option, but it has limitations in very cold weather and can damage plants, affect certain surfaces, and irritate pets’ paws. Calcium chloride, magnesium chloride, and other specialized products may be appropriate in different conditions, but each has its own advantages and disadvantages. Sand and fine grit can provide extra traction when melting the ice is difficult, although they must be applied carefully and cleaned up when practical.
Remember that using more product is not always the answer. Clearing the snow first, applying a thin and even layer, following the manufacturer’s instructions, and allowing the material time to work are generally more effective than scattering large quantities across the entire walkway. If the temperature is outside the product’s effective range, choose another suitable method rather than continuing to add more.
It is also worth looking beyond the ice itself. Repeated freezing may indicate a drainage problem, a leaking gutter, or water flowing across the path from a nearby surface. Correcting these underlying issues can help prevent the same dangerous patches from returning night after night. Regularly checking the forecast and inspecting your walkways in the morning can also help you catch new ice before someone steps onto it.
Finally, safety should extend to your family, pets, garden, and the environment. Store de-icing products securely, clean chemical residue from your pets’ paws, keep salt away from sensitive plants, and avoid washing excess material into storm drains. If an area remains dangerously slippery, restrict access until it can be treated safely rather than assuming that a quick application has solved the problem.
Winter maintenance does not have to be complicated or expensive. With prompt snow removal, careful product selection, sensible application, and regular inspections, you can make your outdoor paths easier to navigate throughout the coldest months. A little preparation before a freeze can save time later, protect your property from unnecessary damage, and help prevent avoidable slips and falls.
The goal is not necessarily to make every outdoor surface look perfectly bare. It is to maintain a reasonably safe, well-cleared route wherever people need to walk. By taking a thoughtful approach and adjusting your methods to the weather and the condition of your property, you can enjoy greater peace of mind all winter long.