
Door drafts are not only uncomfortable, but they also put a strain on heating equipment, preventing it from maintaining a comfortable temperature at all times and increasing energy consumption. To solve this problem, doors can be windproofed. Here are some tips on how to do it right.
Wind drafts in doors can cause discomfort. In the winter, cold wind coming into a warm house can quickly become not only uncomfortable, but also affect your utility bills. This is where windscreens come in. According to Energy Star, installing windscreens can reduce heating and cooling costs by up to 20%. Moreover, windscreens are not an advanced DIY project, as anyone can easily install them. However, to maximize the windshield’s insulation performance, it must be installed correctly. Here are some tips for proper installation.
How to Install Weatherstrips on Doors
Installing weatherstripping on doors is quite simple, and in most cases you will find that doing so is a fairly quick and easy process. To that end, this page will show you how to make this “dream” a reality.

Step 1: Preparation and Measurements
First, clean the door and door frame, removing as much dust and debris as possible. If any dirt remains after scrubbing with soapy water, consider using fine grit sandpaper to remove any remaining dirt.
Once the door opening has been cleaned, proceed to the measurements. Door seals are applied to the top and bottom as well as the left and right sides, so be sure to measure the area well.
Step 2: Tighten the door hinges.
Before you begin cutting the windshield, make sure the door hinges are tight. Use the door handle to lift the door up. If there is a gap and the door moves up, tighten the top hinge screw. Then tighten the bottom hinge screws as well. This will ensure that the door is securely fastened and hung squarely, and that the newly installed windshield will fit evenly into the gap and function properly.
Step 3: Measure the door frame.
There are two questions that need to be asked at this point. First, what is the width of the gap between the door and the door frame? (Measure twice, once at the sides and once at the top. (Dimensions may vary). Second, what is the width of the door frame? The answer to the first question tells you how thick the weatherstrip you are about to purchase can be, the answer to the second question reveals how wide. Purchase the weatherstripping for the width and height of the door, plus about 10% just to be safe.
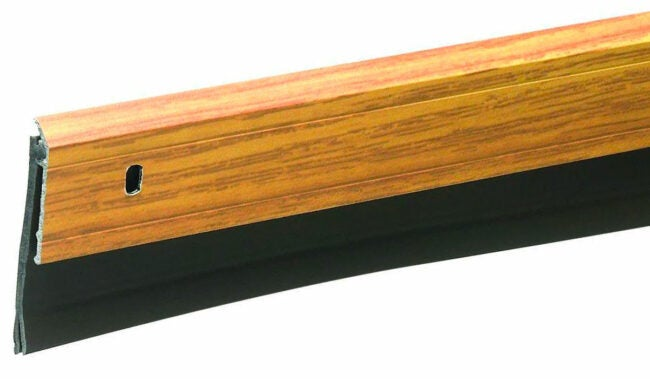
Step 4: Select the appropriate weatherstrip.
Weatherstripping comes in a variety of materials. Each has its own advantages and disadvantages. Felt weatherstripping (see Amazon example) has the advantage of being inexpensive and very easy to cut and install, but is rarely used on doors because it is less durable.
Slightly more expensive is foam weatherstrip (see Amazon example), which is easy to install. Foam weatherstripping is more durable than felt, but not as durable as rubber, which is the most expensive. Rubber is a good insulator, but it is a bit more difficult to install. Unlike other options, it often needs to be secured with nails.

Step 5: Cut the windshield into sections and inspect the cuts.
Prepare the weatherstripping of your choice and cut three strips each for the top and side.
Step 6: Adjust the cut area as needed.
Before you begin using the new weatherstrips, make sure each piece is the right length to place on the door frame. If it is too long, simply cut the excess after it is applied.
However, if it is too short, you will need to check the dimensions and cut a new piece.
Step 7: Fit the weather strip to the door.
If the weatherstrip has adhesive on it, remove it and stick it around the door plywood, not on the door itself. Even if the weatherstripping has adhesive, it is recommended to reinforce the installation with heavy-duty nails or small nails. Either method will keep the windshield in place for a long time.

Step 8: Install the door sweep.
To finish, install a broom along the bottom of the door. The most common door sweep is a metal band with a strip of rubber sticking out of it (see Amazon example). The rubber flexes when the door is opened and provides a strong airtight seal when the door is closed.
Brooms are available in standard sizes, but if you can’t find a broom that matches the width of your door, you can cut the broom to size with a hacksaw. Secure the size broom to the door with the screws provided. These screws are small and not self-tapping, so it is recommended to pre-drill them with a power drill/driver. Position the broom so that it fits snugly against the door threshold.
From start to finish, the process of applying weather stripping to the door should not take more than another hour. This is a small time commitment to make sure you stay comfortable throughout the winter without spending a fortune on it to keep your house warm. A simple task, weather stripping is one of the most effective ways to prevent drafts and the discomfort they cause.
The Many Benefits of Door Weatherstripping
- A weatherstrip on your door can save you a lot of money (up to 20%) on your energy bills because it prevents hot and cold air from escaping outside or into your home.
- Weatherstripping helps prevent rain from entering the home from the bottom of the door.
- Weatherstripping can also repel insects.
Frequently asked questions about window and door seals
What is the best weatherstrip for my door?
There are many different types of weatherstripping available at home improvement stores, including tape, V-strips or V-seals, gaskets and brooms. For doors, most professionals and DIYers find that gaskets and brooms work best.
How do I prevent rain from getting under my door?
A properly installed weatherstrip will prevent rainwater from getting under the door. Incidentally, weatherstripping is also used on interior doors as a soundproofing measure.
Finally.
Weatherstripping is one of those fun home improvement “fixes” that usually costs quite little and provides great benefits without doing a very bad job. A properly installed windshield can reduce heating and cooling costs by up to 20%. It can also keep insects and rainwater out of your home. So what. Installing a windshield is fairly easy and can be done in less than an hour.


