
With the right materials and techniques, we can remove grease and grime from the surfaces of our kitchen cabinets.
Most of us spend most of our kitchen cleaning time on the big three – sink, countertops and floors. It’s easy to forget that cabinets also need regular attention, especially the doors. Doors, in particular, are prone to grease, food splatters and steam buildup. As a result, dust builds up and surfaces become dull and dirty.
Although a bit messy, cleaning kitchen cabinets is not a difficult task that requires the use of odors or potentially toxic chemicals. Whether your cabinets are painted or wooden, with a little effort and some common materials, they’ll come to life – just be careful not to get too close and damage their surfaces. Here are some tips on how to do the job right
Use a mild cleaning solution.
Keep abrasive cleaners and brushes out of the sink. Instead, prepare your own mild detergent by mixing one part mild dishwashing detergent with two parts hot water, or distilled white vinegar with the same ratio of hot water. (When cleaning greasy kitchen cabinets, hot water will soften stains and make them easier to scrub away.) Pour the cleaning solution into a spray bottle and you’re ready to go.
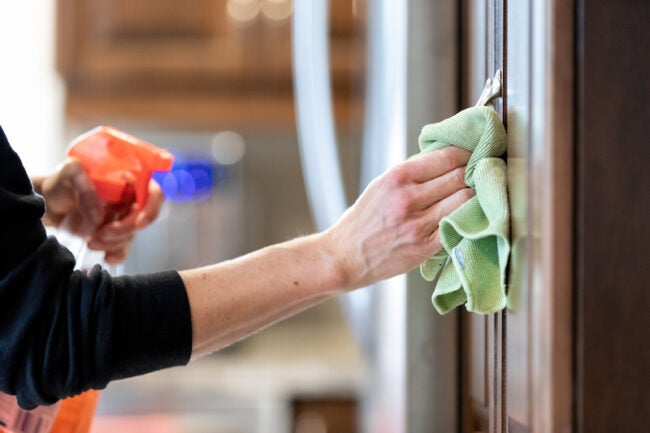
Be careful not to get the cabinets too wet.
Spray the cleaning mixture onto a microfiber cloth or soft cloth until it becomes wet but not soaked. Too much moisture can damage the paint and finish of the cabinets. Wipe down each cabinet door from top to bottom, paying special attention to any trim or moldings that tend to collect dust and dirt. Don’t forget to wipe down the cabinet hardware, as well as the inside of the cabinet doors. Spray more cleaning solution on the cloth and squeeze the excess solution into the sink if necessary.
Use an old toothbrush to treat crevices and cabinet hardware.
Some kitchen cabinets have ornate trim or deep grooves that are inaccessible with a rag alone. If this describes your cabinets, dip an old toothbrush into the cleaning solution and use it to gently scrub those hard-to-reach areas. Don’t forget the crevices around cabinet handles and knobs, and the edges of cabinet doors that are hard to reach with a rag.
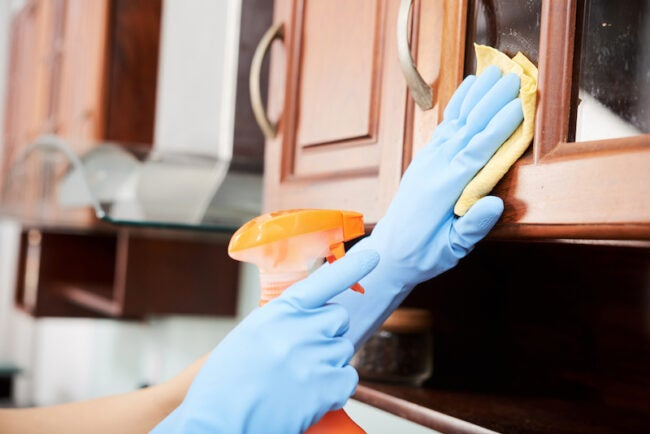
Do not allow water to penetrate the hinges.
Cleaning solutions are safe for finished and varnished wood and laminates, but not for cabinet hinges. You don’t want to expend the effort to clean kitchen cabinets leaving behind rusty hardware. Instead, use a dry microfiber cloth to wipe dust and dirt from the metal. If there are particularly greasy or dirty areas, spray a drop or two of cleaning solution on the cloth, wipe the dirty areas, and then dry the metal.
Finally, rinse with water and dry quickly, wiping off the cleaner.
Once you have cleaned your cabinets, go over them again with a clean cloth lightly dampened with warm water. This will remove any remaining cleaning solution or dirt. As with the cleaner, it is best to work from the top of the cabinet toward the bottom to prevent dripping.
Allowing the cabinets to dry naturally after rinsing can damage the finish and cause blistering. Instead, dry all wet surfaces with a soft cloth and buff them to a shine.
Don’t forget to take care of the glass.
If your cabinets have glass inserts, spray a clean cloth with your vinegar mixture or commercial glass cleaner (see and wipe both sides of the glass thoroughly. It will generally remove dry food splatters, grease and other kitchen stains from the glass fairly easily, but you may need to treat it twice to completely remove the area. Don’t use anything abrasive on the glass, and once you’re done cleaning, dry the panel.
Use baking soda to tackle stubborn stains on cabinets.
If dust, dry stains or grease remain on your kitchen cabinets after you’ve finished cleaning them, you’ll need to add an extra step. In a small bowl, mix one part baking soda with two parts water. Using a clean, dry cloth, spot the paste on the stained area. Let it sit for a few minutes, then gently blot with a damp cloth until the stain is gone. Wipe again with a cloth dampened with water and dry with a microfiber cloth or soft cloth.

Don’t skimp on regular deep cleaning.
At least twice a year, up the cleaning of your kitchen cabinets several notches. Empty the cabinets completely, then wipe down the shelves, inside drawers, inside cabinets, and outside cabinet surfaces using the same cleaning tools and procedures described above. Before returning items to the cupboard, consider whether they are worth keeping. Discard or donate items that are no longer needed. Get rid of badly broken plates, cracked cups, plastic storage containers without lids, and other useless items that tend to accumulate deep in kitchen cupboards.


