There’s something special about the desserts that have been passed down through generations. They’re often simple, made with everyday ingredients, and filled with memories that last a lifetime. Some recipes become family traditions because they’re saved for holidays, while others earn legendary status simply because they disappear almost as soon as they’re made.
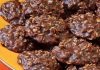
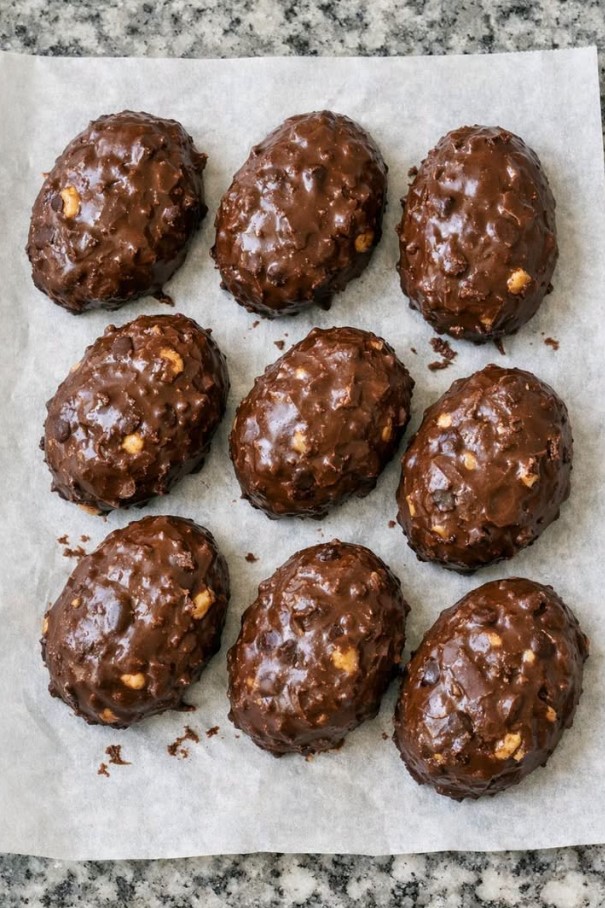
These irresistible no-bake chocolate treats fall firmly into the second category. Rich, crunchy, creamy, and coated in silky chocolate, they’re the kind of dessert that makes you reach for “just one more” until suddenly the plate is empty. It’s no wonder Nana Margaret used to hide them at the back of the refrigerator—she knew that if the kids found them, there wouldn’t be any left for the adults.
The beauty of this recipe lies in its simplicity. There’s no need to turn on the oven, no complicated baking techniques, and no fancy equipment. With just a handful of pantry staples and a little patience while they chill, you’ll have a batch of homemade chocolate treats that taste like they came from a specialty candy shop.
Whether you’re preparing them for the holidays, bringing dessert to a family gathering, or simply satisfying a chocolate craving, these bite-sized delights are guaranteed to become one of your favorite recipes.
Why Everyone Loves These Chocolate Treats
These little chocolate bites have remained popular for decades because they check every box:
- No baking required
- Ready with simple pantry ingredients
- Rich chocolate flavor
- Crunchy and creamy texture
- Perfect for gifting
- Easy enough for beginners
- Great make-ahead dessert
- Freezer-friendly
They’re the perfect combination of homemade comfort and candy-shop quality.
Ingredients :
For the Filling
- 2 cups crushed vanilla wafers or graham crackers
- 1 cup finely chopped roasted peanuts (or pecans)
- 1 cup shredded sweetened coconut
- 1 can (14 oz) sweetened condensed milk
- 1 teaspoon vanilla extract
- Pinch of salt
For the Chocolate Coating
- 2 cups semi-sweet chocolate chips
- 2 tablespoons coconut oil or vegetable shortening
Optional Add-Ins
- Mini chocolate chips
- Chopped almonds
- Rice cereal for extra crunch
- Crushed pretzels
- Toffee bits
- Peanut butter chips
- Espresso powder
- Sea salt flakes
Kitchen Equipment
- Mixing bowl
- Baking sheet or tray
- Parchment paper
- Cookie scoop
- Microwave-safe bowl
- Fork or dipping tool
- Refrigerator
Step 1: Prepare the Filling
Place the crushed vanilla wafers, chopped peanuts, shredded coconut, and salt into a large mixing bowl.
Mix until everything is evenly combined.
Add the sweetened condensed milk and vanilla extract.
Stir thoroughly until the mixture becomes thick, sticky, and holds together easily.
If it feels too dry, add a tablespoon of condensed milk.
If it’s overly sticky, mix in a few extra crushed cookies.
Step 2: Shape the Treats
Line a tray with parchment paper.
Using a cookie scoop or spoon, scoop portions of the mixture.
Roll each into an oval or egg shape with your hands.
Place each piece onto the prepared tray.
Continue until all of the mixture has been used.
Step 3: Chill
Transfer the tray to the refrigerator.
Allow the treats to chill for 45–60 minutes.
Cold filling makes chocolate coating much easier.
Step 4: Melt the Chocolate
Place chocolate chips and coconut oil into a microwave-safe bowl.
Heat in 30-second intervals.
Stir between each interval until completely smooth.
Do not overheat.
Alternatively, melt the chocolate using a double boiler.
Step 5: Coat Each Treat
Using two forks or a dipping tool, lower each chilled piece into the melted chocolate.
Coat completely.
Lift it out and allow excess chocolate to drip away.
Return each coated treat to the parchment paper.
Repeat until all are covered.
Step 6: Decorate
Before the chocolate hardens, decorate with:
- Crushed peanuts
- Coconut flakes
- Chocolate drizzle
- White chocolate
- Sprinkles
- Sea salt
- Mini chocolate chips
Step 7: Chill Again
Refrigerate the chocolate-coated treats for another 20–30 minutes.
The chocolate will harden into a glossy shell while the filling becomes perfectly firm.
The Secret Behind Their Incredible Texture
What makes these treats unforgettable is the contrast between textures.
The cookie crumbs create a soft, cake-like center.
The chopped peanuts add satisfying crunch.
Sweetened condensed milk binds everything together while creating an incredibly creamy consistency.
Finally, the chocolate shell delivers that satisfying snap with every bite.
Each ingredient plays an important role, resulting in a dessert that’s rich without being complicated.
Delicious Variations
Once you’ve mastered the classic recipe, try these creative twists.
Peanut Butter Version
Mix ½ cup peanut butter into the filling.
Cookies and Cream
Use chocolate sandwich cookies instead of vanilla wafers.
Dark Chocolate Lovers
Replace semi-sweet chocolate with dark chocolate.
Coconut Paradise
Increase shredded coconut and drizzle with white chocolate.
Holiday Edition
Decorate with festive sprinkles and colored sugar.
Espresso Chocolate
Add one teaspoon instant espresso powder to intensify the chocolate flavor.
Nut-Free
Replace peanuts with sunflower seeds or extra crushed cookies.
Tips for Success
Always chill the filling before dipping.
Use high-quality chocolate for smoother coating.
Melt chocolate slowly to prevent scorching.
Keep your hands slightly damp while shaping if the mixture sticks.
Store coated treats in the refrigerator until serving.
Storage Instructions :
These treats actually improve after a day in the refrigerator.
Store them in an airtight container for up to one week.
Separate layers with parchment paper.
For longer storage, freeze for up to three months.
Thaw overnight in the refrigerator before serving.
Perfect for Every Occasion
These chocolate treats fit nearly every celebration:
- Christmas cookie trays
- Easter dessert tables
- Valentine’s Day gifts
- Birthday parties
- Family reunions
- Baby showers
- Potluck dinners
- Bake sales
- Homemade holiday gifts
They also make wonderful edible gifts when packaged in decorative boxes or tins.
Frequently Asked Questions
Can I use different nuts?
Absolutely. Pecans, walnuts, almonds, hazelnuts, or cashews all work beautifully.
Can I make them ahead?
Yes. They’re actually even better after chilling overnight.
Do I have to use coconut?
No. Simply replace it with extra crushed cookies or chopped nuts.
Can I freeze them?
Yes. Freeze in an airtight container for up to three months.
Why won’t my chocolate stay smooth?
Adding coconut oil or shortening helps create a silky coating that’s easier to dip.
Can children help?
Definitely. Kids love rolling the mixture into shapes and decorating the finished treats.
Why This Recipe Has Lasted for Generations
Recipes like this survive because they’re dependable, affordable, and absolutely delicious. They don’t require expensive ingredients or advanced baking skills, yet they consistently produce impressive results.
Many families have their own version tucked away in recipe boxes, often written on faded index cards stained with chocolate from years of use. Each generation adds a small twist—different nuts, flavored chocolate, or festive decorations—but the heart of the recipe remains the same.
Perhaps that’s why Nana Margaret always made an extra batch. She knew these little chocolate treats had a magical way of bringing everyone into the kitchen, eager for one more bite.
Conclusion :
Some recipes become cherished traditions not because they’re complicated, but because they create unforgettable moments. These easy no-bake chocolate treats are a perfect example. With their creamy center, crunchy texture, and rich chocolate coating, they deliver bakery-quality flavor with minimal effort.
Whether you’re recreating a family favorite, preparing holiday gifts, or simply looking for an easy dessert everyone will love, this recipe is sure to earn a permanent place in your collection. Just don’t be surprised if you find yourself hiding a few in the back of the fridge—just like Nana Margaret did—because once people discover how delicious they are, they won’t last very long.