
Cleaning your bathroom is an essential chore, but there’s one spot that often escapes our attention – the toilet tank. Neglecting this vital component can lead to foul odors, rust stains, and even the corrosion of your toilet’s metal parts. However, with a little effort and some simple steps, you can keep your toilet tank in top shape, extend the lifespan of your toilet, and maintain a fresh-smelling bathroom. In this guide, we’ll walk you through how to clean a toilet tank effectively and offer some tips for ongoing maintenance.
Step 1: Empty the Tank
Start by emptying the tank. Locate the water valve behind or near the base of the toilet and close it. Lift the tank lid and flush the tank until it’s completely empty. Depending on your water flow rate, you may need to flush it a few times.
Step 2: Assess the Tank
Inspect the tank’s condition. If it’s just surface dirt, a simple brush should do the trick. Proceed to the next step. However, if you see mineral deposits and residue accumulating at the bottom and sides of the tank, you’ll want to use vinegar for a more thorough clean.
Step 3: Vinegar Treatment
Pour enough white vinegar into the tank to fill it up to the overflow valve, which can be up to three gallons, depending on your tank’s size. Allow the vinegar to sit for 12 hours without flushing. When you’re ready to clean, drain the vinegar, which may take two or three rinses.
Step 4: Disinfectant Cleaning
Wear rubber gloves and generously spray the inside of the tank, avoiding metal parts, with a disinfectant cleaner. Check the manufacturer’s recommended dwell time on the label, typically 10 to 15 minutes.
Step 5 (Optional): Maintenance Check
As you remove the tank lid, consider whether your toilet needs maintenance. Replace any parts that are not functioning optimally. If everything is working well, proceed to the next step.
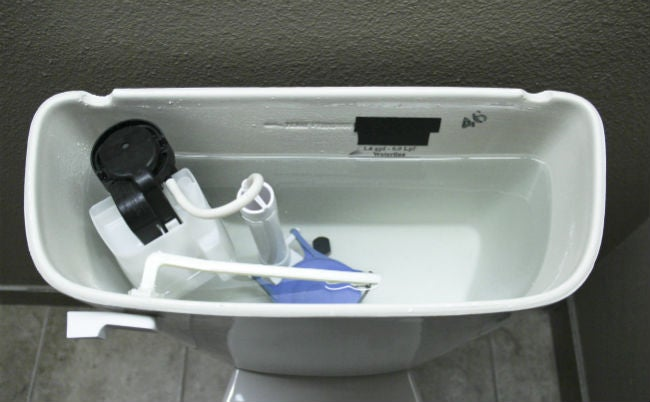
Step 6: Clean All Tank Parts
Dilute your disinfectant cleaner by spraying it onto a sponge soaked in clean, warm water. Wipe down the ball float, flapper, and other tank components with the diluted disinfectant. Rinse and re-soak the sponge if needed.
Step 7: Refill and Test
Turn on the water valve to allow the tank to fill, then flush the toilet once or twice. If the tank looks clean, you’re done. If not, repeat Steps 3 through 6. Once satisfied, turn on the faucet, let the tank refill, and you’re good to go!
Maintaining a Clean Toilet Tank:
To prevent future issues and simplify your cleaning routine, here are some tips:
- Consider using tank tablets to minimize mold, mineral, and contaminant buildup. Avoid those with bleach, as it can corrode metal parts.
- If you prefer not to use tablets, periodically empty the tank and fill it with vinegar overnight to dissolve mineral deposits and kill mold and mildew.
- Assess your tank’s condition every couple of weeks to determine your cleaning schedule. Keep a calendar to track inspections and cleanings.
Conclusion:
Regularly cleaning your toilet tank is a simple yet essential task that can extend the life of your toilet, maintain a fresh bathroom environment, and save you time and effort in the long run. By following these steps and adopting some maintenance strategies, you can ensure that your toilet remains in tip-top condition. So, don’t wait – give your toilet tank the attention it deserves for a cleaner and healthier bathroom.
picture source : istockphoto.com – bobvila.com


")


