If you’ve ever made a mistake while sewing, you probably know the frustration of carefully stitching a seam only to realize that something isn’t quite right.
Maybe the fabric was sewn crooked.
Maybe you accidentally stitched two layers together.
Maybe the thread tension was wrong.
Or perhaps you simply changed your mind and need to remove an entire row of stitches.
Your first instinct might be to grab a pair of scissors.
That’s usually not the best idea.
A seam ripper is specifically designed for this job, and once you learn how to use one properly, it can become one of the most useful little tools in your sewing kit.
Despite its name, a seam ripper isn’t meant to destroy your fabric. Used correctly, it allows you to remove unwanted stitches while minimizing the risk of damaging the material underneath.
What Is a Seam Ripper?
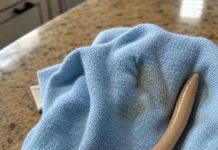
A seam ripper is a small handheld sewing tool designed to cut and remove thread.
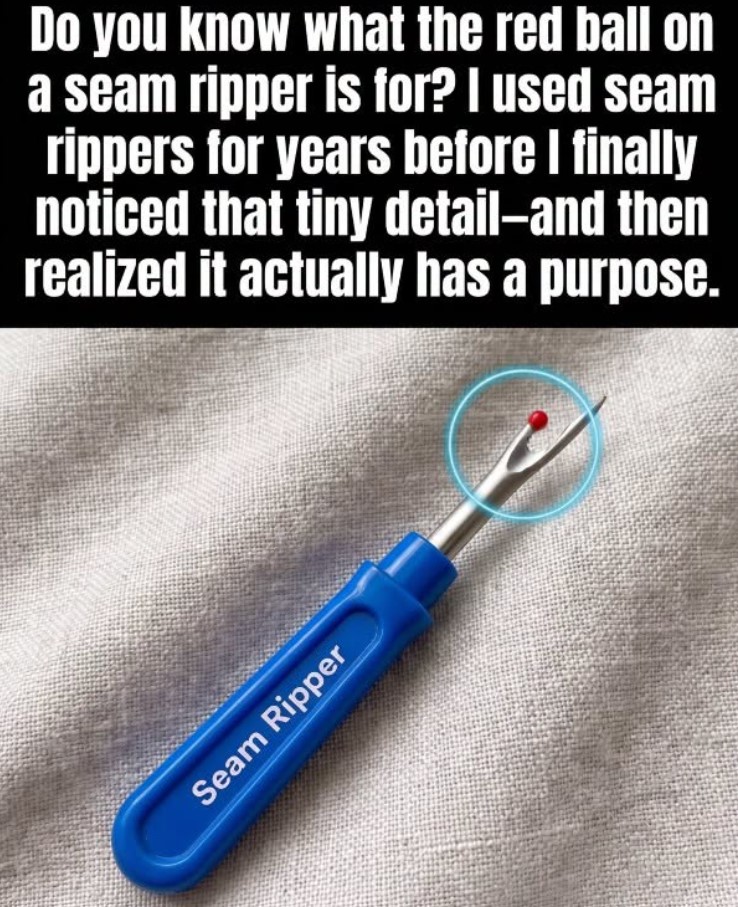
Most traditional seam rippers have a handle with a pointed metal shaft at one end.
The shaft typically has two points separated by a curved section.
One point is sharper and helps you slide underneath a stitch.
The other side usually has a small protective ball or rounded tip.
Between the two points is a sharp cutting edge.
That tiny blade is what cuts the thread.
The design may look simple, but it gives you much more control than ordinary scissors.
Why Not Just Use Scissors?
Scissors are excellent for cutting fabric, but that’s exactly why they can be risky when you’re trying to remove stitches.
A seam ripper is designed to target the thread rather than the fabric.
When you slide the pointed end underneath a stitch, the thread can be positioned against the small cutting edge.
With a controlled motion, the thread is cut without requiring you to place a large pair of scissors close to the fabric.
This makes stitch removal much more precise.
Understanding the Parts of the Tool
Before using a seam ripper, it helps to understand how it’s constructed.
The pointed end allows you to get underneath individual stitches.
The curved section contains the cutting edge.
The small rounded ball helps protect the fabric when the tool is positioned correctly.
Different seam rippers can vary in size and design, but the basic principle is generally the same.
Once you understand where the cutting edge is located, using the tool becomes much easier.
How to Hold a Seam Ripper
Hold the handle comfortably in your dominant hand.
Think of the tool more like a precision instrument than a knife.
You don’t need to apply a lot of pressure.
The sharp blade is designed to do the cutting for you.
Keep your movements slow and controlled, particularly when working with delicate fabric.
If you’re new to using one, practice on a scrap piece of fabric first.
A few minutes of practice can help you understand exactly how much pressure is necessary.
Start With the Stitches You Want to Remove
Don’t immediately start cutting through an entire seam.
First, identify exactly where the mistake begins and ends.
This is particularly important when you’re working on a garment.
You may only need to remove a few stitches rather than the entire seam.
Marking the section mentally—or with a fabric-safe marker if necessary—can help you avoid removing more stitching than needed.
Slide the Point Under the Stitch
Once you’ve identified the stitches, gently position the pointed end underneath one.
The goal is to get the cutting edge close to the thread.
You don’t need to force the tool deeply into the fabric.
In fact, pushing too hard is one of the easiest ways to accidentally damage delicate material.
A light touch is usually enough.
Use the Curved Blade to Cut the Thread
Once the stitch is positioned against the cutting edge, make a small controlled movement.
The blade should cut through the thread.
You may hear a tiny snap as the thread breaks.
Continue carefully until you’ve removed enough stitches to loosen the seam.
There is no need to rush.
Taking a few extra seconds is much better than accidentally cutting the fabric.
An Easy Method for Removing a Long Seam
If you need to remove a long row of stitches, you don’t necessarily have to cut every stitch individually.
Instead, you can work strategically.
Turn the fabric so you can clearly see the seam.
Every few stitches, carefully cut a thread.
Once enough stitches have been broken, gently pull the thread from the opposite side.
The remaining stitches may come loose in a longer strand.
This can make removing a large seam much faster.
However, use extra caution with delicate or tightly woven fabrics.
Always Work From the Right Side When Appropriate
The best side to work from depends on the seam and how the garment was constructed.
Sometimes the stitches are easier to access from the inside.
Other times, working from the outside gives you better visibility.
The important thing is to choose the side where you can clearly see what you’re doing.
Good visibility reduces accidental cuts.
Don’t Push the Point Through the Fabric
This is one of the most important tips for beginners.
A seam ripper has a sharp point.
If you push it aggressively into the fabric, it can puncture or snag the material.
Instead, slide the point gently underneath the thread.
Think of the tool as going under the stitch, not through the fabric.
Once the thread is resting against the blade, a small movement is all you need.
Be Extra Careful With Delicate Fabrics
Some fabrics are much less forgiving than others.
Silk, satin, lightweight cotton, fine knits, and other delicate materials can show damage very quickly.
For these fabrics, take your time.
Use good lighting.
Keep the fabric flat.
Work with only one or two stitches at a time.
If the fabric begins to catch on the tool, stop and reposition it rather than pulling harder.
What About Stretchy Fabric?
Stretch fabrics require a little extra care because the material can move while you’re working.
Avoid pulling the fabric tightly.
Keep it relaxed and supported.
If the material is stretched while you’re cutting stitches, it may shift as soon as the thread is removed.
That can make the fabric more difficult to control.
How to Remove the Loose Threads
Once the stitches have been cut, you’ll usually have loose pieces of thread remaining.
Don’t yank them aggressively.
Instead, gently pull them away with your fingers or use tweezers if they’re difficult to grasp.
If several strands are tangled together, separate them gradually.
The goal is to leave the fabric clean without pulling fibers out of the material.
Why Threads Sometimes Seem Impossible to Remove
Sometimes a seam looks as though it should come apart easily, but the thread refuses to cooperate.
This can happen when the thread has become tangled or when stitches overlap.
Don’t respond by pulling harder.
Instead, cut a few more strategic stitches.
Once the tension is released, the thread will often slide out much more easily.
What If You Accidentally Cut the Fabric?
It happens.
Even experienced sewers occasionally make mistakes.
If you’ve accidentally nicked the fabric, stop immediately and assess the damage.
Don’t keep cutting around the area.
Depending on the location and size of the cut, the fabric may be repairable.
A small stabilizing patch, careful stitching, or another appropriate repair technique may prevent the damage from getting worse.
The important thing is not to panic or continue working blindly.
Keep the Blade Sharp
Like any cutting tool, a seam ripper works best when the blade is in good condition.
A dull seam ripper may require more pressure.
More pressure means less control.
And less control increases the risk of damaging the fabric.
If your seam ripper no longer cuts thread easily, it may be time to replace it.
Fortunately, seam rippers are generally inexpensive, so keeping a spare in your sewing supplies can be useful.
The Protective Ball Has a Purpose
Many people wonder why one end of a seam ripper has a tiny rounded ball.
It’s there for a reason.
When used properly, the rounded tip helps the tool move beneath the stitch while reducing the chance of the sharp point catching the fabric.
Understanding this feature can make the tool much easier to use.
Don’t assume the pointed end is the only part that matters.
The entire design works together.
How to Remove Stitches Without Damaging the Seam
A good technique is to work gradually.
Cut a few stitches.
Pull away the loose thread.
Check the fabric.
Then continue.
This gives you opportunities to catch problems before they become serious.
Trying to remove an entire seam as quickly as possible can make it much easier to lose control.
Slow and steady is particularly important when you’re working with an expensive garment or delicate material.
Seam Rippers Are Useful for More Than Seams
Despite their name, seam rippers can be useful for many sewing tasks.
They can help remove:
- Unwanted decorative stitching
- Incorrect embroidery stitches
- Basting stitches
- Labels sewn into garments
- Thread tails
- Button stitching
- Certain types of machine stitching
They can also be useful when adjusting clothing or repairing older garments.
Once you become comfortable using one, you’ll probably find yourself reaching for it more often than expected.
Removing a Button Carefully
A seam ripper can also help when removing buttons.
Slide the tool underneath the thread holding the button in place.
Carefully cut the stitches one at a time.
Be especially cautious if the button is attached directly to delicate fabric.
You want to cut the thread without accidentally slicing the material beneath it.
Removing Labels
Have you ever bought clothing with an uncomfortable tag or label?
A seam ripper can make removing it much easier.
Rather than cutting the entire label with scissors and risking a hole, carefully separate the stitches holding it in place.
Work around the edges until the label comes free.
Then remove any remaining thread.
Using a Seam Ripper on a Sewing Machine Project
If you’re removing machine stitching, the same basic principles apply.
Machine stitches can be especially secure because there may be many stitches packed closely together.
One efficient approach is to cut selected stitches on one side and then gently pull the thread from the other side.
However, always inspect the seam as you work.
If the fabric begins to distort, stop and adjust your technique.
Good Lighting Makes a Big Difference
Never underestimate the importance of lighting.
Tiny stitches are much easier to see when you’re working under a bright lamp or near a well-lit window.
Good lighting also makes it easier to see the exact position of the cutting edge.
If you’re constantly squinting, you’re more likely to make a mistake.
A simple adjustable sewing lamp can make detailed work much more comfortable.
Keep Your Fabric Flat
Wrinkled or bunched fabric makes stitch removal harder.
Whenever possible, lay the material flat on a stable surface.
Smooth out wrinkles before inserting the seam ripper.
This helps you see the seam clearly and gives you better control over the tool.
For curved garments, you may need to reposition the fabric frequently.
That’s perfectly fine.
Don’t Rush Because You’re Frustrated
One of the worst times to use a seam ripper is when you’re angry about a sewing mistake.
It can be tempting to rip through the stitches as quickly as possible.
That’s when accidents happen.
Take a breath.
Set the project down for a moment if necessary.
Then return to it with a slower, more deliberate approach.
A sewing mistake can usually be fixed.
A large accidental cut in the fabric can be much harder to repair.
Practice Before Working on an Expensive Garment
If you’re new to seam ripping, don’t make your first attempt on your favorite dress or an expensive jacket.
Take a scrap piece of fabric.
Sew a short seam.
Then practice removing it.
Try different fabrics and different stitch lengths.
You’ll quickly learn how the seam ripper behaves and how little pressure is actually required.
That experience will give you much more confidence when working on real projects.
Store Your Seam Ripper Safely
Because seam rippers contain a sharp blade, don’t simply toss one loose into a drawer.
Keep it somewhere where the point won’t accidentally catch your fingers.
Some sewing kits include protective caps for the tip.
If yours doesn’t, store the tool in a dedicated sewing container.
It’s a small habit that can prevent unnecessary injuries.
A Small Tool With a Big Purpose
The seam ripper may look insignificant compared with a sewing machine, fabric scissors, or an iron.
But it performs an incredibly important job.
Sewing isn’t about getting everything right the first time.
Mistakes happen.
Stitches need to be changed.
Patterns need adjustment.
Measurements sometimes need correction.
The seam ripper gives you a second chance.
And that’s one of the most valuable things any sewing tool can provide.
Final Thoughts
Learning how to properly use a seam ripper can completely change the way you approach sewing mistakes.
Instead of worrying that one incorrect seam has ruined an entire project, you can carefully remove the unwanted stitches and try again.
The key is to work slowly and deliberately.
Slide the pointed end under the thread, position the cutting edge against the stitch, and use gentle pressure rather than forcing the tool into the fabric.
Always pay attention to the material you’re working with, especially when dealing with delicate or stretchy fabrics.
Good lighting, a flat working surface, and a little patience can make the process much easier.
And remember: the goal isn’t to rip through the fabric.
You’re removing the stitches—not attacking the material.
Once you get comfortable with the technique, a seam ripper stops feeling like a tool you only reach for after making a mistake.
It becomes an essential part of sewing itself.
After all, sometimes the difference between a frustrating sewing project and a successful one is simply having the right little tool—and knowing exactly how to use it.